This article was co-authored by Alessio Iadicicco. Alessio Iadicicco is an Apparel Manufacturing Specialist and the CEO and Co-Founder of MarkersValley, an online apparel and manufacturer sourcing platform that connects luxury fashion brands to a network of highly-vetted, truly Italian manufacturers. He holds a Bachelor's degree in Economy and Management of Financial Enterprises from The University of Naples Federico II. MarkersValley has connected fashion brands in over 100 countries and has a network of over 100 independent Italian factories and artisans. MarkersValley has been featured in Forbes, EQ, St. Louis Business Journal, Il Mattino, and Corriere Della Sera.
This article has been viewed 37,128 times.
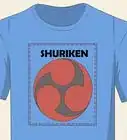
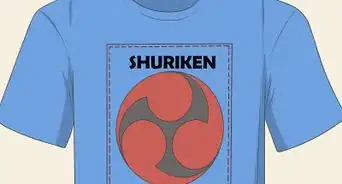
There are several ways to print on fabric, some of which require a lot of skill and special supplies. Using stencils to print on fabric is a quick and easy method that you can use to put your own designs on anything from t-shirts to handbags. You can draw your own designs or download templates online. Once you have your stencil, all you have to do is roll it on with some fabric paint. The best part is, you can use the same stencil several times.
Steps
Cutting the Stencil
-
1Gather your materials. Buy your materials online or at your local craft store. When shopping for acetate, also known as transparency film, look for the thin sheets. Thicker sheets of acetate are harder to cut through. You don't have to use a rotary cutting mat, but you will need something to cut on. You will need the following to make your stencil:[1] [2]
- A rotary cutting mat
- A craft knife
- Thin acetate
- Masking tape
-
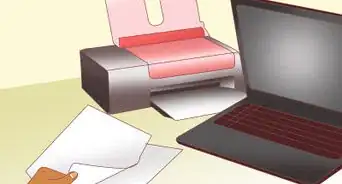
2Print your stencil. You can find free stencil templates online, or you can make your own. Depending on the design, making stencils can be quite complicated.[3]
- Print your stencil design onto thick card stock. Make sure you it is the right size for your project.[4]
Advertisement -
3Tape your stencil down. Using masking tape, tape a sheet of acetate to the printed image. Then, tape both the acetate and the image to your cutting mat.[5]
-
4Start cutting. Use your craft knife to start cutting away the unwanted areas from your image. If you downloaded a stencil template, it should have instructions on which areas to cut away from the image.[8]
- Work from the middle out. The more you cut away from the image, the weaker your stencil will become. Take your time, and work carefully. You can make a stencil last a long time if you take care of it.[9]
-
5Remove the tape from your stencil. Once you finish cutting your image, remove the masking tape. You should now have a sheet of acetate with your cut-out image. If you see any hanging pieces on the acetate, simply pop them out.[10]


Printing Your Design
-
1Gather your supplies. If you plan on printing your design on a t-shirt, make sure you wash and dry it beforehand. Search online or at your local craft store for the following:[11]
- T-shirt or some other fabric
- Foam roller
- Textile ink
- Wax paper
- Cardboard
- Masking tape
-
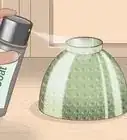
2Prepare your fabric. If you are printing on a t-shirt, place a piece of cardboard inside the shirt. If you are working with some other piece of fabric, such as a handbag, place a piece of cardboard under the area you'll be painting. You need a firm surface to roll the paint onto.[12]
- Tape the acetate stencil over the area you want to paint. Use masking tape to tape down all the edges. Make sure the stencil is secure. You don't want it to move when you start rolling your paint on.[13]
-
3Mix your paint. When shopping for textile ink, look for something that is water-based. You should be able to find a variety of colors, or you can mix your own. You can make quite a few colors if you have red, blue, yellow, black, and white inks on hand.[14]
- Mix the paint on a plate or a shallow dish. Use just enough to cover your image.[15]
-
4Load your roller. Once you've mixed your paint to the desired color, roll your foam roller through the paint. If you spot any lumps, roll them out.[16]
-
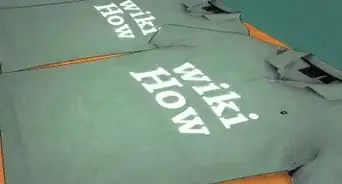
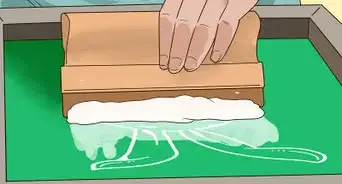
5Roll your paint on. Make a light pass over your image with the foam roller. Don't worry about getting a lot of paint on the fabric with the first pass. You want to make several light coats as opposed to one heavy coat.[17]
-
6Remove the stencil. Before you remove the stencil, use a hair dryer to apply a 2-3 second blast of heat. You don't want the paint to dry completely before removing the stencil, but you don't want it wet either.[20]
- Loosen the tape around the edges of your image. Starting from the top, gently pull the acetate away from the fabric. Take care not to ruin the image you painted, or damage the acetate screen. If you take care of your stencil, you can use it multiple times.[21]


Caring for Your Print
-
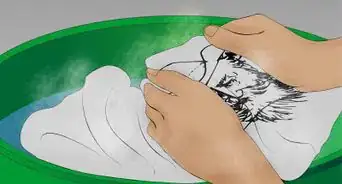
1Heat seal your print. Once the paint is completely dry, you need to heat seal the image. Leave the cardboard under the fabric and place a piece of wax paper over the shirt. Run an iron over the wax paper to seal the ink.[22]
-
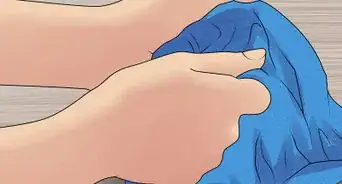
2Wash your shirt in cold water. Hot water can be harsh on your clothes. To prevent your print from fading, and to keep your fabric from wearing thin, use cold water on a gentle cycle.[26]
-
3Let your shirt air dry. Avoid using a high-heat setting on a dryer. Heat can cause your clothes to shrink and may cause the image to fade. Air drying takes longer, but could extend the life of your shirt.[30]
- If you are in a rush, you can speed up the air drying process. Set your dryer to a low heat and remove your shirt from the dryer halfway through the cycle. Hang your shirt to let it finish drying.[31]
-
4Don't wash your shirt every time you wear it. Unless your shirt is noticeably dirty, you don't have to wash it. Even if you take care of your clothes, washing will wear them down over time. If you only wore your shirt for a few hours, fold it back up and wear it again before washing it.[32]


Community Q&A
-
QuestionIf I use regular paint, will it still work?
 T. ChinsenTop AnswererRegular paint may make the fabric stiff. It is not created to flex, and may end up cracking with wear and tear. If the paint goes through the fabric completely, it can be uncomfortable against the skin. Fabric paint is designed to flex and provide good coverage without soaking the fabric. It is also machine-washable when completely dry.
 -
QuestionHow does one print on sweat pants?T. ChinsenTop AnswererAny knit fabric has to be placed over a solid surface directly under the fabric. This ensures that the image prints evenly. You will use more paint, as it has to cover an uneven surface compared to woven fabric. Use fabric paint; you may not get good coverage with a thinner paint.


References
- ↑ http://www.spraypaintstencils.com/make-a-stencil-tutorial.htm
- ↑ http://www.melissaevans.com/tutorials/stencil-art-printing-t-shirts
- ↑ http://www.melissaevans.com/tutorials/stencil-art-printing-t-shirts
- ↑ http://www.melissaevans.com/tutorials/stencil-art-printing-t-shirts
- ↑ http://www.spraypaintstencils.com/make-a-stencil-tutorial.htm
- ↑ http://www.spraypaintstencils.com/make-a-stencil-tutorial.htm
- ↑ http://www.spraypaintstencils.com/make-a-stencil-tutorial.htm
- ↑ http://www.melissaevans.com/tutorials/stencil-art-printing-t-shirts
- ↑ http://www.melissaevans.com/tutorials/stencil-art-printing-t-shirts
- ↑ http://www.spraypaintstencils.com/make-a-stencil-tutorial.htm
- ↑ http://www.melissaevans.com/tutorials/stencil-art-printing-t-shirts/2
- ↑ http://www.melissaevans.com/tutorials/stencil-art-printing-t-shirts/2
- ↑ http://www.melissaevans.com/tutorials/stencil-art-printing-t-shirts/2
- ↑ http://www.melissaevans.com/tutorials/stencil-art-printing-t-shirts/2
- ↑ http://www.melissaevans.com/tutorials/stencil-art-printing-t-shirts/2
- ↑ http://www.melissaevans.com/tutorials/stencil-art-printing-t-shirts/2
- ↑ http://www.melissaevans.com/tutorials/stencil-art-printing-t-shirts/2
- ↑ http://www.melissaevans.com/tutorials/stencil-art-printing-t-shirts/2
- ↑ http://www.melissaevans.com/tutorials/stencil-art-printing-t-shirts/2
- ↑ http://www.melissaevans.com/tutorials/stencil-art-printing-t-shirts/2
- ↑ http://www.melissaevans.com/tutorials/stencil-art-printing-t-shirts/2
- ↑ http://www.melissaevans.com/tutorials/stencil-art-printing-t-shirts/2
- ↑ http://www.melissaevans.com/tutorials/stencil-art-printing-t-shirts/2
- ↑ http://www.stencilrevolution.com/tutorials/t-shirt-printing-with-stencils/
- ↑ http://www.melissaevans.com/tutorials/stencil-art-printing-t-shirts/2
- ↑ https://bigfishtees.com/how-to-care-for-a-screen-printed-t-shirt/
- ↑ http://www.stencilrevolution.com/tutorials/t-shirt-printing-with-stencils/
- ↑ https://bigfishtees.com/how-to-care-for-a-screen-printed-t-shirt/
- ↑ https://bigfishtees.com/how-to-care-for-a-screen-printed-t-shirt/
- ↑ https://bigfishtees.com/how-to-care-for-a-screen-printed-t-shirt/
- ↑ https://bigfishtees.com/how-to-care-for-a-screen-printed-t-shirt/
- ↑ https://bigfishtees.com/how-to-care-for-a-screen-printed-t-shirt/
About This Article

To print on fabric, start by printing a design onto thick card stock. Then, tape a sheet of acetate over it, and cut out the design using a craft knife. Next, tape the acetate stencil over the fabric you want to print onto, and roll some textile paint over it using a foam roller. Finally, remove the stencil, place a sheet of wax paper over the design, and iron over it to set the print. For tips on how to wash printed fabric, scroll down!