This article was co-authored by Kevin Schlosser and by wikiHow staff writer, Hannah Madden. Kevin Schlosser is a Home Improvement Specialist and the Owner of Home Tech Handyman Ltd. With over 20 years of experience, Kevin specializes in age-in-place installations, flooring, roofing, and general remodeling handyman services. Kevin holds a blend of construction and in-home technology-related certifications including NAHB Certified Age-in-Place Specialist, CEDIA membership and certifications, and a Certification from the Association of Certified Handyman Professionals. Also, he is in training to receive certifications in Construction, Project Management, and other CEDIA qualified system integrator certifications. He is fully-insured in the state of Colorado.
There are 10 references cited in this article, which can be found at the bottom of the page.
wikiHow marks an article as reader-approved once it receives enough positive feedback. In this case, 80% of readers who voted found the article helpful, earning it our reader-approved status.
This article has been viewed 302,519 times.
Taking out an interior wall can open up your floor plan and make your home more inviting. Hiring professionals for demolition can be costly, and you may not want to spend the money if you’re on a budget. Fortunately, you can remove an interior wall yourself as long as it’s not load-bearing. Keep reading to learn how you can take down an interior wall quickly and safely.
Steps


How do you prepare to remove a wall?
-
1Turn off the power to any electrical items in the wall. This includes light switches and electrical outlets. If there are electrical outlets in the wall you’re removing, keep in mind that you’ll have to disconnect the wire from the outlet as you remove the wall.[4]
-
2Empty out the room and cover furniture with plastic. Removing walls creates a ton of dust, and it’s probably going to get everywhere. Before you start, move as many things as you can away from the wall, and cover up anything that’s too big to move with a plastic tarp.[5]
-
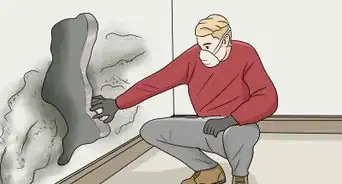
3Put on work gloves, boots, and a breathing mask. Taking out a wall creates a lot of dust, and it’s not great to breathe it in. Before you start, put on long pants, long sleeves, eye protection, and a breathing mask to protect yourself.[6]


What’s the best way to remove drywall or plaster?
-
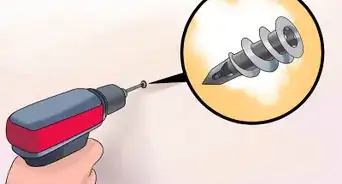
1Cut the wall with a reciprocating saw. It’s a small electrical saw that will cut through drywall or plaster easily. Use your saw to cut a square into the wall, leaving about 2 ft (0.61 m) around the edge. Be careful not to cut any of the electrical or wiring inside of the wall as you go.[7]
-
2Rip out the wall with a hammer. Once you have a hole exposed, you can peek into the wall and see what’s there. If there aren’t any obstacles, grab a hammer and use it to gently pull the drywall and any other wood off the wall.[8] Do this on both sides to expose the wooden beams inside.[9]
- If there are electrical outlets in the wall, remove the electrical box behind the outlet and disconnect the electrical wire from the box. You can hire an electrician to reroute the wire somewhere else in your home.


How do you remove the wall studs and the floor plate?
-
1Saw into the upright studs with a reciprocating saw. Go through the center of each stud and cut them all in half. Then, pull each piece of the stud out of the wall and dispose of it.[11]
-
2Pry up the floor plate with a crowbar. Usually, floor plates are just nailed into the floor. Slide a crowbar underneath the wood and gently pry it up until you can take it off. Wear work gloves and watch out for nails.[12]


How do you patch the ceiling?
-
1Screw thin strips of wood on the exposed ceiling. 2 x 2s or 1 x 2s work just fine for this job. Place the strips of wood across the newly created hole 12 to 16 inches (30 to 41 cm) apart until they cover the entire area. Hold them in place and use a drill to insert a screw into the existing ceiling on each end of the wooden strips.[13]
-
2Secure a piece of drywall to the ceiling. Cut a piece of drywall that’s 1⁄4 in (0.64 cm) smaller than the exposed ceiling. Put it over the wooden strips and attach it to the existing ceiling with drywall screws.[14]
-
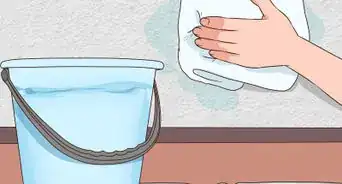
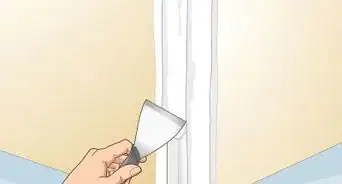
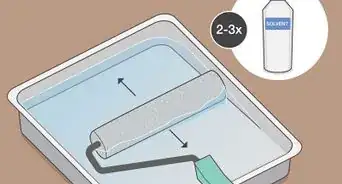
3Add drywall mud to the edge of the new drywall. Use a trowel to spread drywall mud over the new sheet of drywall to fill in the gaps around the edge. Once the mud is dry (it usually takes about 1 day), use sandpaper to sand the mud down until it’s flush with the rest of the ceiling.[15]
- You might have to do this step a few times to get a seamless match.


Community Q&A
-
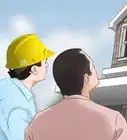
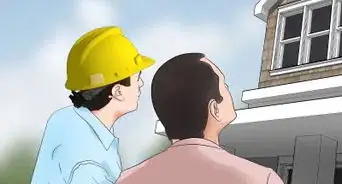
QuestionWe have many windows/skylights that we want to attach, plus remove the walls. What kind of professional should I call to inspect the structures?
 wikiHow Staff EditorThis answer was written by one of our trained team of researchers who validated it for accuracy and comprehensiveness.
Staff AnswerwikiHow Staff EditorStaff AnswerYou can call a structural engineer to come out and make sure your home will still be safe if you remove the walls. You can also call a general contractor, but they'll probably have to call in a structural engineer, too. -
QuestionMy house is built on a slab. How can I tell if a wall is load bearing? The wall I want to remove is a 5 foot wall that is at an angle off a long wall (all interior).wikiHow Staff EditorThis answer was written by one of our trained team of researchers who validated it for accuracy and comprehensiveness.
Staff AnswerwikiHow Staff EditorStaff AnswerIf you can find your floor joists, you can see whether or not the wall is load-bearing. Usually, you can spot these from the attic, basement, or crawl space of your home. If the joists are perpendicular to the wall in question, it's most likely load-bearing. -
QuestionAre these steps the same if removing a basement wall?wikiHow Staff EditorThis answer was written by one of our trained team of researchers who validated it for accuracy and comprehensiveness.
Staff AnswerwikiHow Staff EditorStaff AnswerYes, as long as the wall is not load-bearing. Oftentimes, the walls in basements are load-bearing, so it's important to double check that before you start. If the wall isn't load-bearing (it just separates 2 rooms), it's okay to remove it.
Warnings
- Never remove a load-bearing wall without the proper support first.[17]⧼thumbs_response⧽
Things You'll Need
- Work gloves
- Work boots
- Eye protection
- Nose/mouth breathing mask
- Hammer
- Reciprocating saw
- Crowbar
- Strips of wood
- Drywall
- Drywall mud
- Trowel


References
- ↑ https://www.apartmenttherapy.com/removing-a-wall-demolition-pros-cons-258805
- ↑ https://www.thisoldhouse.com/walls/22242675/how-to-know-if-a-wall-is-load-bearing
- ↑ Kevin Schlosser. Home Improvement Specialist. Expert Interview. 19 February 2021.
- ↑ https://www.finehomebuilding.com/2009/07/16/removing-interior-walls
- ↑ https://www.apartmenttherapy.com/removing-a-wall-demolition-pros-cons-258805
- ↑ https://www.apartmenttherapy.com/removing-a-wall-demolition-pros-cons-258805
- ↑ https://www.youtube.com/watch?t=32&v=rZsS_4HiHT8&feature=youtu.be
- ↑ Kevin Schlosser. Home Improvement Specialist. Expert Interview. 19 February 2021.
- ↑ https://www.youtube.com/watch?t=60&v=rZsS_4HiHT8&feature=youtu.be
- ↑ https://www.youtube.com/watch?t=106&v=uRQjK41qyvY&feature=youtu.be
- ↑ https://www.youtube.com/watch?t=415&v=zjtI-sHUsoA&feature=youtu.be
- ↑ https://www.youtube.com/watch?t=694&v=zjtI-sHUsoA&feature=youtu.be
- ↑ https://www.budgetdumpster.com/blog/knocking-down-a-wall/
- ↑ https://www.budgetdumpster.com/blog/knocking-down-a-wall/
- ↑ https://www.budgetdumpster.com/blog/knocking-down-a-wall/
- ↑ https://www.budgetdumpster.com/blog/knocking-down-a-wall/
- ↑ https://www.thisoldhouse.com/walls/22242675/how-to-know-if-a-wall-is-load-bearing
About This Article