X
wikiHow is a “wiki,” similar to Wikipedia, which means that many of our articles are co-written by multiple authors. To create this article, volunteer authors worked to edit and improve it over time.
This article has been viewed 54,012 times.
Learn more...
This procedure shows how to make a simple repair to aircraft skin for example to repair a dent caused by dropping a tool on the aluminum surface. The time required varies but typically take 1-3 hours depending on skill level and the severity of the damage. The reader should be familiar working with sheet metal and riveting.
Steps
-
1Draw a circle around the damaged area.
-
2Drill a pilot hole in the circle so a bigger Unibit can easily drill into the aluminum.Advertisement
-
3Using a preferred method cut out the aluminum within the circle drawn around the damage. Debur the newly cut hole.
-
4Cut out a circular patch from a sheet of aluminum that is the same thickness and the original aircraft skin. The diameter will depend on the number of rows of rivets you're planning on installing. Debur the outer edge of the patch.
-
5Center the patch over the hole in the aircraft skin and mark its outline.
-
6Since the aluminum being used here is 0.040” thick, and the rivets are 4/32" in diameter. The edge distance for riveting will be ¼”. The patch cut for this repair is big enough in diameter for 2 rows of rivets, so I will draw a line 1/4” from the small hole and ¼ inward from the outline of the patch I drew.
-
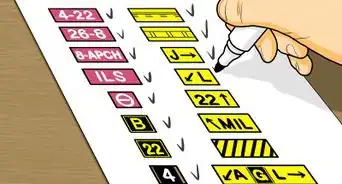
7Once the edge distance lines are drawn, it's time to mark the location of each rivet. The rule for rivet spacing is a minimum of 4 times the diameter of the rivet and a maximum of 12 times the diameter of the rivet. You'll also want to keep the spacing between each rivet the same. Just make sure you're within those limits.
-
8Next, drill pilot holes where the rivet makings are located with a small drill bit so it is possible to drill the holes to full size, without deformation of the aluminum sheet.
-
9Secure the patch on the aircraft skin and drill pilot holes in the patch. Use the holes previously drilled in the skin as a guide.
-
10With the patch still secured to the aircraft skin, expand the holes to the proper diameter. Use clecos to make sure the patch does not move while drilling.
-
11Remove the patch from the aircraft skin and deburr all the holes both on the patch and on the aircraft skin.
-
12Once deburred, re-secure the patch on the skin using clecos.
-
13Using the proper rivets, secure the patch to the aircraft skin.
-
14Finished.


Advertisement
Warnings
- Always wear eye and ear protection when using pneumatic drills, rivet guns and other potentially loud or dangerous tools.⧼thumbs_response⧽
Advertisement
Things You'll Need
- Rivet Gun + Accessories
- Rivet Spacing: Minimum 4D, maximum 5D ( "D" being the diameter of the rivet)
- Rivets Used: MS20420 AD 4-4
- Clecos + Cleco pliers
- Drill
- Aluminum Thickness: 0.040"
- Final Rivet Holes: #30 Drill bit
- Pilot Holes: #40 Drill bit
- Rivet Edge Distance: Minimum 2D
- File
Tools Used:
-
- 30 & #40 Drill Bits
- Unibit


-Step-15.webp)
References
- - A&P Technician General Textbook, Jeppesen Sanderson Inc. 2004.
- ISBN 0-88487-339-0
- - A&P Technician Airframe Textbook, Jeppesen Sanderson Inc. 2003.
- ISBN 0-88487-331-5
About This Article
Advertisement