This article was co-authored by Rio Jongsae Kim. Rio Jongsae Kim is a Designer Shoe and Bag Repair Specialist and the Owner of Kim’s Shoe & Bag Repair in Vancouver, BC, Canada. With over 40 years of experience, Rio and Kim’s Shoe & Bag Repair specialize in the repair and reconstruction of leather and luxury goods including shoes, handbags, and accessories. Rio’s experience and dedication to quality repair and restoration have led to his work being featured on Yahoo, Insider, and MSN.
This article has been viewed 230,376 times.
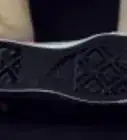
Soles are often the first part of a shoe to wear out. Fortunately, as long as the rest of the shoe is in good shape, repairing the sole can be an easy way to make your shoes good as new. With a little sandpaper and some shoe sole adhesive, you can replace worn-out soles or fix holes or loose soles in just a few minutes, and wear them again within 24 hours.
Steps
Replacing a Worn-Out Sole
-
1Pull the old sole off with pliers. Even if the sole is starting to come loose, you will probably need pliers to pull it off the shoe entirely. Hold the shoe firmly and pull on the edge of the sole with pliers, moving the sole away from the bottom of the shoe. If the sole doesn’t come off easily, try wedging a paint scraper or butterknife between the sole and the shoe as you pull on the sole with pliers.[1]
- You can also use a heat gun or hair dryer to warm up the glue that attaches the sole, which will make it easier to remove.
-
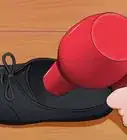
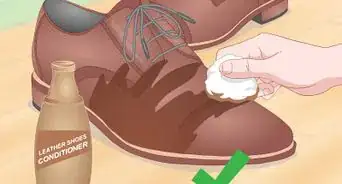
2Clean off any old glue using acetone. There may still be some dried glue remnants on the bottom of your shoe where the sole was attached. Pour a little acetone or nail polish remover on a rag and scrub the bottom of your shoe with it. The glue should dissolve and scrub off. Clean any dirt or residual grime off the shoe as well.[2]Advertisement
-
3Roughen up the bottom of the shoe and the new sole with sandpaper. Rough surfaces hold together better with glue than smooth ones. Use 120-grit sandpaper to scratch up the bottom of the shoe and the top of the sole until their textures appear rougher.[3]
-
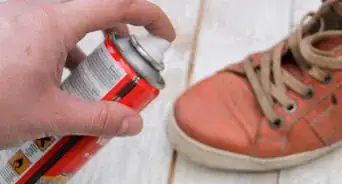
4Apply shoe sole adhesive to the new sole with a brush or cotton ball. Follow the instructions on the adhesive for application. Some adhesives must sit for a few minutes, or “cure,” before the item can be put in place. Some adhesives require heat to be activated
- Shoe Goo is a common and effective shoe sole adhesive, and is available in many shoe shops, sports supply outlets, and department stores.
-
5Put the new sole in place and press it tightly against the shoe. If the adhesive needs to cure before it’s used, wait for as long as the instructions indicate before putting the sole on. Start at the front and lay the sole gradually on the shoe, making sure the edges line up properly. Once it’s in place, apply pressure to stick it firmly on the bottom of the shoe.
-
6Clamp the sole to the shoe using rubber bands, duct tape, or weights. The sole needs to be pressed tightly against the shoe for the two surfaces to adhere. Secure the sole in place by wrapping rubber bands or duct tape around the shoe, or by placing it on the ground and setting weights on top of it to press the shoe into the sole.[4]
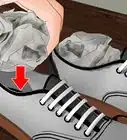
- It can be helpful to stuff the shoe with paper first so that it keeps its shape while being clamped.
-
7Wait 24 hours before using the shoe again. Most shoe sole adhesives take at least a full day to set. Let your shoe sit somewhere cool and dry where it’s not in danger of being moved or touched.[5]


Reattaching a Loose Sole
-
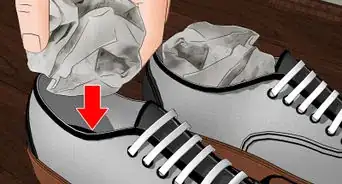
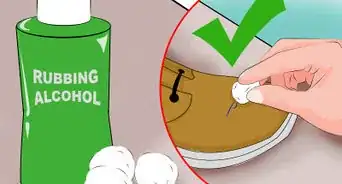
1Clean the shoe and sole with water and alcohol. Use a rag to rub some warm water and isopropyl alcohol over the area around the loose part of the sole. If you can do so without pulling it off further, clean inside where the sole has become loose as well.
-
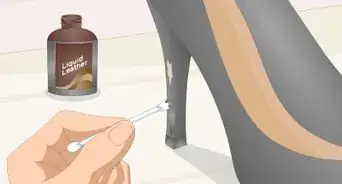
2Apply shoe sole adhesive between the shoe and the sole. Use a toothpick or cotton swab to apply a layer of adhesive inside where the sole has come apart from the shoe. Make the layer fairly thick, as it’s better to put in too much and have it overflow than to not have enough.[6]
- Some adhesives need to cure for a few minutes after being applied and before the sole is put in place. Check the instructions on your adhesive product.
-
3Press the sole against the bottom of the shoe. Being careful not to get any adhesive on your hands, press the sole and the shoe together tightly. Don’t worry if some adhesive spills out -- this can be sanded off later.
-
4Keep the sole in place with rubber bands, duct tape, or weights. The sole should be pressed tightly against the shoe for the entire time it dries. Secure it using rubber bands or duct tape, or set weights on top of the shoe in the area where the glue is drying.[7]
-
5Let the shoe sit for 24 hours. Place the shoe somewhere out of the way, where it can stay cool and dry while it sets. Wait at least a full day before wearing the shoe.[8]
-
6Sand off any dried overflow glue. If any of the shoe sole adhesive spilled out when you pressed the sole down, sand it off using 120-grit sandpaper. Make sure the adhesive has dried out completely before sanding it.[9]


Filling Holes
-
1Clean the area around the hole with water and alcohol. Use a rag to rub warm water and isopropyl alcohol around the hole to clean off any dirt or grime. Let it dry for a few minutes before continuing.
-
2Roughen up the edges of the hole with 120-grit sandpaper. This will help the glue adhere to the rubber. Scrub the edges of the hole with sandpaper until it appears to take on a rougher texture.[10]
-
3Put duct tape over the inside of the shoe above the hole. Remove the insole of the shoe and place a piece of duct tape inside the shoe where the hole is. If the hole does not go all the way through the inside of the shoe, put your finger in the hole and push up to see where the hole is and cover that part with duct tape.[11]
-
4Fill the hole with shoe sole adhesive. Being careful not to touch the adhesive with your bare hands, gently squeeze it into the hole. Make sure the entire hole is filled, and don’t worry if there is some overflow.
-
5Use an ice cube to smooth the surface of the adhesive. The ice cube will allow you to smooth the surface of the glue without sticking to it. You can also use a tongue depressor or spoon covered with petroleum jelly.[12]
-
6Let the shoe dry for 24 hours with the sole turned up. Set the shoe so that the sole is facing upwards. Leave it somewhere out of the way where it will be cool and dry. Leave it for at least a full day.
-
7Sand down any dried adhesive that overflowed from the hole. Check to see if there is dried glue protruding from the hole or spilling out over the edges. If there is, use 120-grit sandpaper to sand it down until the bottom of the sole is smooth.[13]


Expert Q&A
-
QuestionWhat should I check before I repair or replace my soles?
 Rio Jongsae KimRio Jongsae Kim is a Designer Shoe and Bag Repair Specialist and the Owner of Kim’s Shoe & Bag Repair in Vancouver, BC, Canada. With over 40 years of experience, Rio and Kim’s Shoe & Bag Repair specialize in the repair and reconstruction of leather and luxury goods including shoes, handbags, and accessories. Rio’s experience and dedication to quality repair and restoration have led to his work being featured on Yahoo, Insider, and MSN.
Designer Shoe & Bag Care SpecialistYou have to check to see if the soles have started to thin, or they have holes. You should also check both shoes to see if they're wearing away evenly, or if they're splitting from the upper side of the shoes.
References
- ↑ https://www.theguardian.com/lifeandstyle/2014/jun/09/how-to-mend-old-shoes
- ↑ https://healthfully.com/remove-shoe-goo-6022674.html
- ↑ https://www.theguardian.com/lifeandstyle/2014/jun/09/how-to-mend-old-shoes
- ↑ https://www.ifixit.com/Guide/How+to+Repair+a+Hole+on+the+Shoe+Sole/50518
- ↑ https://www.ifixit.com/Guide/How+to+Repair+a+Hole+on+the+Shoe+Sole/50518
- ↑ https://www.theguardian.com/lifeandstyle/2014/jun/09/how-to-mend-old-shoes
- ↑ https://www.ifixit.com/Guide/How+to+Repair+a+Hole+on+the+Shoe+Sole/50518
- ↑ https://www.ifixit.com/Guide/How+to+Repair+a+Hole+on+the+Shoe+Sole/50518
- ↑ https://www.ifixit.com/Guide/How+to+Repair+a+Hole+on+the+Shoe+Sole/50518
About This Article

If you need to repair a shoe sole, start by cleaning all over the shoe with a mixture of warm water and isopropyl alcohol so the adhesive will stick. Once the shoe has dried, use a toothpick or cotton swab to apply a thick layer of adhesive where the sole has come apart from the shoe. Then, press the sole against the bottom of the shoe tightly, making sure not to get any adhesive on your hands. Don’t worry if the adhesive spills out of the cracks, you can always sand it off later. Since you want the shoe and sole pressed tightly together until the adhesive dries, secure them together with rubber bands or tape. After waiting 24 hours, remove any rubber bands or tape and sand off the overflow glue with 120-grit sandpaper. For more help, like how to fix a hole in the sole of your shoe, read on.