This article was co-authored by wikiHow staff writer, Nicole Levine, MFA. Nicole Levine is a Technology Writer and Editor for wikiHow. She has more than 20 years of experience creating technical documentation and leading support teams at major web hosting and software companies. Nicole also holds an MFA in Creative Writing from Portland State University and teaches composition, fiction-writing, and zine-making at various institutions.
This article has been viewed 161,689 times.
Learn more...
This wikiHow teaches you how to render your Blender animation into a playable video file. Rendering your animation creates a high-quality video that you can share online or import into other apps.
Things You Should Know
- Save an animation in Blender by rendering it into a playable video file.
- You can import this file into other apps to share with others.
- If you render your file as images, you won't lose any work during crashes as opposed to saving as a video.
Steps
Preparing to Render
-
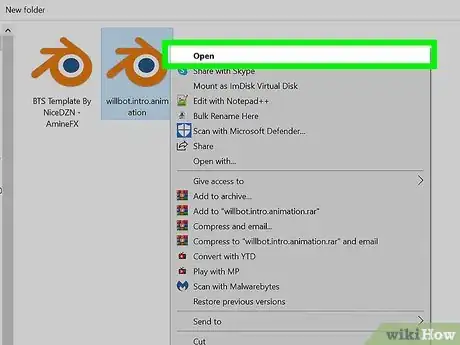
1Open your project in Blender. When you're ready to save your animation as a video file, you'll need to use Blender's rendering tools.
-
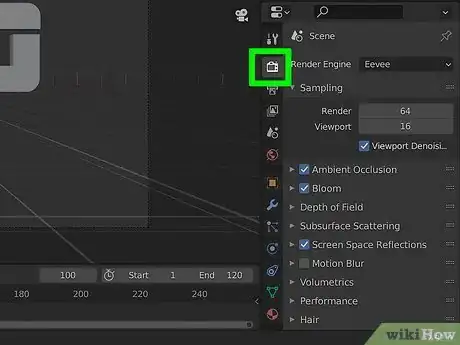
2Click the Render Properties panel. It's the panel tab with a camera icon just below the wrench and screwdriver on the right side of Blender.Advertisement
-
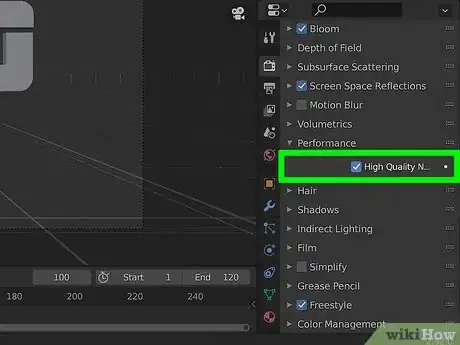
3Set your performance preferences. Rendering uses the bulk of your CPU power for the time it takes to create your animation. This can be an hour or more! With the default settings, you won't be able to use your computer for other purposes while the animation is rendering. If you want, you can tell Blender to use less CPU power:
- Expand the Performance header in the Render Properties panel.
- If "Auto-Detect" is selected for "Threads Mode," Blender will autodetect your CPUs and display how many threads will be used. It'll be the maximum amount by default, which ensures the animation will render the fastest, leaving you little power to do much else.
- If you want to keep using your computer during rendering, select Fixed as the Threads Mode, and enter a fewer number of threads. For example, if the Auto-Detect detected 8 threads, decreasing it to 6 will allow you to still get work done while rendering.
-
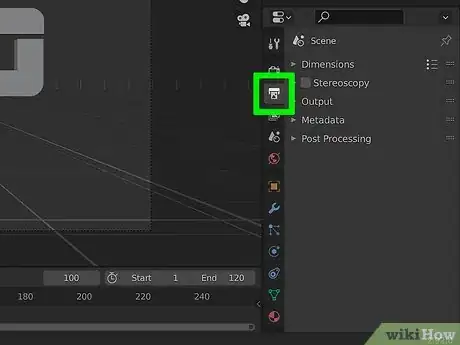
4Click the Output Properties panel. It's the panel tab with a printer icon just below the Render Properties tab.
-
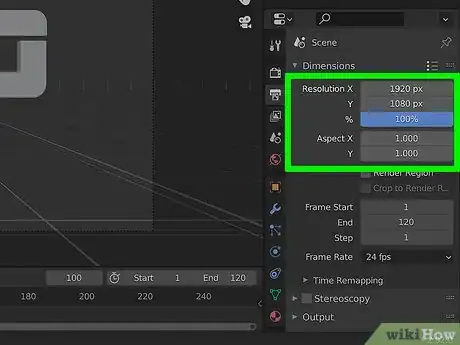
5Set your resolution. The resolution your animation will render at appears in the X and Y values near the top of the panel.[1] If you want to increase or decrease the resolution, you can specify new values here.
- To increase or decrease by percentage, click the default percentage value (100%) and change it to a different value. 100% should be fine for most people.
-
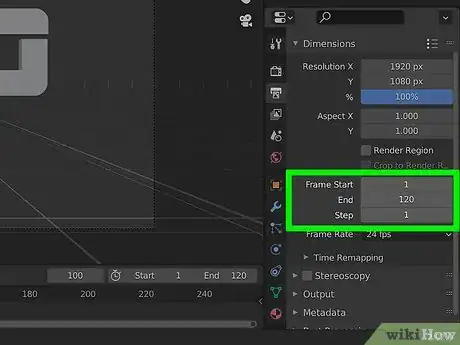
6Set the frames for the animation. The "Frame Start" and "Frame Stop" values should align with the number of frames you have in your animation (check the Start and End values below your animation's bottom-right corner). If you need to, you can edit the start and end frame numbers to remove frames from the beginning or end of the animation.
-
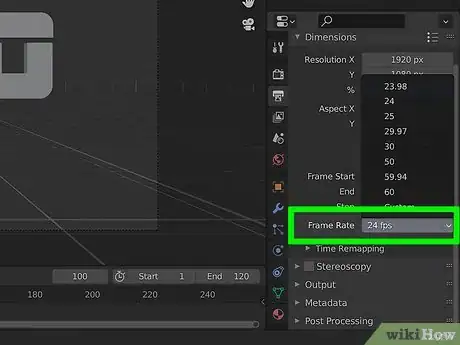
7Set the Frame Rate. The Frame Rate value is 24 fps by default. If you'll be importing the animation into another program and need to use a specific frame rate, you can adjust this value as needed.
-
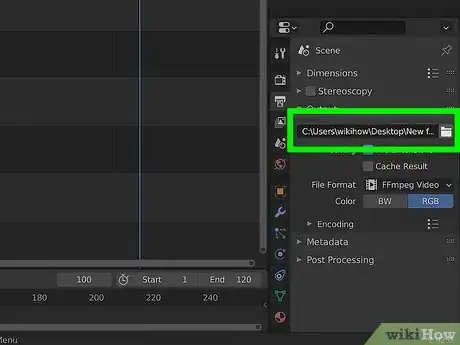
8Set an Output directory. The Output section toward the bottom of the panel is where you can choose a folder to which you'll save the output files. You'll want to create a new directory:
- Click the icon of two folders to select the directory you want to save the files to.
- Select the directory where you want to create your output directory.
- Click the button with a folder and a plus sign on it to create a new directory.
- Type a name for the directory, such as "Render" or "Animation."
- Select your new directory and click Accept. The new directory name will then appear as the Output directory.
-
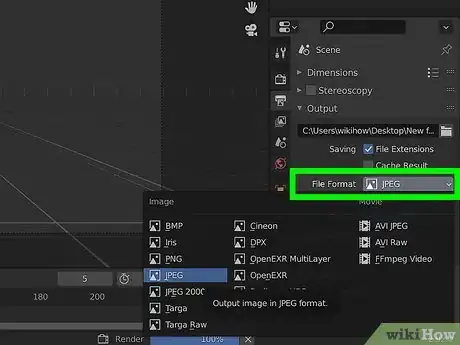
9Select the output format. There are two choices for rendering your output:
-
As images: The default output format is PNG. If you keep the default or select another format under "Image," Blender will first render the animation as individual images, which you can then quickly convert to video using the Video Sequence Editor. Blender recommends this choice for rendering animations.[2]
- If you have to stop the rendering process or your computer loses power while rendering, you won't lose your progress, because you're creating individual image files. You'll also be able to edit any of the images individually before processing into a movie.
- If you have a transparent background, select RGBA as the "Color" value. Otherwise, you can use "RBG" for a smaller file size.
-
As a video: If you choose one of the "Movie" formats, Blender will immediately render the animation to the selected video type. This is sometimes a better choice for much smaller or lower-resolution animations, but you'll run the risk of having to restart rendering if your computer (or Blender) crashes or loses power.
- If you choose a movie file, select FFmpeg, as it will give you the best quality without a massive file size. You should also leave the Video Codec as H.264.
-
As images: The default output format is PNG. If you keep the default or select another format under "Image," Blender will first render the animation as individual images, which you can then quickly convert to video using the Video Sequence Editor. Blender recommends this choice for rendering animations.[2]
Rendering Your Animation
-
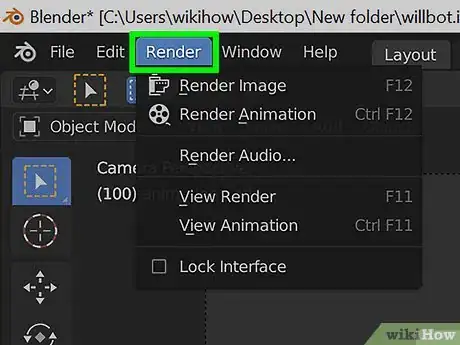
1Click the Render menu. It's at the top of Blender. A menu will expand.
-
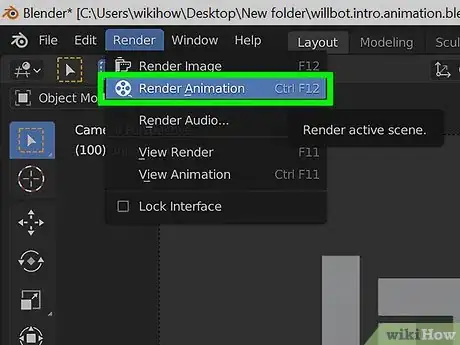
2Click Render Animation. This begins the rendering process. Blender will display a new window that shows the progress of your rendering. Rendering can definitely take a while—close to an hour or more for larger files.
- If you're rendering as a video file, be very careful not to close the preview window during the rendering process or you will corrupt the file and have to start over again.
- If you're rendering as images first, you can stop the rendering process at any time by closing this window. You can then restart the rendering process where you left off. To do so:
- Click the Output Properties panel.
- Remove the checkmark from "Overwrite" below the output directory.
- Click the Render menu and select Render Animation again.
-
3View your rendered animation. Once the animation is rendered, you can close the preview window to go back to the Blender desktop. To see your animation, click the Render menu and select View Animation.
- If you rendered as a video, you're done! Your rendered video is saved to the output directory you created in the Output Properties panel.
- If you rendered as images, you're very close to done—keep reading!
-
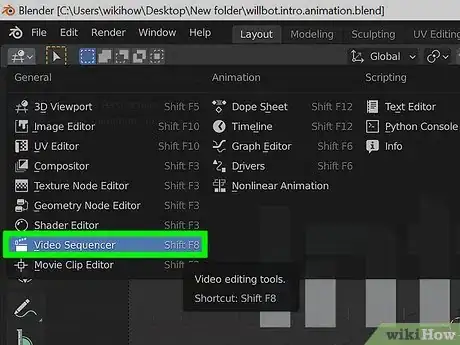
4Open the Video Sequencer. You can do this by clicking the train tracks menu at the top-left corner and selecting Video Sequencer, or by pressing Shift + F8 on your keyboard.
-
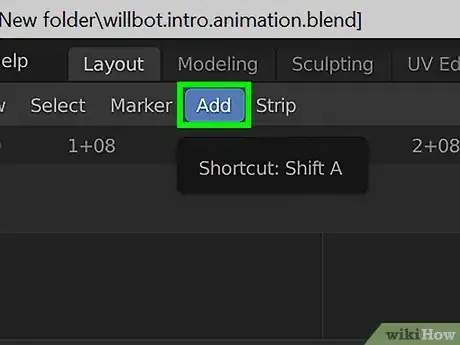
5Click the Add button. It's at the top of the sequencer.
-
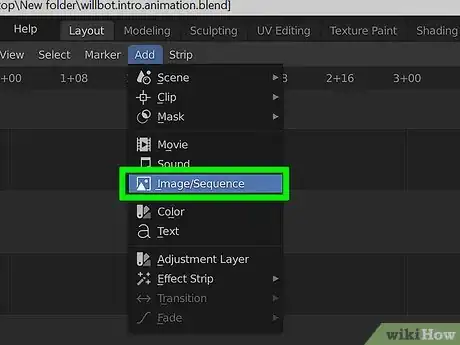
6Click Image Sequence on the menu. This opens the Blender file viewer.
-
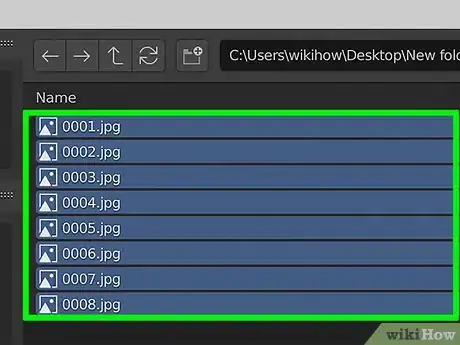
7Select all of the files in your Output directory. Remember the output directory you created earlier? Navigate to that directory in the file viewer, and double-click the output folder to find your rendered files. You'll see an individual file for each frame in the animation. To select all of the files in the directory, just press the A key on your keyboard (no other keys are needed).
-
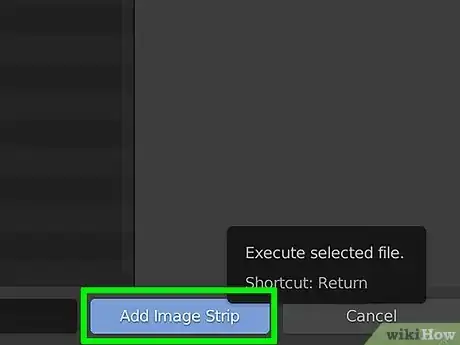
8Click the Add Image Strip button. It's at the bottom of the file viewer. This adds the selected images to the sequencer in the proper order.
- If you want to add sound to the animation, click Add and select Sound, then import the desired sound.
-
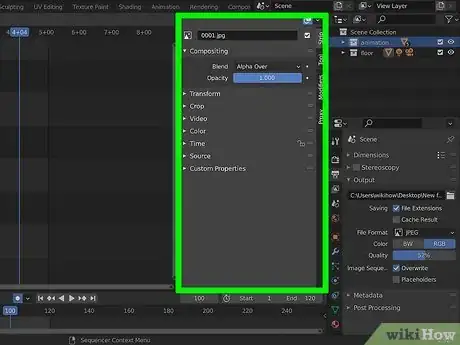
9Press the N key to open the Sidebar. It'll appear on the right side of the sequencer.
- If the sidebar doesn't open to the Strip tab automatically, click the Strip tab on it's upper-right corner to switch to it now.
-
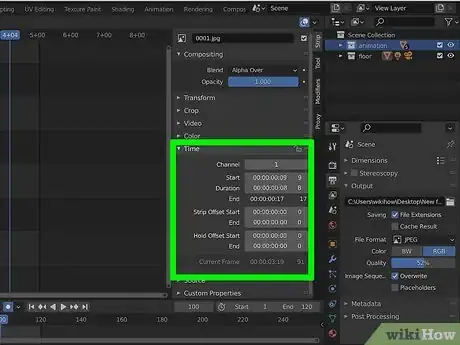
10Expand the Time group to make sure all frames are included. It's in the sidebar. The first frame next to "Start" and "End" should match up with the number of images in your animation.
-
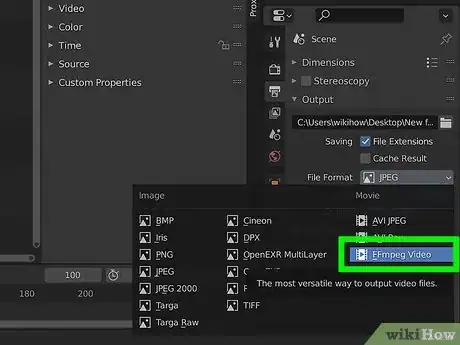
11Select FFmpeg as the Output format. This is over on the Output Properties panel, where you were making settings before you rendered the animation. To choose this option, click the existing file format (probably PNG) and select FFmpeg.
- The default Encoding settings should work fine for most people, but you can choose a different container and codec if you wish.
-
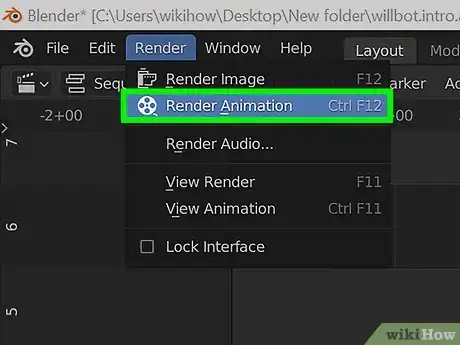
12Click the Render menu and select Render Animation. Now Blender will use the images in your animation to create an MPEG movie file. Unlike the last rendering process, this one will be fast (probably about a minute or so) because the images themselves have already been rendered. Once the rendering is complete, the animation video file will be placed in the Output directory you created.
References
About This Article
1. Open the Output panel.
2. Create an output directory.
3. Select PNG as the output format.
4. Click the Render menu and select Render Animation.
5. Open the Video Sequencer and click Add.
6. Click Image Sequence.
7. Select your images.
8. Select FFmpeg as the output format.
9. Click the Render menu and select Render Animation.
