This article was co-authored by wikiHow staff writer, Luke Smith, MFA. Luke Smith is a wikiHow Staff Writer. He's worked for literary agents, publishing houses, and with many authors, and his writing has been featured in a number of literary magazines. Now, Luke writes for the content team at wikiHow and hopes to help readers expand both their skillsets and the bounds of their curiosity. Luke earned his MFA from the University of Montana.
Learn more...
Mylar bags are a popular storage option for keeping perishable items safe and fresh for long periods of time. Since they’re made of layered plastic or foil, all it takes is a little heat to create an airtight seal. We’ll show you how to properly fill a Mylar bag, seal it with a heat source, and then update you on safe storage periods for some common foods.
Things You Should Know
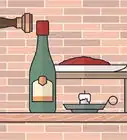
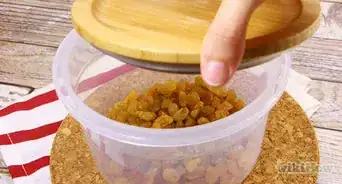
- Label the bag’s contents and packaging date with a permanent marker, then fill it with your items, leaving about 3–4 in (7.6–10.2 cm) of space at the top.
- Place an oxygen absorber packet inside the bag with the items. Add more oxygen absorbers to larger bags.
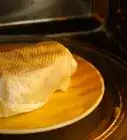
- Run a medium-hot clothes iron or hair straightener quickly and carefully across the top 1 in (2.5 cm) of the bag 1-2 times, until it’s sealed.
- Alternatively, place the open end of the Mylar bag into an impulse or vacuum sealer, and run the sealing function as normal.
Steps


References
- ↑ http://cdn6.bigcommerce.com/s-uyn0oyt/product_images/uploaded_images/How%20to%20Seal%20Mylar%20Bags%20(Quart%20or%20Gallon%20size).pdf
- ↑ https://totalprepare.ca/wp-content/uploads/Food-Storage-Accessories-101.pdf
- ↑ https://www.ncbi.nlm.nih.gov/pmc/articles/PMC4375217/
- ↑ https://pro-ex.com.au/wp-content/uploads/2020/12/Mylar-Bag-Brochure.pdf
- ↑ https://totalprepare.ca/wp-content/uploads/Food-Storage-Accessories-101.pdf
- ↑ https://pro-ex.com.au/wp-content/uploads/2020/12/Mylar-Bag-Brochure.pdf
- ↑ http://cdn6.bigcommerce.com/s-uyn0oyt/product_images/uploaded_images/How%20to%20Seal%20Mylar%20Bags%20(Quart%20or%20Gallon%20size).pdf
- ↑ https://extension.usu.edu/preserve-the-harvest/files/Food-Storage-Booklet.pdf
About This Article