This article was co-authored by wikiHow Staff. Our trained team of editors and researchers validate articles for accuracy and comprehensiveness. wikiHow's Content Management Team carefully monitors the work from our editorial staff to ensure that each article is backed by trusted research and meets our high quality standards.
There are 10 references cited in this article, which can be found at the bottom of the page.
This article has been viewed 58,643 times.
Learn more...
A conibear trap (pronounced kon-uh-bear) is typically used when trapping beavers, muskrats, mink, or raccoons. These rodents can cause serious problems for ranchers and farmers, and conibear traps are a common solution. The device can also be referred to as a “body trap,” since it grips the entire body of the prey, rather than snagging a single paw. You can purchase a conibear trap at large hardware stores or at most sporting goods stores. Conibear traps comprise 2 large metal plates, a large spring which forces the sides of the trap together, and a trip trigger that is set in place with a catch device.
Steps
Selecting a Trap and Location
-
1Choose the size trap that correlates with the animal you're trapping. Conibear traps come in 3 sizes: 110, which measures 5 inches (13 cm) per side; 220, which measures 7 inches (18 cm) per side; and 330, which measures 10 inches (25 cm) per side. Larger traps are used to catch larger animals. Visit a large hardware store or sporting goods store, and ask to peruse the traps selection. As a rough rule of thumb, use each trap for the following animals:
- 110: small mammals like mink and muskrat.
- 220: medium mammals like raccoon and opossum.
- 330: larger mammals like otter or beaver.
-
2Purchase a setter tool. Conibear traps are hefty and would take an extreme amount of strength to set by hand. Trap companies also provide setters: a metal tool that allows you to exert many pounds of pressure on the trap's springs without hurting yourself. The setter looks almost like a pair of garden shears without the blades.[1]
- You can purchase a setter wherever conibear traps are sold. If the setters aren't apparent, ask the sales staff to help you find the item.
- Without a setter, you may be able to set a 110 by hand (if you have strong hands), but you'd be unable to bend the springs on the large 220 or 330.
Advertisement -
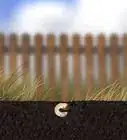
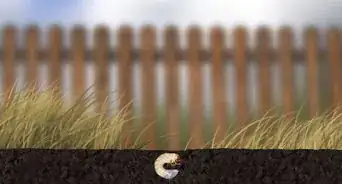
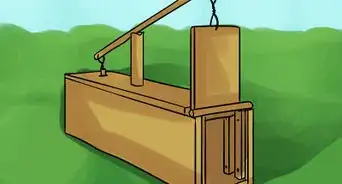
3Set the trap at the mouth of a beaver slide. Beaver slides are the muddy, well-worn tracks that beavers use to climb out of ponds and up onto dry ground. Slides are an ideal location to place the conibear trap, since you can be certain that any beavers in the vicinity will use the slides to access water.[2]
- You do not need to set the trap at the exact location where you plan to trap animals. As long as you do not release the J-hooks before you've placed the trap in the intended position, it won't go off accidentally.
- Try setting the conibear trap right at the mouth of the beaver slide. If a few fruitless days pass, move the conibear trap back farther away from the water.
- Raccoons often hunt for and wash off their food near water as well. If you're trapping raccoon, try setting the conibear near a beaver slide, on an open bank of a river or lake.
-
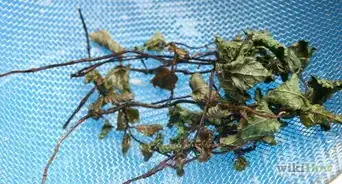
4Place conibear traps in the channel beavers swim through. Beavers use channels—also called runs—to swim back and forth through swampy, flooded wetlands. Since these channels are submerged, beavers will swim through them quickly, not suspecting a trap in the water way. You can easily identify a beaver channel: each channel will be 12–16 inches (30–41 cm) wide.[3]
- When you're ready to trap, just lower the conibear trap into the channel. Be careful not to accidentally bump the trigger and set the trap off as you set it in place.
- If you're hunting other aquatic mammals, like muskrat, mink, or otters, you can place the conibear trap in their underwater channels or on riverbank trails.[4] These passageways will be smaller than beaver channels, but should be just as noticeable.


Setting the Trap
-
1Compress one of the trap springs. Position the setter tool so that each of the two downward-facing prongs are hooked into the large holes at either end of one spring. (These are referred to as “spring eyes.”) Squeeze your end of the setter tool together, so that the setter compresses the springs.[5]
- Keep the conibear trap in place while you're compressing the spring by stepping on the end of the spring with one of your feet.
-
2Slide the J-hook towards the square body of the trap. The J-hook is a thin metal hook, normally dangling from near the end of an un-compressed spring. Pressure from the J-hook will hold the two sides of the spring close together, keeping the spring in the compressed position.[6]
- Keep pressure on the setter tool until the J-hook is in place. If you release the tool early, the spring may pop back open.
-
3Repeat the process with the other trap spring. Once you've compressed one of the trap springs, the other will be easier. Repeat the same procedure: stand on the end of the other spring, and use the tips of the setter tool to compress the spring.[7]
- Then slide the J-hook up so that it holds the spring in its compressed position.
-
4Open the trap with the setter tool. Now that both springs are set, you can open up the center of the trap. Use the setter tool to grab the top bar on each side of the trap. Then, squeeze the setter tool closed so that the trap opens up.[8]
- If done correctly, you should see the trap change shape from a flat square to a 3-dimensional, vertical rectangle.
-
5Select a sensitivity for the trap's trigger. You can adjust the sensitivity of the trap by changing which of the locking mechanism's notches you set it with. The locking mechanism should have 3 distinct notches. The notches nearest the trap will set the sensitivity to “low,” while the notch farthest from the trap will set the sensitivity to “high.”[9]
- Lighter animals—including muskrat and mink—will be able to trigger the trap on the “high” setting, but heavier animals—including beaver and otter—will only trigger the trap on the “low” setting.
-
6Set the locking mechanism over the trigger. The trigger is the thin, 2-pronged piece of metal that should be hanging down from one of the conibear trap's upper bars. The locking mechanism will be hanging down from the bar directly across from the trigger. Fold the locking mechanism over, so that one of the indentations fits over the groove in the center of the trigger.[10]
- Make sure that the trigger is pointing downwards before you try to set the trap.
-
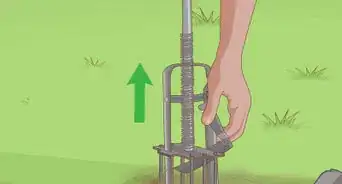
7Shove a sturdy stick through the spring hole and into the ground. The conibear trap will have a large ring at the end of each compressed spring. The stick will hold the conibear trap in place and prevent it from falling over in the mud or underwater.
- If the trap has 2 springs, it will have 2 spring holes. Shove a stick through each one to secure the trap.
-
8Release the J-hooks. Once the trap is set, the J-hooks aren't needed any longer. Use your fingers to slide the J-hooks away from the square body of the trap. This action will release the J-hooks so that the trap can spring shut as soon as an animal steps inside of it.[11] If you forget and leave the J-hooks in place, they'll function as a safety and keep the trap from springing.
- Use caution when releasing the J-hooks. Once they're out of the way, the trap will be armed and can be set off easily.
- Once you've set the trap, leave the area. Return once every 2 days to inspect the trap and see if you've caught a beaver or other mammal.


Warnings
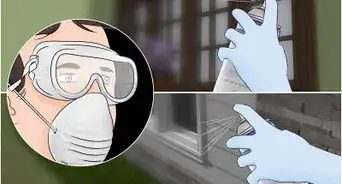
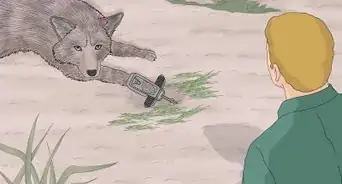
- The conibear is not a live trap; it will kill the animal that you're trapping. If you have ethical reservations against killing animals, you'll need to find another way to trap beaver or other rodents.⧼thumbs_response⧽
- Keep your hands well away from the trigger once the conibear trap is set. A small 110 will only pinch your fingers, but the 330 could seriously crush or break your hand.⧼thumbs_response⧽


References
- ↑ https://youtu.be/LRQxdvT0J8I?t=47s
- ↑ http://www.howtotrapbeavers.com/conibears/
- ↑ http://www.howtotrapbeavers.com/conibears/
- ↑ http://www.northdakotafurtakers.com/EdManual/mink.htm
- ↑ https://www.youtube.com/watch?v=LRQxdvT0J8I&feature=youtu.be&t=53s
- ↑ https://www.youtube.com/watch?v=LRQxdvT0J8I&feature=youtu.be&t=55s
- ↑ https://www.youtube.com/watch?v=LRQxdvT0J8I&feature=youtu.be&t=1m
- ↑ https://www.youtube.com/watch?v=LRQxdvT0J8I&feature=youtu.be&t=1m18s
- ↑ https://www.youtube.com/watch?v=e9-6NgeH-3A&feature=youtu.be&t=30s
About This Article