This article was co-authored by Markeicha Dulaney and by wikiHow staff writer, Amy Bobinger. Chef Markeicha Dulaney is a Personal Chef and Founder of Sweet Monáe Personal Chef Services in 2015 in South Florida. She has over 22 years of experience in the kitchen and provides customizable menus to meet the dietary needs, taste preferences, style, and budget of each client. She also specializes in weekly in-home chef services, all-inclusive pro-chef services, boutique catering, and pantry organizing services. She was featured in The Knot's "Table for Two" YouTube episodes and has also been featured in Real Simple Magazine article on "What routines save you the most time.” Chef Markeicha Dulaney graduated with an Associate's Degree from the Pennsylvania Culinary Institute of Culinary Arts and is a longtime member of the USPCA (United States Personal Chef Association).
This article has been viewed 70,585 times.
Clams are a delicious addition to any seafood dish, but you must store them properly for your safety. If you'll be cooking them within about 3 or 4 days, you can keep them alive in your refrigerator, but if it will be any longer than that, you should store the clams in your freezer.
Things You'll Need=
Storing Live Clams
- Shallow dish, such as a baking dish
- Damp towel or paper towels
- Refrigerator
Freezing Live Clams
- Cool running water
- Airtight freezer bags
- Permanent marker
- Freezer
Refrigerating or Freezing Shucked Clams
- Airtight plastic container or resealable bags
- Clam juice (optional)
- Fridge or freezer
Steps
Storing Live Clams
-
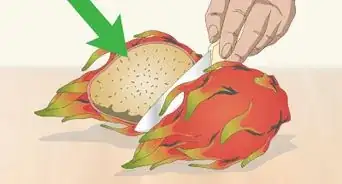
1Inspect the clams right away and throw out any that are dead or broken. Healthy clams should be either closed tightly or slightly open. If they’re open, they should shut quickly when you tap on them. If any clams are open and do not shut when you tap on them, or if they float in water, they are dead and should be discarded immediately. Also, if you see any broken or damaged shells, throw those clams out right away.
- It’s important to throw out dead clams right away so they don’t contaminate those that are still alive.
- The clams should have a fresh smell that reminds you of the ocean. If the clams smell fishy or they have an ammonia-like smell, throw them out.
- Soft-shell clams have a long neck, so they may not close completely.[1]
-
2Place the clams in a single layer in a shallow dish. It’s important that the clams be able to get air, so don’t just pile them up in a bowl. This will cause the clams at the bottom of the pile to suffocate and die. Instead, spread them in a single layer in a baking dish, which will allow the clams to breathe.[2]
- Don’t add fresh water to the dish, as this will kill them.[3]
Advertisement -
3Cover the container holding the clams with a damp towel. A damp towel will keep the clams from drying out, but it will also allow them to get fresh air. Don't cover them in plastic or they'll smother.[4]
- If you like, you can use damp paper towels instead of a cloth towel.
-
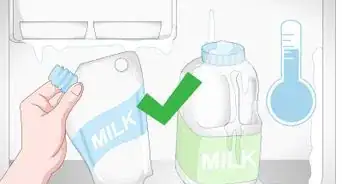
4Store the clams in the back of the fridge. Since cold air escapes every time you open the door, the back of your fridge is usually the coldest part of the fridge. The clams should be kept at a temperature between 32–35 °F (0–2 °C).
-
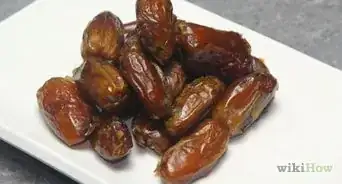
5Use the clams within 2-3 days. When it comes to eating shellfish, the sooner you can prepare them, the better. In the case of clams, make sure you eat them within 3 days at the most. If it’s going to be longer than that, freeze the clams rather than keeping them in the refrigerator.
- Check the clams every day for any open shells and remove them promptly. Allowing dead clams to sit in the container could lead to the spread of dangerous foodborne toxins.


Freezing Live Clams
-
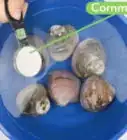
1Rinse the clams under cool running water. If you’re going to freeze the clams, you should rinse them before you put them into storage. Scrub them lightly with your fingers or a clean cloth or brush to remove mud and grit from inside the shells.[5]
- Don’t use hot or warm water to rinse the clams, as this will cause their shells to open. When freezing clams, you want the clams to be closed.
-
2Place the live clams in airtight freezer bags and remove any excess air. Resealable plastic bags are perfect for holding whole clams in the freezer. Typically, you can fit more clams into a bag than you can a hard-sided container, making them ideal for efficient freezer storage.
- Choose moisture-resistant freezer bags rather than basic plastic bags, since you don’t want the clams to become freezer-burned.
-
3Label the container with the date. Write the date on the freezer bag in a permanent marker, or place a waterproof label on the bag that contains the date. This will help you remember how long the clams have been in the freezer, and it will be useful if you end up freezing multiple batches of clams during the same season.
-
4Put the clams into the back of the freezer. The back of the freezer is the coldest part, since the air tends to escape when you open the freezer door. The quality of the clams will be better preserved if they freeze more quickly.
- Do not place the bag of clams in the freezer door, which is typically the least cold area in a freezer.
- It's fine to stack multiple bags of clams on top of each other, since they won't live long in the freezer anyway.
-
5Use the clams within 3 months. When properly frozen, the clams will stay fresh for about 3 months. After that, their taste and texture may change, making them unpleasant to eat.
-
6Thaw the clams by placing them under cool running water. When you’re ready to prepare your frozen clams, take them out of the bag and place them in a colander under cool running water. With this method, the clams should defrost in just a few minutes.[6]
- Do not refreeze thawed clams. If you don’t eat all of the clams that you defrosted within 1-2 days, throw the rest out.


Refrigerating or Freezing Shucked Clams
-
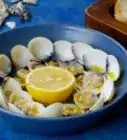
1Keep the clams immersed in their own liquor. When you shuck clams, they release a salty-sweet juice, usually referred to as liquor. This juice is the best way to preserve the flavor of clams.
- Reserve the clam liquor and pour it over the clam meat after it has been shucked.
- You can add a bottle of clam juice if there’s not enough liquor to cover your clams.
-
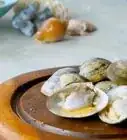
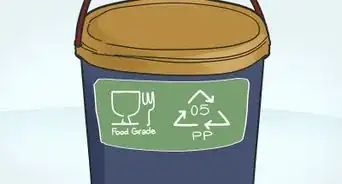
2Place the clams and liquor in a tightly-sealed container. You can either use an airtight plastic container, or you can place the clams into a resealable plastic bag. Since the clams contain juice, however, you might reduce the risk of a spill by using a container with hard sides.
- Leave about 1⁄2 in (1.3 cm) of headroom in the container if you think you may freeze the clams. This will give the liquor room to expand as it freezes.
-
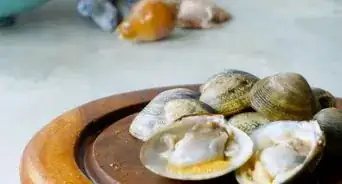
3Place the container in the fridge if you’ll use the clams within 3 days. Shucked clams will stay fresh in the fridge for 2-3 days, so if you know you’ll be using them quickly, you can keep them there. Just be sure to push the container all the way to the back of the fridge, which is usually the coldest part.
-
4Put the container in the freezer if it will be longer than 3 days. Other than leaving headroom in the container, there’s nothing special you have to do to freeze the shucked clams. However, just like when you refrigerate the clams, make sure you place the container in the back of the freezer, where the temperature is coldest.[7]
- Use frozen clams within 3 months.[8]
-
5Thaw frozen, shucked clams in the fridge overnight. The best way to gently defrost your clams while preserving their texture is to place the container in the refrigerator the night before you want to use them. This way, they’ll thaw out while still staying at a safe temperature.
- Leaving the clams at room temperature can lead to dangerous foodborne illness, while other methods of defrosting, such as using the microwave, can make clams rubbery.
- Do not refreeze frozen clams. Throw out any that you don’t use within 1-2 days.


References
- ↑ https://www.bonappetit.com/test-kitchen/cooking-tips/article/clams
- ↑ https://www.bonappetit.com/test-kitchen/cooking-tips/article/clams
- ↑ https://www.tastingtable.com/cook/national/How-to-Clean-and-Store-Clams-Mussels-and-Oysters
- ↑ https://www.tastingtable.com/cook/national/How-to-Clean-and-Store-Clams-Mussels-and-Oysters
- ↑ http://www.issc.org/clams
- ↑ http://www.theculinaryexchange.com/blog/can-you-freeze-clams/#.W4CDtuhKjIU
- ↑ http://www.issc.org/clams
- ↑ http://www.theculinaryexchange.com/blog/can-you-freeze-clams/#.W4CDtuhKjIU
Warnings
- Examine clams carefully and make sure to discard any dead clams before you place them in the refrigerator or the freezer.⧼thumbs_response⧽
- Do not re-freeze clams that have been frozen and then thawed out.⧼thumbs_response⧽
About This Article