This article was co-authored by Karin Lindquist, a trusted member of wikiHow's volunteer community. Karin Lindquist earned a BSc in Agriculture as an Animal Science major from the University of Alberta, Canada. She has over 20 years of experience working with cattle and crops. She's worked for a mixed-practice veterinarian, as a sales representative in a farm supply store, and as a research assistant doing rangeland, soil, and crop research. She currently works as a forage and beef agriculture extension specialist, advising farmers on a variety of issues relating to their cattle and the forages they grow and harvest.
wikiHow marks an article as reader-approved once it receives enough positive feedback. In this case, 91% of readers who voted found the article helpful, earning it our reader-approved status.
This article has been viewed 35,490 times.
Learn more...
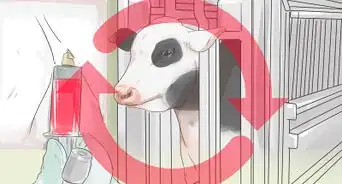
Blood samples obtained from cattle are very useful for a variety of means, from testing for disease to checking pregnancy status. The quick and relatively simple means of taking blood is low stress and almost painless for the animal. However, knowing where and how to place the needle to quickly get a sample is important. Your veterinarian can show you where and how to take a blood sample, though this article will also guide you in following the proper procedures for two locations with two different types of blood sampling.
Two key locations are used for taking blood samples: From the coccygeal vein of the tail-head, and the jugular vein of the neck. There are also two methods of blood sampling: With the classic needle and syringe, and exiting the contents of the syringe into a vaccutainer tube, and with a double-pointed needle that draws blood into a vaccutainer tube, no syringe required.
To make things simpler, the classic needle and syringe is coupled with obtaining a blood sample from the tail-head, and the double-pointed needle holder is coupled with taking blood from the jugular vein. You can use either blood-drawing method from either the tail-head or the neck.
Steps
Using a Classic Needle and Syringe from the Tail-Head
-
1Order your blood test kit and have it shipped to you. The number of samples that need to be taken should be one per bovine. Thus, the number of tubes needed will depend on how many animals you need to draw blood from.
-
2Confine and restrain the animal. It makes taking blood much easier and safer for both you and the animal if the animal is confined to a head-gate or squeeze chute. For this method, a head-gate with a neck extender isn't really necessary.Advertisement
-
3Raise the tail and locate the coccygeal blood vessels underneath the tail. The tail needs to be raised right up in the air so that its perpendicular to the ground. The blood vessel of choice is located under the tail, which is where you will be taking blood from.
- Note though that the vessels actually form an upside-down V from either side of the anus up a couple inches the tail. Where the V ends and the vessels continue parallel to the length of the tail is where you should take your blood sample from.
-
4Clean the area to be sampled. Because the sample is being taken from under the tail, close vicinity to the anus, bacteria from feces could potentially contaminate the sample if the area is not swabbed with alcohol first. A cotton ball dipped in 70% rubbing alcohol will work, just by holding the cotton ball to the opening of the bottle and tipping the bottle nearly upside down to wet the ball. (You can also use a 4x4 gauze.) Rub, in an upward motion only away from the anal region, the area you will be inserting the needle into.
-
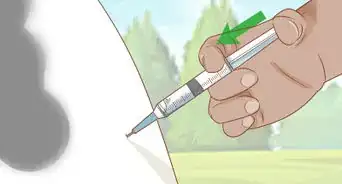
5Insert the needle directly into the vein. The needle needs to be carefully inserted perpendicular to the angle of the tail; but not all the way in.
- It is easier to put the needle in perpendicular to the tail rather than try to put it in parallel because it may be more difficult to puncture the vein when the needle is at more of an angle to the vein than when it's 90-degrees to that vein.
- Use a short needle: an 1-inch, 18-gauge needle is good enough for this job. And as mentioned, only insert the needle slightly over half-way in, never all the way.
- The syringe accompanying the needle should not be more than 5 cc; but, there's nothing wrong with having a 10 cc syringe, just note that you don't need to fill it up completely with blood.
-
6Draw slowly back on the plunger of the syringe. Allow 3 to 5 mL (or 3 to 5 cc) of blood to enter the syringe. Most labs only need a small amount of blood to do the test and to have some left over in case the lab technicians make a mistake.
-
7Remove the needle the same way you inserted it. Apply pressure to the area to stem excess bleeding with a gauze or cotton swab. Then lower the tail when bleeding appears to have stopped.
-
8Take a rubber-capped test tube (called a "vacutainer tube") and insert the needle into the top of the cap. The vacuum-sealed tube will vacate the contents of the syringe without you needing to apply pressure to the plunger. Remove the needle when all contents have been vacated.
-
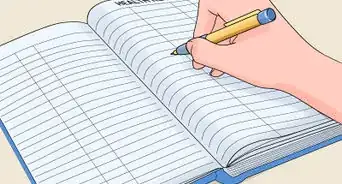
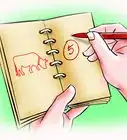
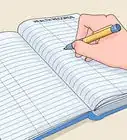
9Label the tube. The vacutainer tube must be labelled with the identifying number and/or name of the animal, sample number (Sample #1, 2, 3, etc., or Sample A, B, C, etc.), and name of your farm.
-
10Put the tube back in its place. Usually the box that contained the kit has a built-in tray to place the vacutainer tubes in. Place the tubes in that box with the bubble wrap surrounding each tube to protect them.


Using the Double-Pointed Needle Holder from the Jugular Vein
-
1Assemble the needles with the needle holder (optional). You must use a fresh blood-letting needle for every cow, for reasons that include you make sure each needle is sharp for a clean puncture into the vein, and so that you don't risk contaminating the samples between animals. Assembling the needles just makes it easy for you to grab the next needle after disposing the last one just used.
- The double-pointed needle holder is designed so that one needle is on the outside, as the "blood-letting" needle, and the other needle, pointing the opposite way, is housed inside a short open-ended tube that is wide enough to insert a vacutainer test tube while keeping your fingers safe.
-
2Ready the double-pointed needle with a clean needle for blood-drawing. Make sure you also have a needle inside the holder ready for the tube. Make sure you have the cap on the outside needle you will use to puncture the jugular vein.
-
3Restrain the animal. Just as in the method above, the animal must be restrained in a head-catch or squeeze chute for the safety of both the handler and the animal.
- While the animal's head is caught, use a rope halter to tie the animal's head off to one side, exposing the side of the neck.
-
4Find the jugular furrow and "tap" the jugular vein. The groove beneath the muscle of the neck (which is the top half to two-thirds of a cow's neck) is where the jugular vein can be felt. With the fingers pf one hand apply pressure to the jugular vein lower down on the neck, right below the biggest bulge of the neck muscle; with the other stroke the grove by starting from the start of the groove at the head and moving your hand downwards to almost your other hand. This will encourage the vein to pop out more, and make it easier for you to do the next step.
- The jugular vein is actually quite large and especially noticeable when animals have their summer coat. You may even be able to see it pulsating if you look carefully.
-
5Put the blood-letting needle into the vein. Keeping the fingers of one of your hands on the lower part of the neck (where the deepest jugular groove is and ends, as indicated in the step above), insert the outside needle into the vein at an angle that is perpendicular to the slope of the neck, and only at half of the needle's length.
- Use a 1-inch 18-gauge needle for going into the vein.
- Feel free to use your forefinger on the needle as a guide, though this is completely optional.
- As in the method above, the reason to go perpendicular into the vein is so that it reduces the needle slipping and missing the vein completely. All needles are tapered at the end, not pointed like a spear. The greater the angle the needle was inserted (i.e., more parallel to the neck), the chance of the needle slipping and missing the vein completely increases.
- You may put in the needle alone in first before attaching the needle holder, or puncture the vein while the blood-letting needle is already attached to the double-needle holder. Whatever you chose to do is optional, and your veterinarian may encourage the same.
-
6While the blood-letting needle remains in the vein, attach a vaccutainer tube to the needle on the inside of the double-needle holder (see step 1). Allow blood to drain into the tube until you have around 3 to 5 mL of blood.
- Once the vaccutainer tube is attached to the needle unit it takes only a few seconds for the tube to get full. You must pay attention to the tube to make sure you remove it before it gets too full.
-
7Once you have obtained your sample, remove the vaccutainer tube from the needle-holder unit. Then remove the double-needle holder unit from the animal, pulling it out in the same direction you put it in.
-
8Apply pressure to stop the bleeding. Use gauze or a cotton swab to do so. Check about every 5 seconds to see if bleeding has stopped. It should only take 30 seconds or less for the area to stop bleeding.
-
9Cap the outside needle, and remove it into a biohazard disposal box. Obtain a fresh needle for the next animal, and keep it capped for now.
-
10Label the tube. Tube must be labelled with the identifying number and/or name of the animal, sample number (Sample #1, 2, 3, etc., or Sample A, B, C, etc.), and name of your farm.
-
11Place tube back in the box. The box that contained the blood-sampling kit has a built-in tray to place the vacutainer tubes in. Place the tubes in that box with the bubble wrap surrounding each tube to protect them.
-
12Repeat for other cattle. Release the animal and move on to the next animal that needs to have its blood collected.


Warnings
- Handle needles with care. You are not taking blood samples from yourself, but from your cattle, so avoid any means, accidental or otherwise, of poking yourself or even others who are working with you!⧼thumbs_response⧽
- Do not drop the test tubes! Handle the tubes carefully to avoid damaging them. Once they are damaged they may leak or loose their efficacy and potentially be contaminated.⧼thumbs_response⧽
- Animals not used to being handled can make it dangerous to take blood samples from, especially from the neck region. You may be better off taking samples from the tail-head instead, because lifting the tail up vertically will stretch the hamstrings preventing the animal from kicking out at you. The risk though is when you grab the tail to lift it and lower it after you've gotten your sample.⧼thumbs_response⧽
Things You'll Need
- One 1-inch 18-gauge needle per animal
- One 5 or 10 mL syringe per animal
- One vacutainer tube per animal
- Head-gate or squeeze chute with head-gate
- Double-pointed needle holder with a needle on outside and needle inside.
- Biohazard box for needle disposal
- A cow, bull, or heifer to take sample from
- Wrappings to cushion tubes (absorbent newspaper, bubble-wrap, plastic foam-wrap, etc.)