This article was co-authored by wikiHow staff writer, Eric McClure. Eric McClure is an editing fellow at wikiHow where he has been editing, researching, and creating content since 2019. A former educator and poet, his work has appeared in Carcinogenic Poetry, Shot Glass Journal, Prairie Margins, and The Rusty Nail. His digital chapbook, The Internet, was also published in TL;DR Magazine. He was the winner of the Paul Carroll award for outstanding achievement in creative writing in 2014, and he was a featured reader at the Poetry Foundation’s Open Door Reading Series in 2015. Eric holds a BA in English from the University of Illinois at Chicago, and an MEd in secondary education from DePaul University.
There are 16 references cited in this article, which can be found at the bottom of the page.
This article has been viewed 86,654 times.
Learn more...
A twilly, also known as a Hermes scarf twilly, refers to a long, thin scarf that’s made of silk. You may want to tie or wrap your bag’s handles with a twilly to give your bag a little personality, add an accent color to a monochromatic bag, or protect the handles from wear and tear. There are a variety of ways to tie a twilly around a bag handle and there’s no right or wrong way to do it, so choose whatever style works best for you. From entire handle wraps to cute bows, there are a bunch of different looks that you can create with a standard twilly.
Steps
Wrapping the Entire Handle
-
1Spread the twilly fabric out to make it flat and remove wrinkles. Take your twilly and pull it out so that the fabric is even and straight. Turn over any folded portions to make 1 flat length of fabric. Brush any wrinkles out with the palm of your hand.[1]
- A traditional twilly is 32 inches (81 cm) long and 2–6 inches (5.1–15.2 cm) wide. This should be more than enough fabric to wrap the handle on a medium-sized bag. This can be kind of hard to do if your bag has big looping handles, though.
-
2Slide the twilly between the handle and the bag. Pull the handle on your bag up and slide the last 3–4 inches (7.6–10.2 cm) of the twilly in between the bag and the end of the handle. If the handle is attached to the top of the bag’s fabric, just hold it against the handle on the side facing the bag.[2]
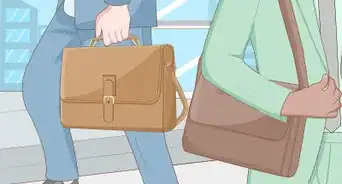
- If your bag has 2 handles, you can wrap a twilly around one of the handles, or use 2 twillies to cover each handle. It’s really up to you![3]
Advertisement -
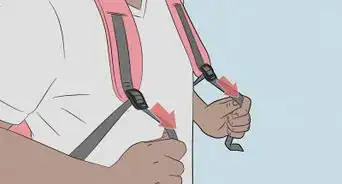
3Pull the fabric towards you about 2–3 in (5.1–7.6 cm) to create a loop. Grab the tip of the fabric sticking out past the handle. Pull the fabric back towards you so that you have roughly 2–3 inches (5.1–7.6 cm) of excess fabric at the end. Hold the 2 sides of the twilly parallel.[4]
-
4Tie the loop into a simple knot with a little fabric sticking out at the bottom. Slide the short end of the twilly underneath the longer end. Pinch the 2 pieces of fabric together and pull the short side over it. Slide the short end through the opening in between the loop. Pull the short end down to tighten the knot.[5]
Tip: Tug the short end tight enough that the fabric stays in place, but not so hard that you’re putting a ton of pressure on the bag handles. Twillys are pretty thin, so it doesn’t take much tension to hold the twilly in place.
-
5Layer the twilly over the handle by wrapping the fabric. Take the long length of fabric and wrap it around the handle where you just tied your knot. Grip the twilly tight as you’re curling it around the handle. Once you’re wrapped the bottom of the handle, pull the fabric up a little while creating a second loop around the handle.[6]
- It doesn’t matter if you go clockwise or counterclockwise around the handle, so choose whichever direction feels natural to you.
-
6Continue wrapping the fabric until you reach the other end of the handle. Fold your third loop around the handle by dragging it up and around the same way you made your second loop. Overlap at least 1 inch (2.5 cm) of the fabric with each wrap so that the thickness of the handle stays uniform and the entire handle is covered.[7]
- If you have more than 4 inches (10 cm) left over when you get to the other end of the handle, wrap the fabric around the base of the handle 1-2 times until you have 3–4 inches (7.6–10.2 cm) left.
- You’re basically wrapping your way around the handle in a sequence of loops, kind of like a spiral staircase.
-
7Loosen the last wrap a little while pinching the fabric above it. Once you get to the end of the handle, rest the side of your nondominant palm on the area above the end of the handle to hold the wrapped fabric still. Then, hold the end of the twilly with your nondominant hand and let it come a little loose. Use your dominant hand to pull the fabric out a little and pinch the fabric to the handle to maintain the slack.[8]
- You’re basically holding the fabric tight while you loosen up the last wrap to make room for a knot.
-
8Pull the loose fabric through the opening to make your second knot. Set the end of the twilly up over the loop you just created. Slide it through the top of the loop and slide it through the other side. Yank it taut until the loop tightens against the end of the handle. Keep pulling until the loop is tight and you have 2–3 inches (5.1–7.6 cm) of excess fabric sticking out from the bottom of your knot.[9]
- You can repeat this process on the other handle for a more symmetrical look, or stop here to go for a more unique look where one of the handles are covered.


Crafting a Handle Knot
-
1Fold the twilly in half lengthwise to make it thinner. Spread the twilly flat and then fold it on top of itself so that the width of the scarf is cut in half. Run your fingers over the fold while pressing down to keep the fold in place.[10]
- This is also known as a camellia, which is a type of shrub with knot-like flowers that resemble the knot you’re going to make.
- This is great way to give a monochromatic bag a little color and personality. It will look like there’s a small flower resting on one the ends of your handle.
-
2Wrap the twilly around the end of the handle where you want to add the knot. Lift the handle on your bag up. Slide the middle of the twilly between the handle and the bag and pull it down so that the twilly is resting at the bottom of the handle.[11]
-
3Pull the 2 sides against one another and twist the fabric clockwise. Tug both lengths out away from the bag with the lengths of the twilly resting against one another. Squeeze the fabric together so that the folds don’t come undone. Then, starting at the base of the handle, wrap the 2 lengths around one another in a clockwise pattern. Continue doing this until the entire twilly is wrapped up in a single rope-like length.[12]
Tip: Do not tie the end of the twilly. Keep the 2 lengths pinched together. There must be roughly 2–3 inches (5.1–7.6 cm) remaining at the end of each length for this to work.
-
4Make a rose-like bundle by twisting the twilly around itself. Pull the twilly down so that it’s pointing away from the bag. Hold the end of the twilly in your dominant hand and pinch the area near the base of the handle with your nondominant hand. Move the larger piece in a circular motion clockwise to create a small ball of fabric on the base of the handle. Continue wrapping the twilly behind itself until you have 2–3 inches (5.1–7.6 cm) remaining.[13]
- With each wrap, you need to tuck the twilly behind the portion that you just wrapped.
-
5Pull the 2 ends of the twilly in opposite directions behind the knot. Once you’ve wrapped the knot 4-5 times, hold the end of the twilly against the base of the knot. Grab the 2 individual ends of the twilly and pull them in opposite directions around the back of the knot.[14]
-
6Tuck the 2 ends together under the knot to secure your twilly. Wrap the 2 lengths around one another like you’re starting to tie your shoes. Next, pull the 2 remaining lengths away from one another to tighten the twilly. To secure it to your bag, tuck the wrapped up ends underneath a portion of the knot to hold them in place.[15]
- If you tie the 2 ends together, you may have a tricky time getting the knot off of your bag.


Crafting a Half-Handle Twilly
-
1Slide the twilly through the middle of the handle. Set your bag down and orient the handle towards you away from the bag. Run the twilly through the middle of the handle in between your bag and the top of the handle. Straighten the fabric out and adjust the location where the bag meets the twilly until the middle of the scarf is resting on the middle of the handle.[16]
- This style will give your bag a unique personality. The twilly will cover half of the handle’s length and look like a bow or standard wrap on the bottom of the handle.
-
2Take the fabric underneath the handle and line it up along the handle. Use your nondominant hand to pinch the fabric against the handle in the middle. Then, use your free hand to pull the long length of fabric that’s underneath the handle and set it on top of the handle in the direction you want to wrap the bag. Line this length of fabric up along the entire length of the section that you’re going to cover.[17]
- This will look like half of the twilly is simply resting on top of the handle.
-
3Wrap the free end of the twilly around the middle to hold it in place. With one end of the fabric lined up on the handle, take the free end and curl it over the center. Pull it through the bottom of the bag and wrap it over the center again. Tug it gently to keep the twilly taut. This will hold the scarf in place while you wrap the rest of the bag.[18]
-
4Continue wrapping the handle using the piece you wrapped the center with. Tie the remainder of the handle with the half of the twilly you wrapped around the center. Loop it under and over the bag in the same direction that you wrapped the center while moving your way towards the bottom of the handle. Overlap each wrap at least 1.5 inches (3.8 cm). Use your free hand to hold the length on top of the handle in place while you’re wrapping it.[19]
- Pull the fabric tight enough that it sits tightly against the handle, but not so tight that you’re constricting the bag’s material.
-
5Wrap the excess twilly around the base of the handle 2-3 times. Once you get to the base of the handle, curl one piece of the twilly clockwise around the strap. Then, wrap the excess portion that is tucked under the fabric counterclockwise over the piece on top. Do this 2-3 times until you have 6–7 inches (15–18 cm) of fabric remaining on both ends of the twilly.[20]
- If you have a hook holding the handle in place, wrap the excess twilly through the hook instead of around the handle.
-
6Create two loops with the remaining fabric to start your bow. Take the first length and roll the fabric against itself to make a 2–3 in (5.1–7.6 cm) pleat. Then, take the second length of the twilly and roll it into a slightly bigger pleat that sits on front of the first loop.[21]
-
7Pass the bottom lengths of fabric through the 2 loops to complete the bow. Pull the fabric on the bottom of the 2 pleats through the center of both loops in opposite directions to make your bow. Pull the 2 sides out away from the center to tighten the bow and let the excess twilly hang.[22]
- You can also tie the end of the handle with a standard wrap by continuing to roll both sides in the same direction. Then, create a loop with the top layer of fabric before pulling the twilly through the loop and tightening it.
Variation: You can tie the bow on its own without wrapping the handle if you have a shorter twilly. Just wrap the end of the handle 6-7 times before using the 2 ends to tie a bow.


References
- ↑ https://youtu.be/84GoJTbaSuM?t=14
- ↑ https://youtu.be/84GoJTbaSuM?t=14
- ↑ http://blog.madisonavenuecouture.com/everything-you-need-to-know-about-hermes-twilly/
- ↑ https://youtu.be/84GoJTbaSuM?t=19
- ↑ http://blog.madisonavenuecouture.com/everything-you-need-to-know-about-hermes-twilly/
- ↑ https://youtu.be/84GoJTbaSuM?t=32
- ↑ https://youtu.be/84GoJTbaSuM?t=38
- ↑ https://youtu.be/84GoJTbaSuM?t=81
- ↑ http://blog.madisonavenuecouture.com/everything-you-need-to-know-about-hermes-twilly/
- ↑ https://youtu.be/84GoJTbaSuM?t=242
- ↑ https://youtu.be/84GoJTbaSuM?t=242
- ↑ https://youtu.be/84GoJTbaSuM?t=265
- ↑ https://youtu.be/84GoJTbaSuM?t=290
- ↑ https://youtu.be/84GoJTbaSuM?t=304
- ↑ https://youtu.be/84GoJTbaSuM?t=310
- ↑ https://youtu.be/fqQ2fsmU2YU?t=19
- ↑ https://youtu.be/fqQ2fsmU2YU?t=20
- ↑ https://youtu.be/fqQ2fsmU2YU?t=22
- ↑ https://youtu.be/fqQ2fsmU2YU?t=31
- ↑ https://youtu.be/fqQ2fsmU2YU?t=40
- ↑ http://blog.madisonavenuecouture.com/everything-you-need-to-know-about-hermes-twilly/
- ↑ http://blog.madisonavenuecouture.com/everything-you-need-to-know-about-hermes-twilly/
About This Article