This article was co-authored by wikiHow staff writer, Hannah Madden. Hannah Madden is a writer, editor, and artist currently living in Portland, Oregon. In 2018, she graduated from Portland State University with a B.S. in Environmental Studies. Hannah enjoys writing articles about conservation, sustainability, and eco-friendly products. When she isn’t writing, you can find Hannah working on hand embroidery projects and listening to music.
There are 18 references cited in this article, which can be found at the bottom of the page.
The wikiHow Video Team also followed the article's instructions and verified that they work.
This article has been viewed 76,592 times.
Learn more...
The holidays are coming around again, which probably means that you’ve pulled your box of decorations out of their storage space. If your decorations seem a little plain, you can try spicing them up with a ribbon on the front. Or, if you’ve lost your ornament hooks, you can use a ribbon as both decoration and a hanger. Try spending an afternoon crafting to brighten up your ornaments and make them look like new again.
Steps
Tying a Classic Bow
-
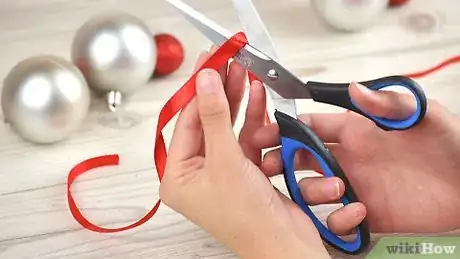
1Measure out 20 in (51 cm) of ribbon. Pick out a 3 to 4 in (7.6 to 10.2 cm) wide ribbon with a wire running through the top and bottom, then measure out 20 inches (51 cm) of it. You can leave the edges straight for now, since you’ll be able to clean them up later.[1]
- Wide ribbon makes a better bow because it stands out more.
- Try picking a ribbon that matches the theme of your ornament.
-
2Fold the 2 sides inwards so they overlap each other. On a flat surface, spread the ribbon out so that the long side faces you. Grab the 2 ends and pull them in towards the center underneath the ribbon, overlapping them to create an awareness ribbon shape on your flat surface.[2]
- You should be left with a small opening in the center of the bow and the 2 tail ends hanging over each other.
Advertisement -
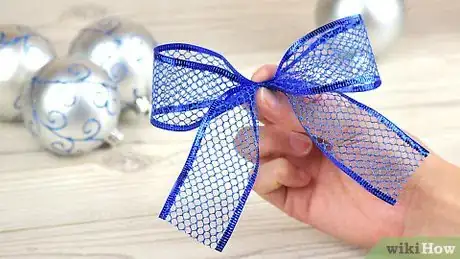
3Pinch the center of the bow together. Keeping the ends overlapped, pick up your ribbon and pinch the center between 2 of your fingers to create the classic bow shape. Don’t worry if your bow doesn’t hold the shape on its own just yet![3]
- If your ribbon has wire in it, it may hold the shape pretty well.
-
4Wrap a pipe cleaner around the center of the bow. Cut a 3 to 4 in (7.6 to 10.2 cm) piece of pipe cleaner out and wrap it around the center of the bow shape you just made. Press the ends of the pipe cleaner down so they wrap flush around the bow, trying not to let them stick up anywhere.[4]
- If you have a lot of excess pipe cleaner sticking out, you can cut the ends off with scissors.
- You don’t have to match the pipe cleaner color to your ribbon since you’ll be covering it up later.
-
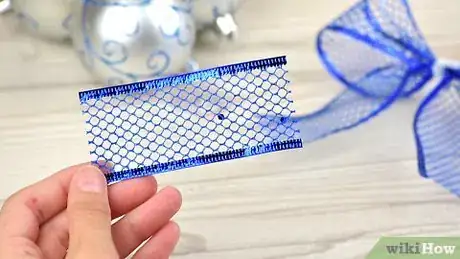
5Cut out a 3.5 in (8.9 cm) length of the same ribbon. Measure out a smaller length of the same ribbon you just used, then use your scissors to cut it out again. You can set your main bow aside for now since it should hold its shape all on its own.[5]
- Using the same kind of ribbon will make your bow look more cohesive.
-
6Fold the small ribbon in half then glue the edges down. Spread the smaller length of ribbon out flat, then fold the edges in towards each other so they meet in the middle lengthwise. Grab a hot glue gun and use it to stick the edges together so you have a seamless, long ribbon piece.[6]
-
7Wrap the small ribbon around the center of the bow, then glue it in place. Wrap the small ribbon around the front of your bow and press the edges down onto the back of the bow. Use your hot glue gun again to stick the ends down in the back of the bow, cutting off any excess ribbon if you need to.[7]
- This is to disguise the pipe cleaner in the center of the bow that’s holding the shape.
-
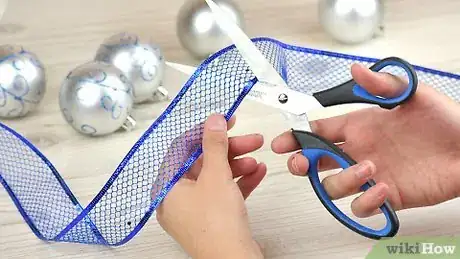
8Cut the edges of the bow at a diagonal. Grab your scissors again and hold them on one of the tails of the bow at a diagonal. Cut down in one smooth motion so the tail is cut at a diagonal, then do the same to the other tail.[8]
- This will give the edges a more polished look.
-
9Squeeze a dot of hot glue onto the metal ornament base. Grab your ornament and squeeze out a dot of hot glue onto the metal base of the ornament hook. Try not to get hot glue anywhere else on the ornament to avoid clouding the design.[9]
- If your ornament doesn’t have a hook, you can find packs of them at most craft supply stores.
-
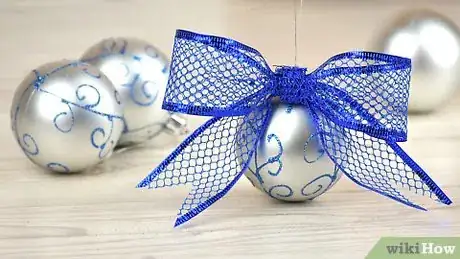
10Press the bow onto the hot glue, then let it dry for 30 minutes. Pick up your bow and press the center of it onto the dot of hot glue, then hold it there for about 1 minute to let the glue bond. Set your ornament aside for about 30 minutes to let it dry fully, then hang it on your tree![10]
- You can make multiple ornaments with different colored bows or a set of ornaments with the same color scheme.
Making a Ribbon Ornament Hanger
-
1Cut out 18 in (46 cm) of skinny ribbon. Find a length of ribbon that’s about 1 in (2.5 cm) wide, then cut out 18 in (46 cm) of it. You don’t need to worry about how the edges look for now, since you’ll be cutting them later on.[11]
- Skinny ribbon works the best for this type of ornament bow because it can fit through an ornament hook much easier than wide ribbon can.
-
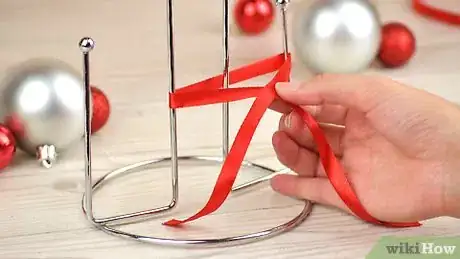
2Wrap the ribbon once around a chair or bed post to hold its shape. Find an object in your house that’s about 6 inches (15 cm) wide to use as a template for your ribbon loop. Wrap the ribbon length around the chair post, bed post, or even a round glass to start making your bow.[12]
- The wider the object is, the longer the loop on the back of your ornament will be.
-
3Tie the ends of the ribbon together in a tight knot. Grab the 2 ends of the ribbon length and cross them over each other on the front of your chair or bed post. Overlap the 2 ends, then pull them together tightly to make a basic knot.[13]
- The knot won’t hold itself together just yet because the ribbon is too slippery.
-
4Create a classic bow with the tail ends of the ribbon. Grab one tail of the ribbon and fold it upwards to make a small loop, then wrap the other ribbon tail around the base of the loop. Pull the loose end behind the back of the loop to create a classic bow, then pull it tight.[14]
- Think of making a bow in the same way you’d tie your shoelaces.
-
5Cut the tails of the bow at an angle. Grab some scissors and hold them at a diagonal against one of the tails of the bow. Cut the edge at a diagonal, then do the same to the other tail to clean them up.[15]
- If the tails of your bow are too long, you can also use your scissors to cut off some length before you cut them at an angle.
-
6Slide the ribbon off the post, leaving the large loop in the back. Grab the ribbon and gently pull it off of the base object you were using. Keep hold of the bow so that it doesn’t pull apart, and leave the long loop at the back of the bow intact.[16]
-
7Thread the back loop through a metal ornament hanger. Grab an ornament that has a hanger on top, but no hook to hang it with. Push the long loop of your ribbon through the front of the metal loop, sliding it through until the bow rests on top of your ornament.[17]
- If you’re having trouble getting the ribbon through the metal loop, pinch it between your fingers before you thread it through.
-
8Use the back loop to hang your ornament. Grab your ornament by the long loop in the back and hang it up on your tree! You can make a few ornaments in this style to decorate and hang your ornaments at the same time.[18]
- This is a great trick to use if you don’t have any more ornament hooks or you want to spice up some plain decorations.
Warnings
- Use caution with hot glue, and try not to get it on your fingers to avoid burning your hands.⧼thumbs_response⧽
Things You’ll Need
Tying a Classic Bow
- Wide ribbon
- Ruler
- Scissors
- Pipe cleaner
- Hot glue
Making a Ribbon Ornament Hanger
- Skinny ribbon
- Scissors
- Ruler
- Bed or chair post
References
- ↑ https://www.youtube.com/watch?v=G94OTmL-dz4&feature=youtu.be&t=154
- ↑ https://www.youtube.com/watch?v=G94OTmL-dz4&feature=youtu.be&t=165
- ↑ https://www.youtube.com/watch?v=G94OTmL-dz4&feature=youtu.be&t=169
- ↑ https://www.youtube.com/watch?v=WEpvUkDy6wk&feature=youtu.be&t=148
- ↑ https://www.youtube.com/watch?v=WEpvUkDy6wk&feature=youtu.be&t=266
- ↑ https://www.youtube.com/watch?v=WEpvUkDy6wk&feature=youtu.be&t=278
- ↑ https://www.youtube.com/watch?v=WEpvUkDy6wk&feature=youtu.be&t=296
- ↑ https://www.youtube.com/watch?v=G94OTmL-dz4&feature=youtu.be&t=212
- ↑ https://www.youtube.com/watch?v=G94OTmL-dz4&feature=youtu.be&t=219
- ↑ https://www.youtube.com/watch?v=G94OTmL-dz4&feature=youtu.be&t=230
- ↑ https://www.youtube.com/watch?v=9GcIBwzroQI&feature=youtu.be&t=3
- ↑ https://www.youtube.com/watch?v=fn6_tFnaJsA&feature=youtu.be&t=44
- ↑ https://www.youtube.com/watch?v=9GcIBwzroQI&feature=youtu.be&t=6
- ↑ https://www.youtube.com/watch?v=fn6_tFnaJsA&feature=youtu.be&t=56
- ↑ https://www.youtube.com/watch?v=fn6_tFnaJsA&feature=youtu.be&t=88
- ↑ https://www.youtube.com/watch?v=9GcIBwzroQI&feature=youtu.be&t=25
- ↑ https://www.youtube.com/watch?v=fn6_tFnaJsA&feature=youtu.be&t=103
- ↑ https://www.youtube.com/watch?v=9GcIBwzroQI&feature=youtu.be&t=62
