This article was co-authored by Ryan Corrigan, LVT, VTS-EVN. Ryan Corrigan is a Licensed Veterinary Technician in California. She received her Bachelor of Science in Veterinary Technology from Purdue University in 2010. She is also a Member of the Academy of Equine Veterinary Nursing Technicians since 2011.
There are 7 references cited in this article, which can be found at the bottom of the page.
This article has been viewed 27,272 times.
An “Ehmer” sling is a binding technique used by veterinarians to stabilize a dislocated hind leg in dogs. The configuration of the wrap reduces the movement of the injured leg, preventing further injury and allowing it to heal faster. To apply an Ehmer sling correctly, flex the leg so that it’s held close to the animal’s body, then tape around the bottom portion of the leg and up over the abdomen. When properly immobilized, the injury should begin to heal within 1-2 weeks.
Steps
Positioning the Injured Leg
-
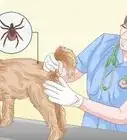
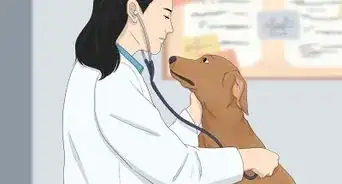
1Set the injured limb. For an Ehmer sling to be of any use, the dislocated joint must first be put back into place. You should never attempt to do this yourself. Instead, take your dog to a licensed veterinary professional where they can receive proper treatment.[1]
- Your dog will need to be anesthetized in order to relax the muscles surrounding the injury and make it easier to secure the sling.
- In most cases, an Ehmer sling will be most effective when used on dislocations that are less than 24 hours old. After that, prolonged muscle contraction may make more intensive surgeries necessary.
-
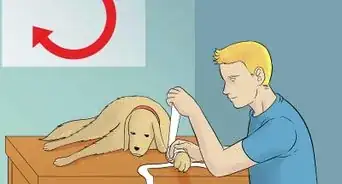
2Lay the dog on its side. Gently lower the dog into a relaxed position with its legs fully outstretched. The injured leg should be on top. While you work, support the limb with one hand to keep it from drooping. Any drastic changes in posture may make the injury worse.[2]
- Speaking to your dog in a soothing voice will help keep them calm throughout the immobilization process.
Advertisement -
3Wrap the lower part of the leg in gauze to cushion it. An additional layer will provide insulation from the tape and prevent it from sticking to the dog’s fur. Alternatively, you can trim a piece of thick cotton roll to the right proportions.[3]
- If necessary, hold the padding in place with a small strip of tape to keep it from coming undone while you’re fashioning the sling.
-
4Flex the injured leg up toward the dog’s body. Carefully bend the knee joint so that the hip is lying flat against the outer edge of the lower abdomen. The hip should be pulled slightly inward, with the knee pointing toward the center of the belly. In this position, the dog will be forced to keep its weight off the dislocated joint, giving it a chance to heal.[4]
- Manipulate the injured leg slowly. If your dog winces or cries out in pain, you may be moving too quickly or attempting to place the limb at the wrong angle. Stop immediately and reset the limb correctly before proceeding.
- A small degree of abduction, or keeping the leg tucked in close to the body, will decrease the chances of the joint drifting back out of the socket.[5]


Wrapping the Sling
-
1Anchor the tape around the backside of the injured leg. For an effective Ehmer sling, it’s best to use a strong, non-elastic roll of tape that’s porous enough to let the skin beneath the wrapping breathe. Fold the loose end of the tape around the lower leg just above the paw. Rather than encircling the entire limb, leave 2–3 inches (5.1–7.6 cm) free and press both adhesive sides of the tape together.[6]
- Be careful not to wrap the sling too tight. This could cut off your dog’s circulation, or at the very least cause discomfort.[7]
- By securing one side of the tape to the other, you can avoid wrapping the tape too tightly, which could cut off circulation to the limb or lead to sores or skin irritation.
- Make sure the tape is centered, or else it could lose its hold as you begin to wrap the sling.
-
2Guide the tape over the hip joint. Holding the injured leg in a flexed position, pull the free end of the tape up and around the crease where the thigh meets the abdomen. Then, work your way around to where you originally started to form a complete loop. The leg will now stay bent, which will help alleviate the strain on the muscles and tendons.[8]
- Repeat this taping pattern 2-3 more times to make sure the wrapping stays firmly in place.
- Make sure you're applying an even amount of pressure as you continue to wrap the tape. If some spots are wrapped tighter than others, your dog could get painful pressure sores.
-
3Redirect the tape to form an abdominal band. If you’re using a separate piece of tape, start by positioning the tape in the same spot you did the first strip. This time, you can stick the end of the tape directly to the lower layer. If you’re using the same roll, simply unravel it enough to allow you to change direction without crossing any other part of the dog’s body.[9]
- When applying a sling to a larger breed, you may need to use a second roll of tape to ensure that you’ll have enough for multiple passes.
- Without another point to support the leg band, the joint still won’t have the stability it needs to limit side-to-side movement. The leg band will therefore be responsible for keeping the knee flexed while the abdominal band braces the hip joint itself.
-
4Continue wrapping the tape around the lower abdomen. Once the lower leg is secured, bring the roll up and over the lower back and around the front to the belly. The idea is to create a sort of girdle that anchors the leg band at two different angles. Repeat this wrapping pattern as many times as needed to fortify the sling. When you’re finished, the injured leg will be fully immobilized and ready to begin healing.[10]
- To keep the sling nice and snug, pull the loose skin around the haunches taut before stretching the tape around the dog’s midsection.
- Take care not to pull the tape too tight, as this could cause discomfort or restrict breathing.
- Avoid wrapping male dogs in such a way that they have difficulty urinating.


Utilizing an Ehmer Sling Effectively
-
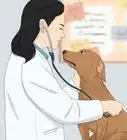
1Use an Ehmer sling to stabilize recent dislocations. "Closed reduction" methods like Ehmer slings that restrict joint movement are most effective for dealing with injuries that have just occurred. Generally, it’s best to apply the wrapping within 24 hours of the incident. After that, there may be too much inflammation in the joint for a sling to be of any use.[11]
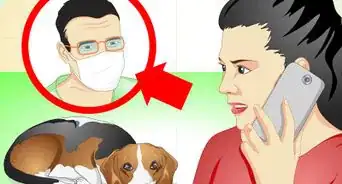
- Consult your vet before deciding that an Ehmer sling is what your dog needs. Depending on the nature of the injury, it may not be the best way to ensure recovery.
- Never wrap a joint that has been dislocated for more than about 3 days—this could end up doing more harm than good.
-
2Leave the sling in place for a minimum of 7-10 days. It may take up to two weeks before you begin to see an improvement in the injured limb. The longest you should leave an Ehmer sling in place is 14 days, after which time the joint should be strong enough to support the dog’s weight while walking short distances.[12]
- Assuming that it’s been applied correctly, the sling shouldn’t loosen up or come undone.
- Keep the wrapping as dry as possible. Otherwise, there’s a chance the adhesive may wear off prematurely.
-
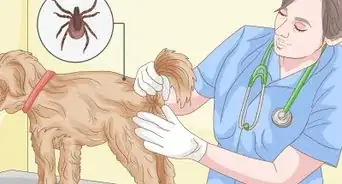
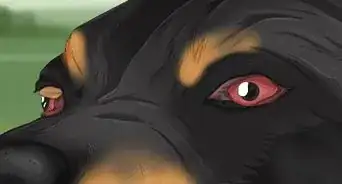
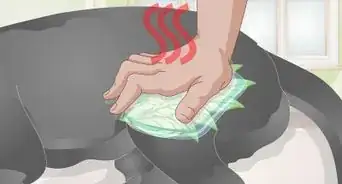
3Check periodically for sores and other complications. Examine the area around your dog’s lower leg, thigh, and abdomen for signs of swelling, skin irritation, bruising, or thinning fur. Should you happen to discover any of these issues, reposition or remove the sling right away. When left unaddressed, they have the potential to pose serious health risks.[13]
- Ask your vet what they recommend as your next best course of action.


Warnings
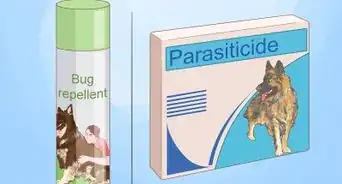
- It can be very difficult to perform closed reductions on cats, since their flexible joints are prone to repeated dislocation even when immobilized.⧼thumbs_response⧽
- Ehmer slings should not be used to treat dogs with hip dysplasia, or that have suffered hip or knee injuries in the past.⧼thumbs_response⧽
- Slings and other closed reduction treatments can be very effective for healing minor dislocations. However, if your dog has sustained a serious injury, or the dislocation is more than three days old, it may need to undergo surgery.⧼thumbs_response⧽
Things You'll Need
- Porous, nonelastic medical tape
- Vetrap or Coflex gauze
- Roll cotton


References
- ↑ http://www.marvistavet.com/hip-dislocation.pml
- ↑ https://www.cliniciansbrief.com/article/ehmer-sling-canine-orthopedic-surgery
- ↑ https://www.cliniciansbrief.com/article/ehmer-sling-canine-orthopedic-surgery
- ↑ https://www.slideshare.net/drsatyajeetsingh/bandaging-principles-and-techniques
- ↑ http://www-staro.vef.unizg.hr/org/kirurgija/wp-content/uploads/2009/11/stavljanje-povoja-u-slikama.pdf
- ↑ https://www.youtube.com/watch?v=lNwaXmekNgQ&feature=youtu.be&t=20
- ↑ https://www.cliniciansbrief.com/article/ehmer-sling-canine-orthopedic-surgery
- ↑ https://www.cliniciansbrief.com/article/ehmer-sling-canine-orthopedic-surgery
- ↑ https://www.youtube.com/watch?v=lNwaXmekNgQ&feature=youtu.be&t=45
About This Article