This article was co-authored by wikiHow Staff. Our trained team of editors and researchers validate articles for accuracy and comprehensiveness. wikiHow's Content Management Team carefully monitors the work from our editorial staff to ensure that each article is backed by trusted research and meets our high quality standards.
This article has been viewed 55,092 times.
Learn more...
Fitted hats are a wonderful and long lasting piece of fashion that is popular with both sexes. However, even the sturdiest fitted hats get dirty eventually. Knowing just how to tackle cleaning a fitted hat can help maintain its lifespan and keep it looking great for as long as you want to wear it.
Steps
Examining the Material and Stitching
-
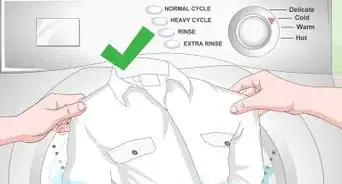
1Read the tag. The tag will supply you with many of the instructions you'll need for washing your hat, including whether or not it's washing machine safe, what temperature of water to use, what kind of cleaning solution is most effective, and how to dry your hat after washing. Look for the hat's tag on the inside; it should be in the back, near the headband. If the tag has no instructions, or you cannot find the tag at all, follow the instructions below.[1]
-
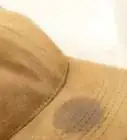
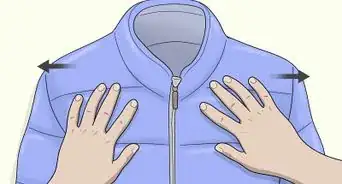
2Examine the material your hat is made from. Different materials need to be washed in different ways. Wool, for instance, cannot be washed in hot water and requires a special type of detergent. Cotton hats are more durable and can be washed normally. Knowing the material your hat is made from will help you determine the best way to wash your hat.[2]Advertisement
-
3Wash wool hats in cold water with a wool detergent. Wool is naturally more challenging to clean, thanks to its texture. Take your wool hats to the dry cleaner to ensure they're cleaned in the best and safest way.[3]
-
4Wash twill, cotton, and polyester blends with standard detergent in warm water. Cotton twill is comparable to the material the average pair of pants is made from. It is designed to be sturdy and long lasting, so you can wash it like you'd wash any other piece of clothing.[4]
-
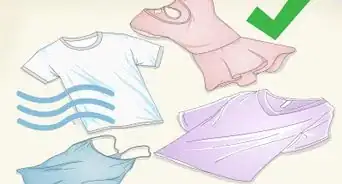
5Use normal detergent and warm water to wash jersey mesh hats. Jersey mesh hats are most commonly found on the golf field. You can identify this type of hat by the multiple pinprick holes scattered throughout the body. Jersey mesh hats maintain their color and shape easily due to their design, which is enhanced for athletic use, so wash them normally.[5]
-
6Inspect the hat's stitching for fraying or poor quality. The quality of the stitching can help you decide whether to proceed with washing your hat. If the stitching shows signs of wear or low quality (fraying or unraveling), you may be better off getting a new hat. If the stitching of your hat is otherwise intact, handle this area of your hat with extra care as you wash.[6]
-
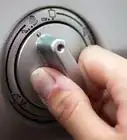
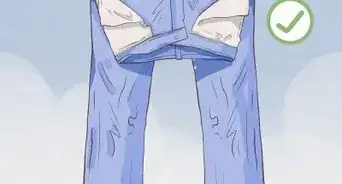
7Check what materials the headband and brim are made from. The materials of the headband and brim are important to deciding how to wash a fitted hat. Wash the hat if the brim is made from plastic. Do not proceed, however, if the hat's brim is made of cardboard; this is more likely to ruin the hat.[7]


Handwashing Your Fitted Hat
-
1Load a bucket or your sink full of lukewarm water. Hot water may cause your hat to shrink as it dries. Lukewarm water is just as effective in getting your hat clean, but does not present the possibility of shrinkage. You can also wash your hat in cold water and achieve the same cleanliness.[8]
- Make sure your bucket or sink is clean beforehand.[9]
-
2Drop a spoonful of OxiClean or laundry detergent into the water. About a teaspoon of cleaner is all you need. These 2 types of products are designed for heavy-duty cleaning and stain removal. They will be more effective at getting rid of built up grime in your hat than dish detergent or hand soap, (though these latter 2 cleaners will work if you have nothing else on hand). For best results, mix the cleaner into the water while it runs into the bucket/sink.[10]
-
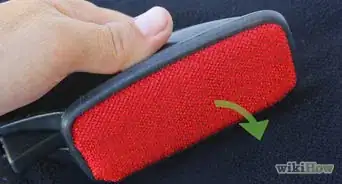
3Scrub extra dirty areas with a toothbrush loaded with detergent. This procedure is known as “spot cleaning.” Make sure the hat is wet first by dunking it into the bucket/sink. Move the toothbrush in a circular motion and focus on applying detergent directly to the stains. Scrub until the hat has thoroughly absorbed the detergent.[11]
-
4Submerge the hat in the water and gently wash it with a soft cloth. Don't scrub the hat too vigorously. The water will do most of the work. Focus on the dirtier areas of the hat, especially those that you may have missed or couldn't remove during the spot cleaning phase. Be careful around the hat's stitching as you wash.[12]


Soaking, Rinsing, and Drying Your Hat
-
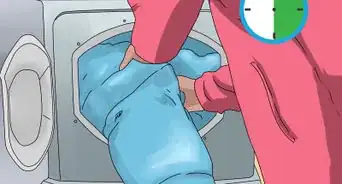
1Soak the hat in the sink for 2 hours. Check on your hat within the first hour to make sure the grime is disappearing. Repeat the spot cleaning procedure if you notice any stains that haven't subsided during the soaking process, then let it continue to soak for the remainder of those 2 hours. If you're in a rush, you can shorten your hat's soaking time to about a half hour.[13]
-
2Wash the hat off under a warm faucet. Leaving extra soap in your hat could lead to residue and stiffness, both of which will hurt the hat's quality. Rinse the hat off thoroughly under running water until all of the soap is gone.[14]
-
3Dab away any excess water with a soft towel. Extra water will make it harder for your hat to dry evenly and completely. Rub the hat dry with a soft towel, and give extra attention to the wettest areas. Dry off the hat with the towel until any dripping has subsided.[15]
-
4Place your hat on top of a round container. You can use a mannequin, container of oatmeal, or any object that is tall and round. The idea is to help your hat keep its shape as it dries so it will easily fit on your head later.[16]
- Roll a soft towel into a ball and stuff it inside your hat to help it keep its shape. This is especially useful for hats that have gone limp after washing, or if you do not have a container on hand to rest your hat on as it dries.[17]
-
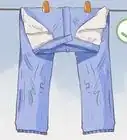
5Air dry your hat with a towel placed underneath its container. The towel will catch any dripping, since you won't be able to get rid of all drippage by toweling the hat off. It may take a few hours for your hat to dry completely.[18]
- Plug in a blow dryer and turn it on your hat on the lowest/coolest possible setting. This will hasten the drying process if you're short on time.[19]
- If you don't have a blow dryer on hand, a fan is just as effective. Plug in a pedestal fan and aim the head down at your hat. The air flow will help your hat to dry faster.[20]


Warnings
- Avoid washing your fitted hat in the dishwasher. Dishwashers are known for using hot temperatures and bleach throughout their wash cycles, both of which will harm the material of your hat.[22]⧼thumbs_response⧽
- Bleach will ruin the colors of your hat. Never use it (or any detergents containing it) to wash a fitted hat.[23]⧼thumbs_response⧽
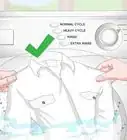
- Fitted hats and laundry machines do not mix. The natural tumbling motions could ruin the form of your hat, and the hot temperatures of the average dryer could cause shrinkage.[24]⧼thumbs_response⧽
- Take extra care when you clean on and around the hat's stitching and embroidery. This area of the hat is always more delicate. Scrubbing too hard may create wear in the stitching.[25]⧼thumbs_response⧽
Things You'll Need
- Dirty fitted hat
- Bucket or sink
- Lukewarm (or cold) water
- Detergent (such as OxiClean)
- Toothbrush
- Soft towels
- Round container
- Blow dryer (optional)
- Pedestal fan (optional)
You Might Also Like
This is a modal window.
This is a modal window.
This is a modal window.
This is a modal window.
This is a modal window.
This is a modal window.

References
- ↑ http://articles.chicagotribune.com/2013-08-06/features/sc-fam-0806-lifeskill-wash-cap-20130806_1_hat-brim-wool
- ↑ http://articles.chicagotribune.com/2013-08-06/features/sc-fam-0806-lifeskill-wash-cap-20130806_1_hat-brim-wool
- ↑ http://cleanmyspace.com/clean-your-baseball-cap/
- ↑ http://cleanmyspace.com/clean-your-baseball-cap/
- ↑ http://cleanmyspace.com/clean-your-baseball-cap/
- ↑ http://articles.chicagotribune.com/2013-08-06/features/sc-fam-0806-lifeskill-wash-cap-20130806_1_hat-brim-wool
- ↑ http://articles.chicagotribune.com/2013-08-06/features/sc-fam-0806-lifeskill-wash-cap-20130806_1_hat-brim-wool
- ↑ https://www.artofmanliness.com/2016/09/08/how-to-clean-a-baseball-cap/
- ↑ https://deadspin.com/how-to-clean-your-filthy-baseball-cap-1453998609
- ↑ https://www.artofmanliness.com/2016/09/08/how-to-clean-a-baseball-cap/
- ↑ https://www.artofmanliness.com/2016/09/08/how-to-clean-a-baseball-cap/
- ↑ http://articles.chicagotribune.com/2013-08-06/features/sc-fam-0806-lifeskill-wash-cap-20130806_1_hat-brim-wool
- ↑ https://www.artofmanliness.com/2016/09/08/how-to-clean-a-baseball-cap/
- ↑ https://www.artofmanliness.com/2016/09/08/how-to-clean-a-baseball-cap/
- ↑ https://www.artofmanliness.com/2016/09/08/how-to-clean-a-baseball-cap/
- ↑ https://www.artofmanliness.com/2016/09/08/how-to-clean-a-baseball-cap/
- ↑ https://deadspin.com/how-to-clean-your-filthy-baseball-cap-1453998609
- ↑ https://www.artofmanliness.com/2016/09/08/how-to-clean-a-baseball-cap/
- ↑ https://www.artofmanliness.com/2016/09/08/how-to-clean-a-baseball-cap/
- ↑ https://deadspin.com/how-to-clean-your-filthy-baseball-cap-1453998609
- ↑ https://www.artofmanliness.com/2016/09/08/how-to-clean-a-baseball-cap/
- ↑ https://www.artofmanliness.com/2016/09/08/how-to-clean-a-baseball-cap/
- ↑ https://www.artofmanliness.com/2016/09/08/how-to-clean-a-baseball-cap/
- ↑ https://www.artofmanliness.com/2016/09/08/how-to-clean-a-baseball-cap/
- ↑ https://www.artofmanliness.com/2016/09/08/how-to-clean-a-baseball-cap/
About This Article