This article was co-authored by LaTricia Brown. LaTricia Brown is a Master Tailor and Designer and the Owner of Trish B. Stylin' based in the Savannah, Georgia metro area. LaTricia has over a decade of experience including bridal design, men's and women's clothing design, and fashion show directing. She has a BFA in Fashion with a minor in Accessory Design from the Savannah College of Art and Design (SCAD). LaTricia has worked with W Magazine in New York City and has assisted with the personal styling of P. Diddy. She has also assisted the development of Sean John's 10-Year Anniversary Collection and appeared in the filming of Diddy's "If I Were King" Documentary.
There are 14 references cited in this article, which can be found at the bottom of the page.
This article has been viewed 29,509 times.
Backless bras, often commonly called sticky bras, are great options for when you still want a little coverage and support but don’t want any straps showing—anywhere! It can take a little time to learn how to apply the bra and position it the way you want it, but once you’ve practiced a few times, you’ll be able to do it easily and quickly. Take your time positioning the bra and smoothing it into place. If you care for your sticky bra by washing it with soap and water after each use, you should be able to reuse it for a long time!
Steps
Getting the Bra into Position
-
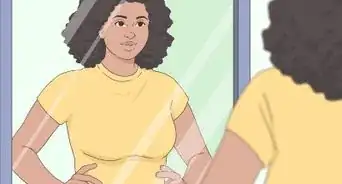
1Make sure your skin is clean, dry, and free of creams or moisturizers.[1] If you’ve just showered, you should be good to go as long as you haven’t applied any products to your skin. If not, go ahead and use a washcloth with warm water and soap to quickly clean your chest and prepare it for the sticky bra’s adhesive.[2]
- Make sure to dry off completely before applying the bra—the adhesive won’t work if your skin is wet.
-
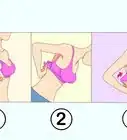
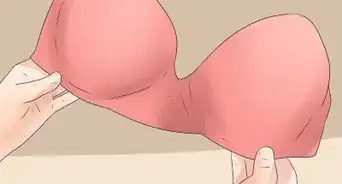
2Separate the cups for accurate placing if the bra has clasps in the front. Many sticky bras have a clasp or ties in the front, though there are also options that are made of one continuous piece of material. If yours has a clasp in the middle, go ahead and undo it so that you have two separate cups to work with—this way, you can take your time getting each one into exactly the right position.[3]
- Always check the instructions before putting on your backless bra. Each brand may have a slightly different method for making it stick the best.
- Work in front of a mirror so you can easily see what you’re doing. If you’re new to wearing a backless bra, it can feel a little weird at first when you try to put the cups on.
-
3Remove the plastic backing to expose the adhesive. Locate the edge of the clear plastic film that is protecting the bra’s adhesive from getting stuck on other things. Peel away the adhesive, but don’t throw those strips away! Put them to the side to reapply later and keep your sticky bra in good condition.[4]
- If you need to set the cups down, make sure to put them adhesive-side up.
-
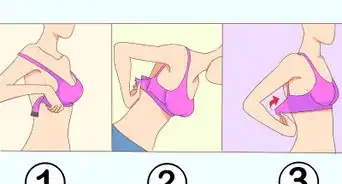
4Flip the cups inside out to apply the bra without air bubbles forming. Simply pop the cups so that the adhesive is sticking out and the front side is concave. When you go to apply the cups, it’ll be much easier to get it to lay flat and adhere completely to your skin.[5]
- If you have a two-piece bra, focus on doing on cup at a time.
- Before you move on to attaching the bra, consider placing tissue paper or pasties over your nipples if they tend to be sensitive. When you remove the bra, the sticky adhesive could be painful as it pulls on your nipples. Tissue paper or pasties will keep the adhesive from attaching and alleviate some of that sensitivity.[6]
-
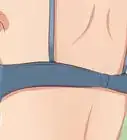
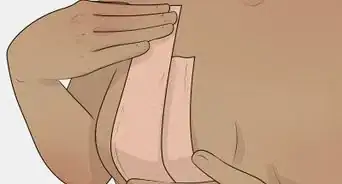
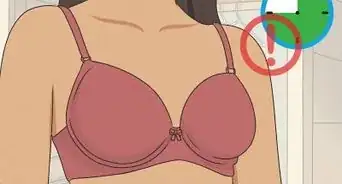
5Place the bra over your breast and smooth it upward and outward. Place the cup so that the middle is centered over your nipple. Attach the cup to your breast at the bottom-most point, and then slowly smooth the rest of the cup upwards over your breast, using your hand to push the material flat against your skin. Avoid putting the bottom of the bra under your breast—you may be tempted to replicate the look and feel of a traditional bra, but most sticky bras need to be set up differently to provide adequate protection.[7]
- If your bra has sticky side panels that extend underneath your arms, get the cup into place first and then smooth down the side panel so it’s flush against your skin.
- If your bra has detached cups, keep in mind that the further away the cups are from one another, the greater cleavage you’ll have once the clasps are connected.
- If you’re having trouble with the placement, just take a deep breath, peel off the cup, and try again! It won’t hurt anything to reapply the cup several times until you get it where you want it.
-
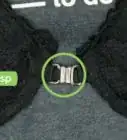
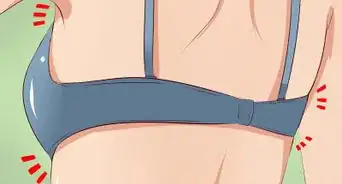
6Connect the front clasp or ties if your bra has that function. Gently pull the clasps toward each other and secure them into place. Many brands have clasps that simply hook into each other to provide the most security. If there are ties or a corset-type situation, you’ll need to pull the ties as tight as you want them and secure the ends with a knot.[8]
- Some backless bras come with ties so you can make adjustments to the size of your cleavage. A looser tie means less cleavage, and a tighter tie means more cleavage.[9]


Removing and Caring for Your Sticky Bra
-
1Undo the front clasp of the bra if yours can be separated. Instead of peeling the bra off in one fell swoop, go ahead and undo the clasp or ties in the front. This will give you a little more flexibility to remove each cup slowly and intentionally, which will be more comfortable and cause less skin irritation.[10]
- As tempting as it might be to just take the bra off quickly, taking your time and doing it properly will help keep your bra in good shape for longer.
-
2Grasp the topmost edge of the bra and peel it down off your breast. As you peel off the cup, pull the bra straight down rather than outwards away from your skin. Keeping the adhesive and the cup as close to your skin as possible will minimize the amount of discomfort you might feel.[11]
- If your bra has sticky side panels, start peeling the bra off from that point. Once the panel is up and you’ve reached the cup, go ahead and return to the topmost edge to peel it off your breast.
- If your bra is in two pieces, peel away each cup, one at a time, starting from the top outer edge.
- If you were to pull outwards, your skin would also stretch outwards as it detaches from the cup, which could cause unnecessary irritation.
-
3Take your time when removing the bra so you don’t irritate your skin. Move slowly and avoid pulling the cups off quickly. Quick movements could hurt your breasts or even rip the cup, depending on how thin the material is.[12]
- Even if you take your time, it still isn’t going to take long at all to get your sticky bra off. One to two minutes should be all you need.
-
4Wash your sticky bra by hand with mild soap and water. Try to wash your bra after each use, as this will help keep the adhesive sticky and in great shape. Simply wet the cups in the sink, add a few drops of gentle soap, and massage the adhesive to clear away any skin cells and oils that got left behind. Once you’re done, rinse away all the soap.[13]
- If you have long nails, make sure to use the pads of your fingers to clean the cups. Your nails could potentially scratch and ruin the adhesive.
-
5Let your bra air dry completely before putting it away. Don’t use towels or a blow dryer on your backless bra, and never put it into the dryer. The fibers from a towel would stick to the adhesive and ruin it, and heat would warp it. Simply set it on your counter overnight, adhesive-side up.[14]
- It’s okay to set the cups on a towel, just as long as the towel isn’t going to come into contact with the adhesive.
-
6Replace the adhesive sticky sheet and put the bra away. Once the cups have completely dried, go ahead and reapply the clear plastic you removed when getting ready to put the bra on. If you have the original box that the cups came in, slip the bra back inside of it to keep it from getting misshapen. If you no longer have the box, put the bra somewhere it won’t get smashed underneath other pieces of clothing, or use a small box to create a safe spot for your delicate backless bra.[15]
- If you threw away the plastic pieces, never fear! Use cling wrap or something similar to cover the adhesive. As long as it’s protected by something that can easily peel away, it should be fine.


Expert Q&A
-
QuestionHow do I make my boobs sticky?
 LaTricia BrownLaTricia Brown is a Master Tailor and Designer and the Owner of Trish B. Stylin' based in the Savannah, Georgia metro area. LaTricia has over a decade of experience including bridal design, men's and women's clothing design, and fashion show directing. She has a BFA in Fashion with a minor in Accessory Design from the Savannah College of Art and Design (SCAD). LaTricia has worked with W Magazine in New York City and has assisted with the personal styling of P. Diddy. She has also assisted the development of Sean John's 10-Year Anniversary Collection and appeared in the filming of Diddy's "If I Were King" Documentary.
Master Tailor & Creative DirectorYou must cleanse your skin and apply an alcohol based cleanser or facial adstringent to ensure oils are removed. Then, place the bra on the skin and hold it in place for at least 30 seconds. -
QuestionWhat can I use if I don't have a backless bra?LaTricia BrownLaTricia Brown is a Master Tailor and Designer and the Owner of Trish B. Stylin' based in the Savannah, Georgia metro area. LaTricia has over a decade of experience including bridal design, men's and women's clothing design, and fashion show directing. She has a BFA in Fashion with a minor in Accessory Design from the Savannah College of Art and Design (SCAD). LaTricia has worked with W Magazine in New York City and has assisted with the personal styling of P. Diddy. She has also assisted the development of Sean John's 10-Year Anniversary Collection and appeared in the filming of Diddy's "If I Were King" Documentary.
Master Tailor & Creative DirectorIn this case, you may consider contacting a seamstress to sew cups into your dress as another option.


References
- ↑ LaTricia Brown. Master Tailor & Creative Director. Expert Interview. 24 January 2022.
- ↑ https://youtu.be/tSu9sxkyqHE?t=24
- ↑ https://youtu.be/Ar9IK8od-hw?t=35
- ↑ https://youtu.be/Ar9IK8od-hw?t=37
- ↑ https://youtu.be/Ar9IK8od-hw?t=45
- ↑ https://www.cosmopolitan.com/style-beauty/fashion/reviews/a54147/sticky-bra-reviews/
- ↑ https://youtu.be/tSu9sxkyqHE?t=82
- ↑ https://youtu.be/Ar9IK8od-hw?t=56
- ↑ https://www.cosmopolitan.com/style-beauty/fashion/advice/a18488/7-non-bras-for-difficult-dresses/
About This Article