This article was co-authored by wikiHow Staff. Our trained team of editors and researchers validate articles for accuracy and comprehensiveness. wikiHow's Content Management Team carefully monitors the work from our editorial staff to ensure that each article is backed by trusted research and meets our high quality standards.
This article has been viewed 173,652 times.
Learn more...
Cap-and-gown graduation ceremonies are a tradition that go back to the Middle Ages. Even though times (and styles) have changed considerably since then, it’s still important to cut a handsome image when you’re walking across the stage. Donning a graduation cap may seem simple, but there’s a right and a wrong way to do it that may vary depending on your school, field of study or graduate level. No matter what sort of cap you’re wearing, you’ll want to make sure that it fits properly and is lined up in all the right places, and that you keep it in pristine condition until it’s time to receive your diploma.
Things You Should Know
- After placing your cap so the point faces forward, hang your tassel on the right before your ceremony and the left after your ceremony.
- For great style, get a cap that's the right size, fix your hair so it fits under your cap, and decorate with accessories or a quote.
- Store your cap in a box while it's not being used and be sure to brush out its tassels before use.
Steps
Putting on the Cap
-
1Arrange the cap so that the point is in front. The mortarboard (the square piece on the crown of the cap) is meant to be worn offset in a diamond shape. The front and back of the cap will usually be indicated by the design of the headpiece—look for the slight taper in the forehead area and the elastic band in the rear.
- Situate the cap so that the front corner of the mortarboard is centered on your forehead.[1]
- If you’re still not sure which way it goes, take a look inside the brim. The manufacturer often includes basic directions for how to wear the cap properly.
-
2Make sure the cap sits evenly. Once the cap is on your head, the mortarboard should be flat and level with the ground. If it’s not, you may need to tilt it slightly to straighten it out. Double check that the band of the headpiece is symmetrical and comes to a stop about an inch above your eyebrows.[2]
- Don’t push the cap too far forward or back on your head or let it lean to one side.
- To test whether your cap is level, try placing a lightweight object on top and see if it stays in place.
Advertisement -
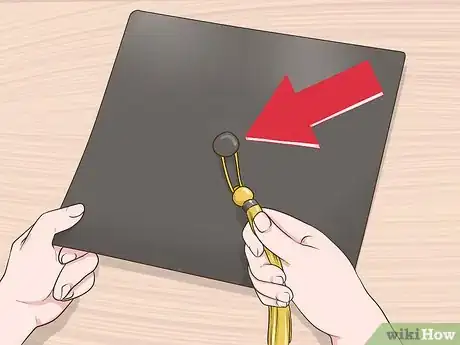
3Attach the tassel. If the cap doesn’t have a fixed tassel, or it doesn’t arrive preassembled, you’ll need to put it on yourself. To do this, simply loop the circular end of the tassel over the raised button in the center of the mortarboard. It should be able to slide freely around the button without coming loose.
- Give the tassel a couple gentle tugs to make sure it’s secure.
-
4Position the tassel correctly. At the beginning of the ceremony, the tassel should fall on the right side of the cap (unless otherwise specified). Once everyone in the class has been announced, you and your fellow grads will flip it around to the left side, signifying your transition from student to graduate.
- Some schools and programs may do things a little differently. Be sure that you’re clear about your school’s established practices prior to the big day.
- Keep the tassel out of your line of sight and resist the urge to mess with it as much as possible.
-
5Leave your cap on for the duration of the ceremony. Once you've got your cap and gown on, try not to fidget with them too much. They may not be the most comfortable, but you'll only have to wear them for a couple of hours. When it comes time to remove your cap, do it in style—new graduates traditionally toss their caps into the air as a celebratory gesture when the ceremony draws to a close.
- Resist the urge to remove your cap for any reason once the ceremony is underway, unless it's for the singing of the National Anthem.[3]
- You can hold onto your cap if you'd rather be wearing it when it comes time to take pictures. In fact, this will definitely be a good idea if your regalia is rented!
Looking Your Best
-
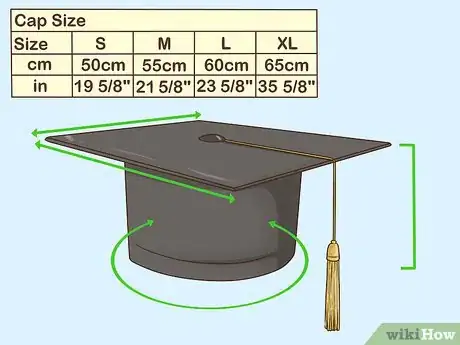
1Order your cap and gown in the right size. Use the size measurements provided by the supplier to ensure that your graduation regalia will fit the way it’s supposed to. The cap itself should be snug, but not too tight. If it keeps slipping out of place, it’s most likely too big, whereas if it’s cutting off your circulation you might benefit from going up a size.[4]
- Get a more accurate estimate by measuring your crown with a tape measure and comparing that measurement to the available sizing options.[5]
- Return poorly-fitting caps and gowns right away to give yourself plenty of time to have them exchanged for the correct size.
-
2Give the cap a trial run. It’s a good idea to try your cap and gown on a time or two before the actual ceremony so you can get an idea of how the completed ensemble will look together. This will also give you a chance to make any necessary last minute adjustments.
- The more times you wear the cap, the more comfortable you’ll feel once it’s time to take to the stage.
-
3Style your hair to fit under the cap. Most guys and ladies with shorter hair will be able to get away with minimal styling. Those with longer locks can experiment with ponytails, braids or straightened looks that draw the eye to the neck and shoulders. The key is to keep the hair smoothed away from the crown to give the cap the space it needs to rest comfortably.
- If you’d prefer to show off a more elegant style, try curling the ends or tucking it up so that it’s just visible beneath the cap.
- It’s typically wise to avoid up-dos and styles with too much volume.
-
4Save the cap for last. Wait until you’re wearing your gown, stole and any other components to put on the cap. That way, you can focus your attention on fixing your hair and makeup without worrying about messing them up later. The cap should be the final addition to your graduation regalia.[6]
- Some gowns and hoods are designed to be slipped over your head, which can be tricky if you’ve already got your cap on.
-
5Decorate your cap. Some schools may allow you to add small embellishments to your graduation cap to express your personality and help you stand out from the crowd. Tack on a few buttons or a pendant for a modest injection of personality, or break out the paint pens, glitter and fabric letters to really make a statement. This is an important day in your life, so it's important that you enjoy yourself while you're receiving your honors.[7]
- Use paint, fabric and other accessories in your school's colors.
- Spell out a special message or quote related to graduation. Even if your classmates can't see it, the audience will.[8]
- Be sure to run your decorating ideas by the principal or dean before you making any drastic modifications to your regalia.
Keeping Your Cap in Good Condition
-
1Put the cap away until you need it. The best way to protect your graduation cap from damage is to not take it out any more often than you have to. Stash the cap in the box it was packaged in when it’s not in use and set it on the top shelf of a closet where it won’t get crushed or bent. This will keep it from being exposed to dust, sunlight and moisture, as well as other potential dangers like pets or small children.
- Handle the mortarboard carefully. Always grip it lightly by the edges whenever you’re picking it up or setting it down.
- As soon as you receive your cap and gown, place them on a hanger to work out the wrinkles.
-
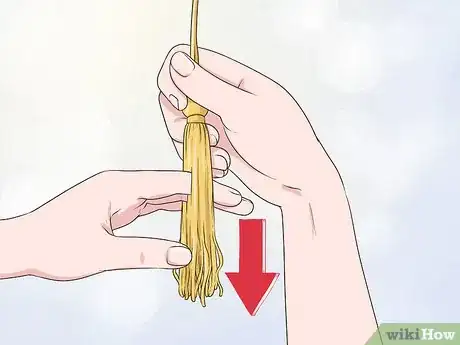
2Brush out the tassel. As your cap gets moved around, the strands of the tassel may get hung up on one another. Run your fingers through the strands before putting on the cap to separate them and keep them looking neat and orderly.
- This should be done just before you put the cap on so you can walk down the aisle confident and tangle-free.
-
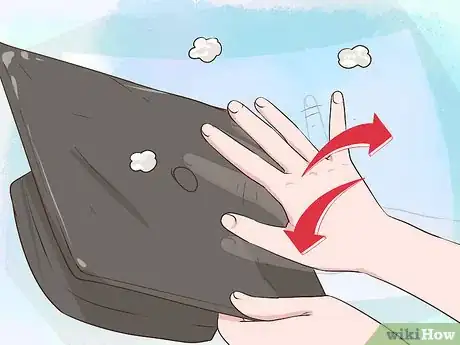
3Keep your cap spotless. There will probably be no need to clean your cap prior to graduation, but if for some reason you must, do it with a gentle steaming or ironing. Never put the cap through the washing machine, have it dry cleaned or allow it to get wet, as this can easily ruin the fabric or cause it to lose its shape.[9]
- Brush loose dust and dirt from your cap and gown by hand rather than using an implement that may damage the material.
- Don’t leave your cap sitting out where it may get something spilled on it.
Community Q&A
-
QuestionWhat if you have a big head?
 Otterly BadgerificTop AnswererRequest a larger size of graduation cap; try it on before hiring or purchasing, so that you can be absolutely certain it's a good fit.
Warnings
- Find a better place to keep your graduation regalia than in your car, locker or luggage.⧼thumbs_response⧽
- Avoid ironing caps or gowns made from synthetic materials like polyester or rayon. Intense heat can cause them to melt.⧼thumbs_response⧽
- Some schools won’t let you decorate your cap; ask your principal or dean if you are allowed to decorate your cap.⧼thumbs_response⧽
References
- ↑ https://www.youtube.com/watch?v=QkHvztPu6PE
- ↑ https://oakhalli.com/Graduation-Cap-and-Gown-Etiquette.html
- ↑ https://oakhalli.com/Graduation-Cap-and-Gown-Etiquette.html
- ↑ http://www.jostens.com/apps/shop/help/college_regalia/CRG_measuregown.asp
- ↑ https://www.bullard.com/hat-sizing-and-how-to-measure-your-head
- ↑ https://www.youtube.com/watch?v=QkHvztPu6PE
- ↑ http://hative.com/awesome-graduation-cap-decoration-ideas/
- ↑ http://mashable.com/2014/05/21/creative-graduation-caps/
- ↑ https://www.youtube.com/watch?v=QkHvztPu6PE
About This Article
To wear a graduation cap, arrange it so that the tapered part is on your forehead and the elastic band is in the back near the nape of your neck. Once on, the square piece on the crown of the cap should make a diamond shape on your head, with points over your ears, neck, and forehead. Additionally, at the beginning of the ceremony, the tassel should fall on the right side of the cap, and once everyone in the class has been announced, you and your fellow graduates can flip the tassel to the left side, signifying your graduation. To learn how to style your hair to fit under the cap, keep reading!


