X
wikiHow is a “wiki,” similar to Wikipedia, which means that many of our articles are co-written by multiple authors. To create this article, 11 people, some anonymous, worked to edit and improve it over time.
This article has been viewed 263,500 times.
Learn more...
Steps
-
1Cut strips of fabric 1–3 inches (2.5–7.6 cm) wide and remove seams. The length only matters for how often you want to be taking the time to join new strips.
-
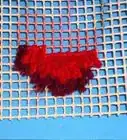
2Tie two strips in a simple loose knot. You'll be trying to shove fabric through this later, so if you make it too tight, you might get aggravated. Also, notice that the pieces in the picture are uneven. At the end of every strand, you'll have to join a new one, and it looks better if that's staggered.Advertisement
-
3If you want stripes in your rug, arrange your strips so that they alternate A,B,A,B when you lay them flat. Then take the one on the right side and go under, over, under.
-
4Continue taking each right-hand strand and going under, over, under. Notice that it's not a tight braid. It's just snug enough to lay flat and hold its shape.
-
5When you get a braid about half the length of the rug you want, it's time to turn. Go under, over, under with that strip on the right (a gray one in this picture) and then turn the entire braid to the right so you can tuck the strip in the edge of the original braid.
Depending on your material, your rug may not want to lie flat if you turn it too quickly, so you may not get to tuck every strand into the original braid. Sometimes you might have to skip tucking a couple so you can turn the corner smoothly. -
6Work your way back down to the starting knot following the exact same pattern as you used to make the original braid, just tucking the end through each time. (If you want the stripes, tuck it in its own color as you come around and down.)
-
7Once you get back down to the original knot, and work your way around the curve, skipping and tucking as necessary to lay flat, it's time to add a strip! To maintain the stripes, join one of each color together and stick it through the starting knot in a way that keeps the pattern. Then continue braiding the same way you have been all along, but now it's under, over, under, over, under-->TUCK!
-
8Braid all of the way down to the end and back up the other side to the original knot. Add another strip where ever you can sneak it in to make eight strips.
-
9Pick up that right-hand gray one, and go under, over, under, over, under, over, under, over, under-->TUCK!
-
10Every time you work yourself back to the beginning knot, add another set of strips until you get the size rug you're looking for.
-
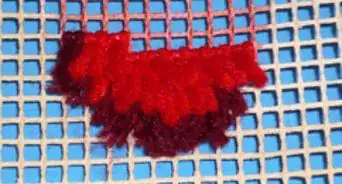
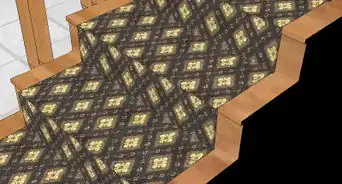
11Once the rug is the width you want it across the middle, it's time to work yourself back down to 8 strips, then 6, 4, 2, and finally none in a way that doesn't throw off your overall shape. As shown in the picture, go under, over, under, over, under-->TUCK-->TUCK AGAIN under two more blues horizontally--->snip off the excess. Continue until you run out of strands.


Advertisement
Method 1
Method 1 of 1:
Joining Strips


Community Q&A
-
QuestionDo you have a video of the above technique where you are braiding the rug together instead of sewing it together?
 Community AnswerI don't think that there is one for this specific tutorial, but there are many others on YouTube that you could watch.
 -
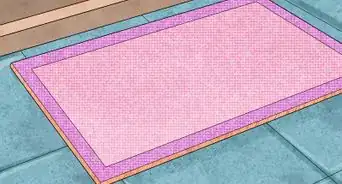
QuestionWhat type of fabric do we need?
 Lush AmbienceCommunity AnswerOne possibility is to use brushed cotton. It is the softest cotton to work with. However, all forms of cotton work beautifully to create a slightly distressed look.
Advertisement


-Step-19.webp)


References
- LittleHouseInTheSuburbs.com - Original source of content and images, shared with permission.
About This Article
Advertisement