Battle of Hohenlinden
The Battle of Hohenlinden was fought on 3 December 1800[7] during the French Revolutionary Wars. A French army under Jean Victor Marie Moreau won a decisive victory over an Austrian and Bavarian force led by 18-year-old Archduke John of Austria. The allies were forced into a disastrous retreat that compelled them to request an armistice, effectively ending the War of the Second Coalition. Hohenlinden is 33 km east of Munich in modern Germany.
| Battle of Hohenlinden | |||||||
|---|---|---|---|---|---|---|---|
| Part of the War of the Second Coalition | |||||||
 Moreau at Hohenlinden (Galerie des Batailles, Palace of Versailles) | |||||||
| |||||||
| Belligerents | |||||||
|
|
| ||||||
| Commanders and leaders | |||||||
|
|
| ||||||
| Strength | |||||||
|
Total: 53,595 41,990 infantry 11,805 cavalry 99 guns[3] |
Total: 60,261 46,130 infantry 14,131 cavalry 214 guns[4] | ||||||
| Casualties and losses | |||||||
|
2,500-3,000[5] dead or wounded 1 gun |
Total: 13,550-15,500[6] 4,600-5,500[6] dead or wounded 8,950-10,000[6] captured 76 guns | ||||||
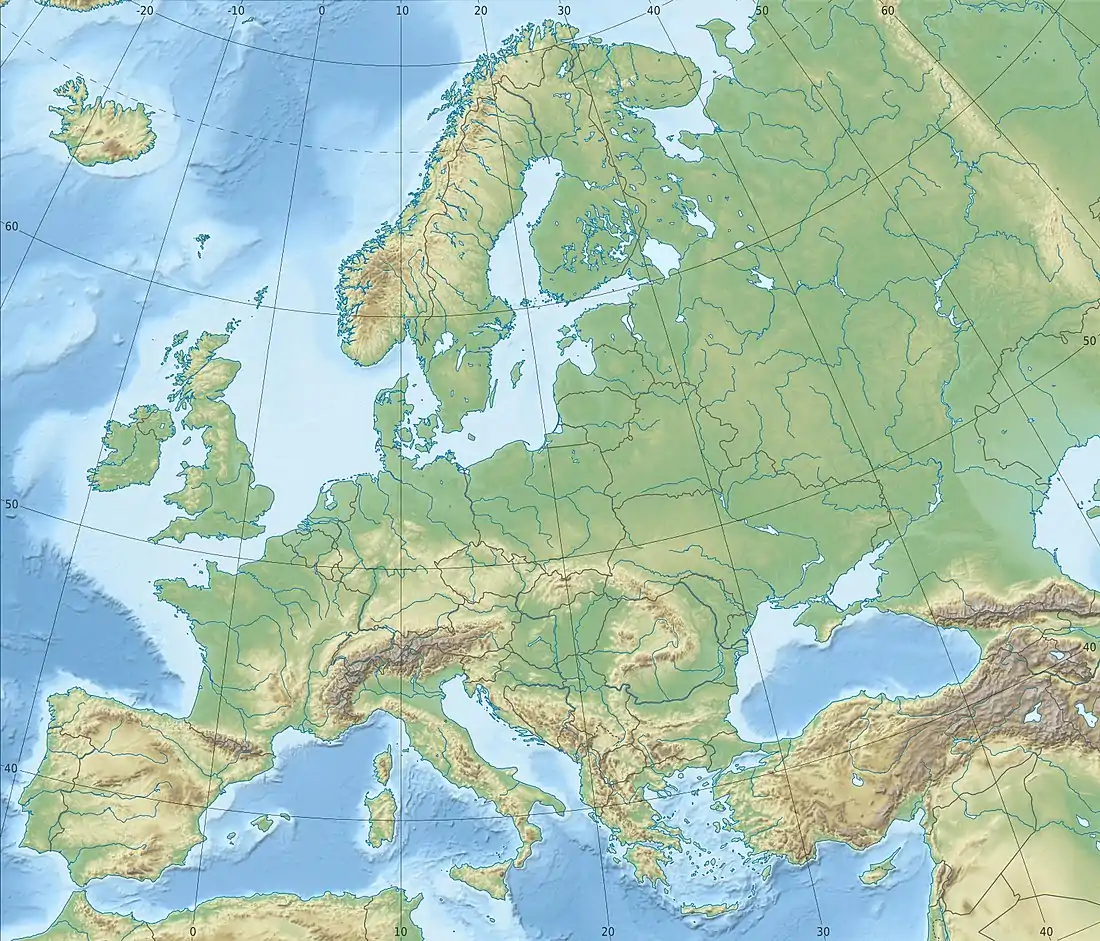 Location within Europe | |||||||
General of Division Moreau's 56,000-strong army engaged some 64,000 Austrians and Bavarians. The Austrians, believing they were pursuing a beaten enemy, moved through heavily wooded terrain in four disconnected columns. Moreau ambushed the Austrians as they emerged from the Ebersberg forest while launching Antoine Richepanse's division in a surprise envelopment of the Austrian left flank. Displaying superb individual initiative, Moreau's generals managed to encircle and smash the largest Austrian column.
This crushing victory, coupled with the narrow French victory at the Battle of Marengo on 14 June 1800, ended the War of the Second Coalition. In February 1801, the Austrians signed the Treaty of Lunéville,[7] accepting French control up to the Rhine and the French puppet republics in Italy and the Netherlands. The subsequent Treaty of Amiens between France and Britain began the longest break in the wars of the Napoleonic period.
Background
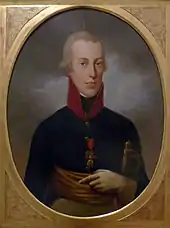
From April to July 1800, Moreau's army drove the Austrian army of Feldzeugmeister Pál Kray from the Rhine River to the Inn River with victories at Stockach, Messkirch, and Höchstädt. On 15 July, the combatants agreed to an armistice. Realizing that Kray was no longer up to the task, Emperor Francis II removed him from command.[8] The Austrian chancellor Johann Amadeus von Thugut first offered Archduke Ferdinand Karl Joseph of Austria-Este and Archduke Joseph, Palatine of Hungary command of the army but both declined.[9] Because his brother, the capable Feldmarschall Archduke Charles, Duke of Teschen, also refused the command, the emperor appointed another brother, the 18-year-old Archduke John. Clearly, the inexperienced youth could not cope with this enormous responsibility, so the emperor nominated Franz von Lauer as John's second-in-command and promoted him to Feldzeugmeister. John was directed to follow Lauer's instructions.[8] To further complicate the clumsy command structure, the aggressive Oberst (Colonel) Franz von Weyrother was named John's chief of staff.[10]
The armistice was renewed in September but lapsed on 12 November. By this time, Weyrother had convinced John and Lauer to adopt an offensive posture. Weyrother's plan called for crushing the French left wing near Landshut and lunging south to cut Moreau's communications west of Munich. After a few days of marching, it became obvious that the Austrian army was too slow to execute such an ambitious plan. So Lauer convinced the archduke to convert the enterprise into a direct attack on Munich. Even so, the sudden advance caught Moreau's somewhat scattered French forces by surprise and achieved local superiority.[10]
In the Battle of Ampfing on 1 December, the Austrians drove back part of General of Division Paul Grenier's Left Wing. The defeated French managed to inflict 3,000 casualties on the Austrians while only suffering 1,700 losses. Yet, when the Austrian leaders found that Grenier evacuated Haag in Oberbayern the next day, they became ecstatic. Archduke John and Weyrother overrode Lauer's cautious counsel and launched an all-out pursuit of an enemy they believed to be fleeing.[11] However, Moreau decided to stand and fight, deploying his army in open ground near Hohenlinden. To approach his position, the Austro-Bavarians had to advance directly west through heavily wooded terrain.[12]
Plans
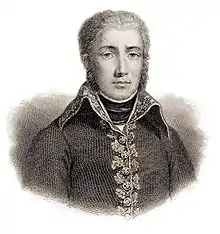
Moreau's main defensive position consisted of four divisions facing east. From north to south, these were commanded by General of Division Claude Legrand (7,900), General of Brigade Louis Bastoul (6,300), General of Division Michel Ney (9,600) and General of Division Emmanuel Grouchy (8,600). The divisions of Legrand, Bastoul and Ney belonged to Grenier's corps. Moreau held 1,700 heavy cavalry under General of Division Jean-Joseph Ange d'Hautpoul in reserve. Off to the south near Ebersberg were two more divisions, under Generals of Division Antoine Richepanse (10,700) and Charles Decaen (10,100). The divisions of d'Hautpoul, Richepanse, Decaen, and Grouchy formed Moreau's Reserve Corps. Moreau planned to have Richepanse march northeast to strike the Austrian left, or southern flank. His main line would maneuver in open terrain and counterattack the Austrians as they emerged from the woods. Decaen would support Richepanse.[13]
According to the battle plan drawn up by Weyrother, the Austrians advanced west in four corps. From north to south they were Feldmarschall-Leutnant Michael von Kienmayer's Right Column (16,000), Feldmarschall-Leutnant Louis-Willibrord-Antoine Baillet de Latour's Right Center Column (10,800),[14][15] Feldzeugmeister Johann Kollowrat's Left Center Column (20,000), and Feldmarschall-Leutnant Johann Sigismund Riesch's Left Column (13,300). The three southern columns marched near the main road from Haag to Hohenlinden. Meanwhile, Kienmayer followed the Isen River valley from Dorfen west to Lengdorf, then south to Isen, before approaching the Hohenlinden plain from the east.[16] Archduke John rode with Kollowrat's force, which used the main east–west highway. Latour used trails just to the north of the highway, while Riesch followed tracks just to the south. Due to the densely forested terrain, bad roads, and poor staff work, the Austrian columns were not mutually supporting. Their commanders mistakenly thought the French were in retreat and were rushing to catch their enemies before they could escape.[12]
Battle
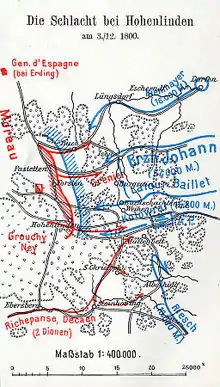
Kollowrat and Grouchy's fight
All Austrian columns started at dawn. Marching on the all-weather highway, Kollowrat's column made good time despite heavy snow. At 7:00 am, his advance guard under General-Major Franz Löpper collided with Colonel Pierre-Louis Binet de Marcognet's 108th Line Infantry Demi-Brigade of Grouchy's division. Defending deep in the forest, the 108th held their ground at first. However, General-Major Lelio Spannochi sent a grenadier battalion in a flank attack and drove the French back. Kollowrat committed General-Major Bernhard Erasmus von Deroy's Bavarian brigade and a second grenadier battalion to keep the attack rolling.[17]
As the Austrians burst from the tree line, Grouchy led a powerful infantry and cavalry counterattack. Kollowrat's troops reeled back as the 11th Chasseurs à cheval Regiment broke a square of grenadiers and the 4th Hussar Regiment overran an artillery battery. Both Spannochi and the wounded Marcognet became prisoners. Having lost five cannon, Kollowrat decided to suspend his drive until Latour and Riesch came up on his flanks. Anxious about his open left flank, he sent two grenadier battalions back in search of Riesch's column.[18]
Attack on Grenier's wing
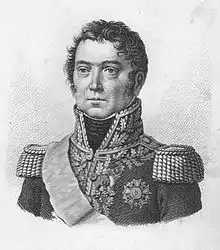
To the north, Kienmayer flushed French outposts from Isen. These executed a planned withdrawal westward to Grenier's main line of defense. Feldmarschall-Leutnant Prince Karl of Schwarzenberg, who led Kienmayer's left division, pushed southwest to crash into the divisions of Bastoul and Ney. An Austrian force captured the town of Forstern, but Moreau committed d'Hautpoul's reserve cavalry to help drive them out. A back and forth struggle began over the hamlets of Tading, Wetting, Kreiling, and Kronacker, which run in a north to south line. The Austrian Murray Infantry Regiment Nr. 55 distinguished itself in the fighting for Kronacker, which lies only 1.3 km north of Hohenlinden. On the far north flank, Feldmarschall-Leutnant Archduke Ferdinand's division began coming into action against Legrand near the town of Harthofen.[19]
Latour, moving along muddy forest trails amid snow and sleet squalls, fell badly behind schedule. At 10:00 am, his column was still well to the rear of Kollowrat's corps. By this time, the gunfire from Kienmayer's and Kollowrat's combats could be clearly heard to the front. Even more disturbing were sounds of battle from the south. Latour made the extraordinary decision to divide the divisions of Feldmarschall-Leutnants Prince Friedrich of Hessen-Homburg and Friedrich Hohenlohe-Ingelfingen into small task forces. He sent one infantry battalion and six cavalry squadrons to the north to look for Kienmayer. One battalion and four squadrons marched south to find Kollowrat. After advancing the bulk of his column to the village of Mittbach, Latour sent two battalions and two squadrons to assist Schwarzenberg's attack and three battalions and an artillery battery to help Kollowrat. This left him with only three battalions and six squadrons.[20]
Richepanse's envelopment
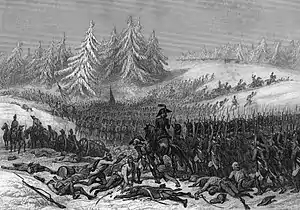
Like Latour, Riesch's troops had to contend with terrible roads and snow squalls. They fell far behind Kollowrat, reaching Albaching only at 9:30 am. Consequently, Richepanse's division passed in front of Riesch. Near the village of St. Christoph, the two Austrian grenadier battalions sent by Kollowrat stumbled upon Richepanse's marching column, cutting his division in half. With single-minded determination, the Frenchman left his rear brigade under General of Brigade Jean-Baptiste Drouet to fight it out and drove to the north with his leading brigade.[21]
With the 8th Line Demi-Brigade and 1st Chasseurs à Cheval leading, Richepanse seized the village of Maitenbeth and advanced to the main highway. There he confronted elements of Feldmarschall-Leutnant Prince Johann of Liechtenstein's cavalry division. Leaving his two advance units to bear the brunt of General-major Christian Wolfskeel's cuirassier charges, Richepanse wheeled the 48th Line Demi-Brigade west onto the highway. Aware that this route took him directly into Kollowrat's rear area, he formed the demi-brigade's three battalions side by side with skirmishers protecting the flanks. Hearing firing to the east, Weyrother gathered up three Bavarian battalions from Kollowrat's column and sent them to investigate. These units moved to the southeast and became embroiled in the fight with Drouet. Two more Bavarian battalions under General-major Karl Philipp von Wrede now appeared and blocked Richepanse's path. After a brief fight, the 48th Line overwhelmed Wrede's men and Weyrother fell wounded.[22]
Riesch's patrols told him that two French divisions were in the area. Instead of pushing into the combat raging to his front, he cautiously decided to wait for his stragglers to arrive at Albaching. He then fell into the same error as Latour. Dividing his two powerful divisions under Feldmarschall-Leutnant Ignaz Gyulai and Feldmarschall-Leutnant Maximilian, Count of Merveldt into five small columns, he sent each forward on a separate forest trail. Riesch held back three battalions and most of his cavalry as a reserve.[23]
Crisis
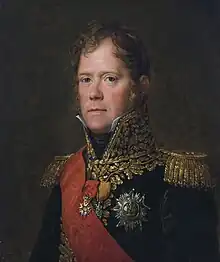
At 11:00 am, Decaen came up in support of Drouet's brigade near the southern edge of the battlefield. The situation was very fluid, with units blundering into each other in a heavy snowfall. The fresh infusion of French troops finally broke through the opposition. Drouet led his troops north to the highway, where the 8th Line still battled Liechtenstein's cavalry. Spearheaded by the Polish Danube Legion, Decaen turned east to grapple with Riesch. Decaen's men overcame Riesch's small columns one by one and pushed them back to the heights of Albaching.[24] The Austrian managed to hold onto his hilltop position and capture 500 French soldiers while suffering 900 casualties.[25]
Sensing victory, Moreau ordered Grenier's divisions and Grouchy to attack around noon. Undeterred by Latour's weak pressure on his front, Ney swung to his right and began pounding Kollowrat's troops. Pressing his attack, he overran their positions, capturing 1,000 soldiers and ten cannon. Grouchy also returned to the offensive. Hemmed in on three sides by Ney, Grouchy and Richepanse, Kollowrat's column finally disintegrated in a disorderly rout.[24] Archduke John escaped capture on a fast horse, but many of his men were not so lucky and thousands of demoralized Austrians and Bavarians surrendered. In addition, over 60 artillery pieces fell into French hands.[26]
Latour learned of the left center column's fate when its fugitives flooded the nearby woods. Abandoning his position, he retreated to Isen, leaving Kienmayer to fend for himself. When Kienmayer got news of Kollowrat's destruction, he ordered his division commanders to fall back. After a brief fight against Legrand on the north flank, Archduke Ferdinand pulled back with General-major Karl von Vincent's dragoon brigade covering his withdrawal. Legrand reported fewer than 300 casualties while rounding up 500 prisoners and three guns. Thanks to Schwarzenberg's able combat leadership, his division escaped a very tight spot. At one point, a French officer came forward under a flag of truce to demand his surrender, but the Austrian successfully disengaged his command and brought them to safety that evening without the loss of a single cannon.[27]
Aftermath
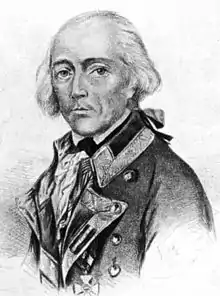
The Austrians reported losses of 798 killed, 3,687 wounded, and 7,195 prisoners, with 50 cannons and 85 artillery caissons captured. Bavarian casualties numbered only 24 killed and 90 wounded, but their losses also included 1,754 prisoners, 26 artillery pieces, and 36 caissons. In round numbers, this amounts to 4,600 killed and wounded, plus 8,950 soldiers and 76 guns captured. The French admitted casualties of 1,839 soldiers, one cannon, and two caissons. Since several units failed to turn in reports, Moreau's army probably lost at least 3,000 men. Bastoul was mortally wounded.[28]
After the disaster, the Austrian high command found its scapegoat in Lauer who was summarily retired. Archduke John heaped blame on Riesch for being slow, but also considered Latour and Kienmayer at fault. Weyrother escaped censure and in 1805 his plan at the Battle of Austerlitz contributed to that disaster. Bavarian Lieutenant General Christian Zweibrücken blamed Austrian ignorance and ineptitude. Apart from Schwarzenberg, the Austrian commanders showed little initiative. Meanwhile, Moreau's division commanders performed well, particularly Richepanse.[29]
Archduke John ordered his demoralized army into a retreat. Moreau pursued slowly until 8 December. Then, in 15 days, his forces advanced 300 km and captured 20,000 Austrians.[30] General of Division Claude Lecourbe's Right Wing brushed aside Riesch at Rosenheim on 9 December. At Salzburg on 14 December, the archduke held off Lecourbe in a successful rearguard action.[31] However, in a series of actions at Neumarkt am Wallersee, Frankenmarkt, Schwanenstadt, Vöcklabruck, Lambach and Kremsmünster during the following week, the Austrian army lost cohesion. Richepanse greatly distinguished himself in the pursuit. On 17 December, when Archduke Charles relieved his brother John, the Austrian army was practically a rabble.[32] With French forces 80 km from Vienna, Charles requested an armistice, which Moreau granted on 25 December. The resulting Treaty of Lunéville was signed in February 1801,[7] which was highly favourable to France. The decisive French victory at Hohenlinden made Moreau a potential rival to Napoleon Bonaparte.[33]
Legacy
The battle is the subject of a poem Hohenlinden by Thomas Campbell (1777–1844). The first verse is:
- On Linden, when the sun was low,
- All bloodless lay the untrodden snow;
- And dark as winter was the flow
- Of Iser, rolling rapidly.
— Thomas Campbell.[34]
The American cities Linden, Alabama, and Linden, Tennessee, are named in honor of this battle. The former was established to serve as the county seat of Marengo County, Alabama. The county's first European settlers were exiled French Bonapartists and many of the settlements they established were named in honor of Napoleonic victories.[35][36][37]
References
- Russell F. Weigley (1 April 2004). The Age of Battles: The Quest for Decisive Warfare from Breitenfeld to Waterloo. Indiana University Press. p. 373. ISBN 978-0-253-21707-3. Retrieved 23 April 2013.
- Terry Crowdy (18 September 2012). Incomparable: Napoleon's 9th Light Infantry Regiment. Osprey Publishing. p. 175. ISBN 978-1-78200-184-3. Retrieved 23 April 2013.
- Arnold, p 275
- Arnold, p 277
- Arnold, p 253
- Bodart 1908, p. 357.
- "Battle of Hohenlinden". Encyclopædia Britannica.
- Arnold, p 206
- Rothenberg, p 64
- Arnold, pp 213–214
- Arnold, pp 219–221
- Arnold, p 223
- Arnold, p 225
- Smith-Kudrna, Latour-Merlemont. Arnold incorrectly calls this corps commander FZM Maximilian Baillet. It was actually his brother, FML Ludwig Baillet.
- Ebert, Graf Baillet de Latour-Merlemont
- Arnold, p 222
- Arnold pp 229–230
- Arnold, pp 230–233
- Arnold, pp 233–234
- Arnold, p 233
- Arnold, p 237
- Arnold, pp 237–243
- Arnold, p 235
- Arnold, pp 243–244
- Arnold, p 248
- Arnold, p 247
- Arnold, pp 248–249
- Arnold, p 253
- Arnold, pp 253–255
- Eggenberger, p 193
- Smith, p 190
- Smith, pp 190–192
- Chandler, p 201
- Campbell, Thomas (1875), "CCXV: Hohenlinden", in Palgrave, Francis T. (ed.), The Golden Treasury: of the Best Songs and Lyrical Poems in the English Language, London: Macmillan
- Marengo County Heritage Book Committee. The Heritage of Marengo County, Alabama, pages 1–4. Clanton, Alabama: Heritage Publishing Consultants, 2000. ISBN 1-891647-58-X
- Blaufarb, Rafe (2006). Bonapartists in the Borderlands: French Exiles and Refugees of the Gulf Coast, 1815–1835. Tuscaloosa: University of Alabama Press. pp. 6–10.
- Smith, Winston (2003). The Peoples City: The Glory and the Grief of an Alabama Town 1850–1874. Demopolis, Alabama: The Marengo County Historical Society. pp. 32–56. OCLC 54453654.
Further reading
- Arnold, James R. Marengo & Hohenlinden. Barnsley, South Yorkshire, UK: Pen & Sword, 2005. ISBN 1-84415-279-0
- Chandler, David. Dictionary of the Napoleonic Wars. New York: Macmillan, 1979. ISBN 0-02-523670-9
- Clausewitz, Carl von (2021). The Coalition Crumbles, Napoleon Returns: The 1799 Campaign in Italy and Switzerland, Volume 2. Trans and ed. Nicholas Murray and Christopher Pringle. Lawrence, Kansas: University Press of Kansas. ISBN 978-0-7006-3034-9
- Eggenberger, David. An Encyclopedia of Battles. New York: Dover Publications, 1985. ISBN 0-486-24913-1
- Furse, George Armand. 1800 Marengo and Hohenlinden (2009)
- Rothenberg, Gunther E. Napoleon's Great Adversaries, The Archduke Charles and the Austrian Army, 1792–1814. Bloomington, Ind.: Indiana University Press, 1982 ISBN 0-253-33969-3
- Smith, Digby. The Napoleonic Wars Data Book. London: Greenhill, 1998. ISBN 1-85367-276-9
- Bodart, Gaston (1908). Militär-historisches Kriegs-Lexikon (1618–1905). Retrieved 3 February 2023.
External links
- Ludwig Baillet de Latour-Merlemont by Digby Smith, compiled by Leopold Kudrna
- Graf Baillet de Latour-Merlemont in German by Jens-Florian Ebert
 Media related to Battle of Hohenlinden at Wikimedia Commons
| Preceded by Convention of Alessandria |
French Revolution: Revolutionary campaigns Battle of Hohenlinden |
Succeeded by Second League of Armed Neutrality |