Battle of Verona (1805)
The Battle of Verona was fought on 18 October 1805 between the French Army of Italy under the command of André Masséna and an Austrian army led by Archduke Charles, Duke of Teschen. By the end of the day, Massena seized a bridgehead on the east bank of the Adige River, driving back the defending troops under Josef Philipp Vukassovich. The action took place near the city of Verona in northern Italy during the War of the Third Coalition, part of the Napoleonic Wars.
| Battle of Verona (1805) | |||||||
|---|---|---|---|---|---|---|---|
| Part of the War of the Third Coalition | |||||||
.jpg.webp) The French launched their attack across the lightly guarded Ponte di Castelvecchio. | |||||||
| |||||||
| Belligerents | |||||||
|
|
| ||||||
| Commanders and leaders | |||||||
|
|
| ||||||
| Strength | |||||||
|
13 battalions 15 guns[1] |
6 battalions 1 squadron 12 guns[1] | ||||||
| Casualties and losses | |||||||
| 323[2]-450[1] |
1,152[2]-1,622 4 guns lost[1] | ||||||
In the fall of 1805, Emperor Napoleon I of France planned for his powerful Grande Armée to fall upon and crush the Austrian Empire army in southern Germany. The French emperor hoped to win the war in the Danube valley. To help accomplish this purpose, Napoleon wanted Masséna to hold Archduke Charles' large army in Italy for as long as possible.
In order for Masséna to grapple with his enemies, it was necessary to establish a bridgehead on the east bank of the Adige. During the battle, the French attacked across the river, cleared two suburbs, and seized some high ground on the opposite bank. The Austrians suffered considerably more casualties than the French in the encounter. This clash set the stage for the subsequent Battle of Caldiero on 29 to 31 October.
Background
Austrian plans
On 5 September 1805, Feldmarschall Archduke Charles, Feldmarschall-Leutnant Karl Friedrich von Lindenau, and General-Major Anton Mayer von Heldensfeld drew up the final Austrian strategic plan. This strategy largely conformed to an earlier plan worked out by Charles, Feldmarschall-Leutnant Karl Mack von Leiberich, and Feldmarschall-Leutnant Karl Philipp, Prince of Schwarzenberg. However, Mayer convinced Charles and Lindenau to transfer troops from Italy to Germany, where Mack was pressing for an invasion of the Electorate of Bavaria.[3]

The original plan put 120,000 troops in Italy, 70,000 in Germany, 25,000 in the Tyrol, and 20,000 for internal security. Mayer's revision reduced the force in Italy to 90,000, with 30,000 on the march for Germany.[4]
Archduke Charles disagreed with Mack's aggressive strategy. When Emperor Francis I asked his opinion, Charles wrote him that Mack was making a serious blunder by invading Bavaria. Nevertheless, the emperor allowed Mack to pursue his course of action.[5] Fearing the worst in Bavaria, Charles took up a defensive posture, even though he knew he outnumbered Masséna.[4]
The archduke posted Feldmarschall-Leutnant Johann von Hiller's 22,000 troops in the Italian Tyrol, north of Rivoli Veronese. The archduke lined the east bank of the Adige from Verona to Legnago with 40,000 soldiers and he held a 30,000-man central reserve at Caldiero. Of these troops, Feldmarschall-Leutnant Count Heinrich von Bellegarde watched Verona, with the division of Vukassovich northeast of the city and the divisions of Feldmarschall-Leutnants Joseph Simbschen and Andreas O'Reilly von Ballinlough to the east. Feldmarschall-Leutnant Eugène-Guillaume Argenteau's six divisions manned the line at Caldiero. Feldmarschall-Leutnant Paul Davidovich with two divisions defended the Adige near Legnago.[6]
French plans
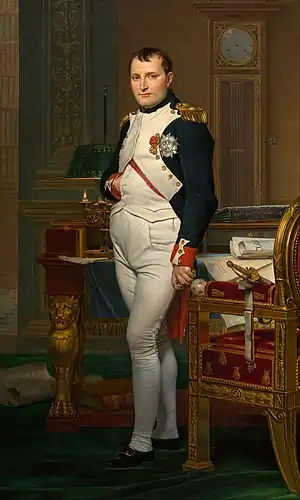
At the beginning of August 1805, Napoleon gave up his plan for invading Great Britain across the English Channel. Instead, he decided to move his army from the channel coast to south Germany to smash the Austrian army. He hoped to be at the Austrian capital of Vienna in November, before the Russian army appeared on the scene.[7] With corps numbering I through VII, a cavalry corps, the Imperial Guard, and Bavarian allies, Napoleon committed 194,000 troops to the campaign in Germany. In training, personnel, morale, and organization, the Grande Armée was the finest body of troops that Napoleon would ever command. On 26 August, he gave the order to march and a month later his troops were crossing the Rhine.[8]
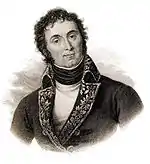
Thanks to an elaborate spy network, Napoleon was aware that the Austrians deployed their largest army in Italy. The emperor desired that Archduke Charles' army not be allowed to influence events in southern Germany. Masséna, whose army only counted 48,000 troops, first looked to his defenses. In 1805 the Adige was the boundary between French Lombardy and Austrian Venetia.[9] On the west side of the Adige, Masséna placed 5,000 garrison troops in the fortresses of the Quadrilateral, that is, Verona, Legnago, Peschiera del Garda, and Mantua.[10]
Initially, Masséna held the line of the Adige with three infantry divisions. General of Division Jean-Mathieu Seras observed Hiller from a strong position at Rivoli in the north. General of Division Gaspard Amédée Gardanne held Verona and General of Division Jean-Antoine Verdier defended the Adige near Legnago in the south. Following Napoleon's instructions, Masséna began concentrating his army. He intended to mass his striking force of five infantry and two cavalry divisions near Verona. He planned to have Verdier's division, supported by General of Division Charles Randon de Pully's cavalry division, divert the Austrians' attention by making a probe farther south.[11]
To play for time, Napoleon authorized Masséna to propose a truce. He did so, and Archduke Charles accepted. On 29 September, a convention was drawn up whereby the armies would not begin fighting until six days after one side notified the other. A week later, Masséna sent word to Charles that hostilities would begin on 14 October. On 17 October Charles received word that Napoleon was in Munich. Foreseeing the disastrous outcome of the Ulm Campaign, the archduke made plans to withdraw from Italy. But first he would defend himself against a French attack.[12]
Battle
French Army
Masséna's order of battle on 18 October is as follows.[13] Army of Italy: André Masséna
- 1st Division: General of Division Gaspard Amédée Gardanne (engaged)
- 1st Brigade: General of Brigade Louis Fursy Henri Compère
- 22nd Light Infantry Regiment (3 battalions)
- 52nd Line Infantry Regiment (3 battalions)
- 2nd Brigade: General of Brigade Louis François Lanchatin
- 29th Line Infantry Regiment (3 battalions)
- 101st Line Infantry Regiment (3 battalions)
- Attached:
- 23rd Chasseurs à cheval Regiment (4 squadrons)
- 15/2nd Foot Artillery Company
- 1st Brigade: General of Brigade Louis Fursy Henri Compère
- 2nd Division: General of Division Jean-Antoine Verdier (1 foot and 1 horse artillery company)
- 1st Brigade: General of Brigade Antoine Digonet (engaged)
- 23rd Light Infantry Regiment, (3 battalions)
- 10th Line Infantry Regiment (3 battalions)
- 2nd Brigade: General of Brigade Jacques Brun (7 battalions)
- 3rd Brigade: Colonel François Léon Ormancey (8 squadrons)
- 1st Brigade: General of Brigade Antoine Digonet (engaged)
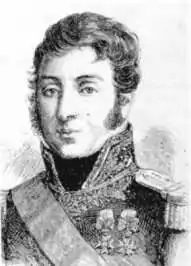
- 3rd Division: General of Division Gabriel Jean Joseph Molitor (1 foot artillery company)
- 1st Brigade: General of Brigade Jean-Marie Auguste Aulnay de Launay (8 battalions)
- 2nd Brigade: General of Brigade Jean-Baptiste Herbin-Dessaux (3 battalions)
- 3rd Brigade: General of Brigade Guy Louis Henri de Valory (4 battalions)
- 4th Division: General of Division Guillaume Philibert Duhesme (engaged)
- 1st Brigade: General of Brigade François Goullus
- 1st Line IR (3 battalions)
- 102nd Line IR (3 battalions)
- 2nd Brigade: General of Brigade Jean Le Camus
- 14th Light IR (3 battalions)
- 20th Line IR (4 battalions)
- Attached:
- 25th Chasseurs à cheval Regiment (4 squadrons)
- 19/2nd Foot Artillery Company
- 1st Brigade: General of Brigade François Goullus
- 5th Division: General of Division Jean Mathieu Seras (1 foot artillery company) (lightly engaged)
- 1st Brigade: General of Brigade Jacques Laurent Gilly (6 battalions)
- 2nd Brigade: General of Brigade Pierre-Joseph Guillet (6 battalions)
- 3rd Brigade: General of Brigade Claude François de Malet (3 battalions, 4 squadrons)
- 4th Brigade: General of Brigade Jean Jacques Schilt (2 battalions)
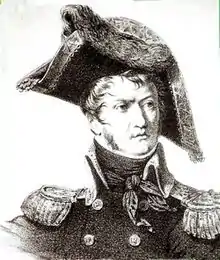
- Reserve Division: General of Division Louis Partouneaux (1 horse artillery company)
- 1st Brigade: General of Brigade Jean-Baptiste Solignac (3 Grenadier battalions, 1 Carabinier battalion)
- 2nd Brigade: General of Brigade François Valentin (4 Grenadier battalions)
- Reserve Cavalry Division: General of Division Julien Augustin Joseph Mermet (1 horse artillery company)
- 1st (Dragoon) Brigade: General of Brigade Nicolas Bernard Guiot de Lacour (8 squadrons)
- 2nd (Cuirassier) Brigade: Colonel François-Joseph d'Offenstein (8 squadrons)
- Light Cavalry Division: General of Division Jean Louis d'Espagne (1 horse artillery company)
- 1st Brigade: General of Brigade César Alexandre Debelle (8 squadrons)
- 2nd Brigade: Colonel Antoine Maurin (8 squadrons)
- Cavalry Division: General of Division Charles Randon de Pully
- 1st (Cuirassier) Brigade: General of Brigade Maurice Fresia (8 squadrons)
- 2nd (Dragoon) Brigade: Colonel Davenay (8 squadrons)
Austrian Army
On 18 October, Archduke Charles' forces were organized as follows.[14]
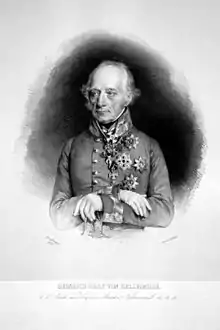
Armee von Italien: Feldmarschall Archduke Charles, Duke of Teschen
- Right Wing: General of Cavalry Count Heinrich von Bellegarde
- Division: Feldmarschall-Leutnant Josef Philipp Vukassovich (engaged)
- Brigade: General-Major Hannibal Sommariva
- Licaner Grenz Infantry Regiment Nr. 1 (3 battalions)
- Ottocaner Grenz Infantry Regiment Nr. 2 (1 battalion)
- 2nd Banat Grenz Infantry Regiment Nr. 11 (3 battalions)
- Archduke Ferdinand Hussars Nr. 3 (4 squadrons)
- Brigade: General-Major Karl Hillinger
- Davidovich Infantry Regiment Nr. 34 (4 battalions)
- Auffenberg Infantry Regiment Nr. 37 (3 battalions)
- Brigade: General-Major Hannibal Sommariva
- Division: Feldmarschall-Leutnant Joseph Anton von Simbschen (lightly engaged)
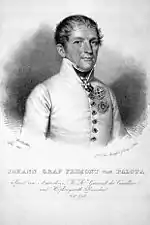
- Brigade: General-Major Johann Maria Philipp Frimont (3 Grenz bns, 4 sqns)
- Brigade: General-Major Stephan Mihaljevich (8 bns)
- Brigade: General-Major Friedrich Kottulinsky (8 bns)
- Brigade: General-Major Karl Soudain von Niederwerth (8 bns)
- Division: Feldmarschall-Leutnant Andreas O'Reilly von Ballinlough (16 sqns)
- Division: Feldmarschall-Leutnant Josef Philipp Vukassovich (engaged)
- Center: Feldmarschall-Leutnant Eugène-Guillaume Argenteau
- Division: General-Major Armand von Nordmann
- Brigade: General-Major Franz Anthony von Siegenfeld (4 Grenz bns)
- Brigade: General-Major Nordmann (2 Grenz bns, 1 Grenadier bn, 8 sqns)
- Division: Feldmarschall-Leutnant Karl Friedrich von Lindenau
- Brigade: General-Major Guido Lippa von Duba (4 Grenadier bns)
- Brigade: General-Major Prince Ludwig of Hohenlohe-Bartenstein (5 Grenadier bns)
- Division: Feldmarschall-Leutnant Ludwig von Vogelsang
- Brigade: General-Major Hieronymus Karl Graf von Colloredo-Mansfeld (5 Grenadier bns)
- Brigade: General-Major Georg Croll von Herzberg (7 Grenadier bns)
- Division: Feldmarschall-Leutnant Prince Heinrich XV of Reuss-Plauen
- Brigade: General-Major Joseph Wetzel (8 bns)
- Division: Feldmarschall-Leutnant Argenteau
- Brigade: General-Major Johann Kalnássy (8 bns)
- Brigade: General-Major Joseph Walther von Waldenau (16 sqns)
- Division: Feldmarschall-Leutnant Prince Joseph of Lorraine-Vaudemont (16 sqns)
- Division: General-Major Armand von Nordmann
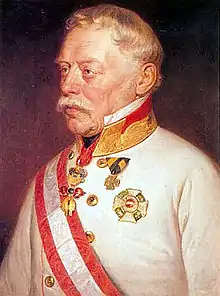
- Left Wing: Feldmarschall-Leutnant Paul Davidovich
- Division: Feldmarschall-Leutnant Prince Franz Seraph of Rosenberg-Orsini
- Brigade: General-Major Joseph Radetzky von Radetz (engaged)
- Szluiner Grenz Infantry Regiment Nr. 4 (3 battalions)
- Ott Hussar Regiment Nr. 5 (8 squadrons)
- Brigade: General-Major Alois von Gavasini (7 battalions)
- Brigade: General-Major Peter Knesevich (8 battalions, 6 squadrons)
- Brigade: General-Major Joseph Radetzky von Radetz (engaged)
- Division: General-Major Wunibald Löwenberg
- Brigade: General-Major Löwenberg (3 Grenz battalions, 2 squadrons)
- Division: Feldmarschall-Leutnant Prince Franz Seraph of Rosenberg-Orsini
- Tyrol Column: Feldmarschall-Leutnant Johann von Hiller
- Division: Feldmarschall-Leutnant Franz Joseph, Marquis de Lusignan
- Brigade: General-Major Karl Schauroth (5 Grenz battalions, 6 squadrons)
- Brigade: General-Major Peter Lutz (13 battalions)
- Division: General-Major Joseph Dedovich
- Brigade: General-Major Dedovich (7 battalions)
- Brigade: General-Major Otto Gottlieb Edler von Zschock (8 battalions)
- Brigade: General-Major Christoph Johnson (8 battalions)
- Division: Feldmarschall-Leutnant Franz Joseph, Marquis de Lusignan
Action
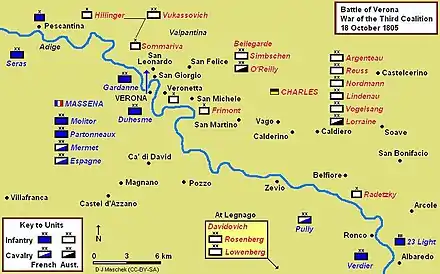
Directly east of Verona was the suburb of Veronetta, which the Austrians had heavily fortified. In addition, the bridges between Verona and Veronetta were well-covered by Austrian artillery. Therefore, Masséna turned his eyes to the west side of Verona, to the suburb of San Giorgio, which was accessible by a stone bridge[15] known as the Castelvecchio Bridge (Ponte di Castelvecchio).[16] Vukassovich was responsible for defending the area. The Austrian division commander had a wall built across the center of the bridge and fortified San Giorgio. However, Vukassovich only allocated two battalions to its defense. He deployed six battalions in the hills northeast of Verona, while the remainder of his division lay farther north, maintaining contact with Hiller's corps.[17]
Masséna decided to personally command the bridge assault. Stripping the 24 voltiguer (light infantry) companies from the battalions in Gardanne and General of Division Guillaume Philibert Duhesme's divisions, the French army commander formed them into a storming column. The voltiguers were supported by a sapper battalion and a light artillery company, and backed by Gardanne's division.[18]
In the early hours of 18 October, Masséna led his storming column silently onto the Castelvecchio Bridge. The sappers set charges which destroyed the wall, and the French column surged forward. After quickly overrunning the Austrian outposts, the voltiguers attacked San Giorgio. General of Brigade Louis Fursy Henri Compère advanced to support the attack, while Vukassovich reinforced the defenders with two battalions. Sometime after 10:00 am San Giorgio fell to the French. Soon afterward, Vukassovich had the Archduke Ferdinand Hussar Regiment # 3 and General-Major Hannibal Sommariva's Grenz infantry on hand. The Austrian division commander hurled his hussars at Compère's brigade. The French formed square, and with the help of artillery firing across the river, drove off the Austrian cavalry.[19]
Around noon, Verdier mounted a diversionary attack. Easily penetrating General-Major Joseph Radetzky von Radetz's screen, he crossed the Adige at Albaredo d'Adige with two battalions of the 23rd Light Infantry Regiment. Believing that the action at Verona was the diversion and the crossing at Albaredo was the real attack, Archduke Charles marched against Verdier with three columns. By the time he arrived at Albaredo, the 23rd Light had withdrawn safely to the French side of the Adige.[2]
Masséna also ordered Seras to mount a diversion in the north. Leaving part of his division at Rivoli, Seras demonstrated in front of Pescantina, 11 kilometers west of Verona. This action froze half of Vukassovich's division, which remained watching Seras and never got into action.[2]
In the afternoon, some of Duhesme's troops and the 23rd Chasseurs à cheval were in action on the French side. By 5:00 pm, San Leonardo fell to the French after severe fighting, allowing Masséna's troops to occupy the heights and press to the east. At this time, Bellegarde appeared with Feldmarschall-Leutnants Andreas O'Reilly and Joseph Simbschen's divisions at the hamlet of San Felice in the Val Pantena, northeast of Verona. Bellegarde pushed back the French a short distance until darkness and fatigue ended the fighting.[2]
Results
One historian puts French losses at 77 dead and 246 wounded, a total of 323, while stating Austrians casualties as 1152, including 246 killed and 906 wounded.[2] A second authority writes that the French counted 150 killed and 300 wounded, while Austrian losses numbered 1,622 killed, wounded, and captured, and four cannons.[1]
Masséna failed to capture Veronetta, but he carved out a bridgehead on the heights northeast of Verona. Angry that Vukassovich failed to stop Massena's attack, Archduke Charles dismissed him and replaced him with Feldmarschall-Leutnant Prince Franz Seraph of Rosenberg-Orsini. The archduke believed that Vukassovich could have repulsed the first French assault if he had defended the bridge with more troops.[1][2] Smith writes that Vukassovich was dismissed because he gave battle too close to the river, against explicit orders. It is impossible to reconcile the Smith and Schneid accounts so only Schneid's view is presented in the article.
Even so, Charles had sufficient troops to attack the French bridgehead. Instead, he contented himself with holding Veronetta, placing General-Major Johann Maria Philipp Frimont's brigade in the suburb of San Michele, east of Veronetta, and ordering Rosenberg to hold the Val Pantena. The Austrian commander withdrew the rest of Bellegarde's Right Wing into the Caldiero lines. Massena reinforced his bridgehead with all of Gardanne and Duhesme's divisions. Both Charles and Massena later explained away their subsequent inaction by claiming that they were awaiting events in Germany.[20] The next action was the Battle of Caldiero from 29 to 31 October.[1]
Footnotes
- Digby Smith. The Napoleonic Wars Data Book. London: Greenhill, 1998. ISBN 1-85367-276-9, 206
- Frederick C. Schneid. Napoleon's Italian Campaigns: 1805–1815. Westport, Conn.: Praeger Publishers, 2002. ISBN 0-275-96875-8, p. 28.
- Rothenberg, Gunther E. (1982). Napoleon's Great Adversaries, The Archduke Charles and the Austrian Army, 1792–1814. Bloomington, Ind.: Indiana University Press. pp. 82–84. ISBN 0-253-33969-3.
- Schneid, 18
- Rothenberg, 89–90
- Schneid, 19–20
- Schneid, 20
- Rothenberg, 90
- Schneid, 20–21
- Rothenberg, 94
- Schneid, 22
- Schneid, 22–23
- Schneid, 161–163. The French order of battle is from Schneid.
- Schneid, 164–166. The Austrian order of battle is from Schneid.
- Schneid, 23
- Kagan, Frederick W. (2006). The End of the Old Order: Napoleon and Europe, 1801–1805. Cambridge, Massachusetts: Da Capo Press. p. 522. ISBN 0-306-81137-5.
- Schneid, 23–24
- Schneid, 24
- Schneid, 27
- Schneid, 29
References
Printed materials
- Kagan, Frederick W. (2006). The End of the Old Order: Napoleon and Europe, 1801–1805. Cambridge, Massachusetts: Da Capo Press. ISBN 0-306-81137-5.
- Rothenberg, Gunther E. Napoleon's Great Adversaries, The Archduke Charles and the Austrian Army, 1792–1814. Bloomington, Ind.: Indiana University Press, 1982 ISBN 0-253-33969-3
- Rothenberg, Gunther E. (1982). Napoleon's Great Adversaries, The Archduke Charles and the Austrian Army, 1792–1814. Bloomington, Ind.: Indiana University Press. ISBN 0-253-33969-3.
- Schneid, Frederick C. Napoleon's Italian Campaigns: 1805–1815. Westport, Conn.: Praeger Publishers, 2002. ISBN 0-275-96875-8
- Smith, Digby. The Napoleonic Wars Data Book. London: Greenhill, 1998. ISBN 1-85367-276-9
External links
- The following webpages are excellent sources for full names of generals.
- napoleon-series.org Dictionary of Austrian Generals 1792–1815 by Digby Smith, compiled by Leopold Kudrna
- French Wikipedia, Liste des généraux de la Révolution et du Premier Empire
 Media related to Battle of Verona (1805) at Wikimedia Commons
| Preceded by Battle of Ulm |
Napoleonic Wars Battle of Verona (1805) |
Succeeded by Battle of Trafalgar |