OneDrive and Office Online
Upload, Sync, and Manage Files
Introduction
 Watch the video (3:15). Need help?
OneDrive isn't just for storing documents. You can also upload other files, like photos, videos, music, and more. In total, OneDrive gives you 7GB of free space to store files of all types.
In this lesson, you will learn how to upload and sync files from your computer to OneDrive. You'll also learn how to move files from one folder to another. Finally, you'll learn about additional file options, including special options for managing photos.
Uploading and syncing files with OneDrive
The OneDrive desktop application makes it easy to upload and sync files across all of your devices—check out our lesson on Getting Started with OneDrive to learn how to install the app (if you haven't already). The OneDrive desktop application works like any other folder on your computer. Whenever you move a file to the OneDrive folder, that file is moved online to the cloud, allowing you to access the same version of that file from any computer connected to the Internet.
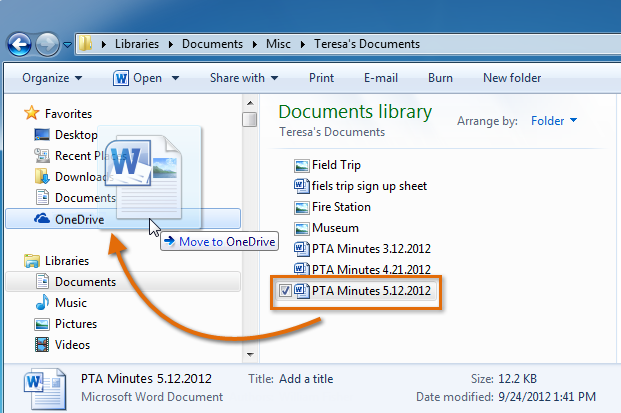
To upload files:
- Locate the file on your computer you wish to upload to your OneDrive.
- Click, hold, and drag the file to the OneDrive folder.
 Moving a file to the OneDrive folder
 - The file will appear on your OneDrive. Now you can access the file from anywhere by signing in to your OneDrive account.
 The uploaded file
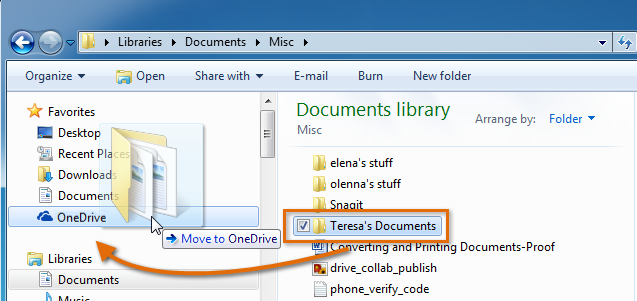
To upload folders:
Uploading individual files can start to become very time consuming. Fortunately, you can also move entire folders to OneDrive. Whenever you upload a folder, the folder and every file stored within it will be uploaded to your OneDrive.
- Locate the folder you wish to upload to your OneDrive.
- Click, hold, and drag the folder to the OneDrive folder.
 Moving a folder to the OneDrive folder
 - The folder and its files will appear on your OneDrive.


