CSS Layout - float and clear
The CSS float property specifies
how an element should float.
The CSS clear property
specifies what elements can float beside the cleared element and on which side.
The float Property
The float property is used for
positioning and formatting content e.g. let an image float left to the text in a
container.
The float property can have one of the
following values:
- left - The element floats to the left of its container
- right- The element floats to the right of its container
- none - The element does not float (will be displayed just where it occurs in the text). This is default
- inherit - The element inherits the float value of its parent
In its simplest use, the float property can be used to wrap text around images.
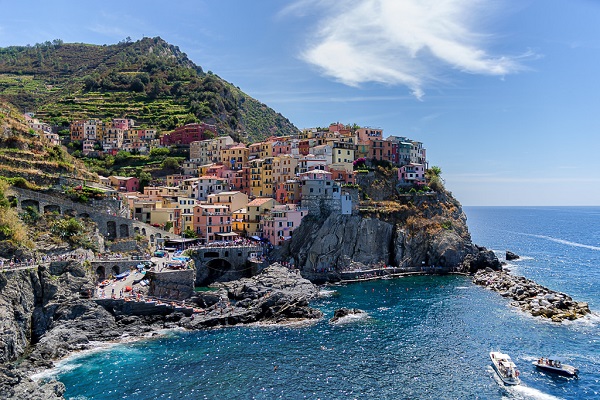
Example - float: right;
The following example specifies that an image should float to the right in a text:
 Lorem ipsum dolor sit amet, consectetur adipiscing elit. Phasellus imperdiet, nulla et dictum interdum, nisi lorem egestas odio, vitae scelerisque enim ligula venenatis dolor. Maecenas nisl est, ultrices nec congue eget, auctor vitae massa.
Example - float: left;
The following example specifies that an image should float to the left in a text:
Lorem ipsum dolor sit amet, consectetur adipiscing elit. Phasellus imperdiet, nulla et dictum interdum, nisi lorem egestas odio, vitae scelerisque enim ligula venenatis dolor. Maecenas nisl est, ultrices nec congue eget, auctor vitae massa.
Example - No float
In the following example the image will be displayed just where it occurs in the text (float: none;):
Lorem ipsum dolor sit amet, consectetur adipiscing elit. Phasellus imperdiet, nulla et dictum interdum, nisi lorem egestas odio, vitae scelerisque enim ligula venenatis dolor. Maecenas nisl est, ultrices nec congue eget, auctor vitae massa.
The clear Property
The clear property specifies what
elements can float beside the cleared element and on which side.
The clear property can have one of the
following values:
- none - Allows floating elements on both sides. This is default
- left - No floating elements allowed on the left side
- right- No floating elements allowed on the right side
- both - No floating elements allowed on either the left or the right side
- inherit - The element inherits the clear value of its parent
The most common way to use the clear
property is after you have used a float
property on an element.
When clearing floats, you should match the clear to the float: If an element is floated to the left, then you should clear to the left. Your floated element will continue to float, but the cleared element will appear below it on the web page.
The following example clears the float to the left. Means that no floating elements are allowed on the left side (of the div):
The clearfix Hack
If an element is taller than the element containing it, and it is floated, it will "overflow" outside of its container:
Without Clearfix
With Clearfix
Then we can add overflow: auto; to the containing element to fix
this problem:
The overflow: auto clearfix works well as long as you are able to keep control of your margins and padding (else you
might see scrollbars). The
new, modern clearfix hack however, is safer to use, and the following code is used for most webpages:
You will learn more about the ::after pseudo-element in a later chapter.
Grid of Boxes / Equal Width Boxes
Box 1
Box 2
Box 1
Box 2
Box 3
With the float property, it is easy to float boxes of content side by side:
Example
* {
box-sizing: border-box;
}
.box {
float: left;
width: 33.33%; /* three
boxes (use 25% for four, and 50% for two, etc) */
padding:
50px; /* if you want space between the images */
}
Try it Yourself »
What is box-sizing?
You can easily create three floating boxes side by side. However, when you add something that enlarges the width of each box (e.g. padding or borders), the box will break. The box-sizing property allows us to include the padding and border in the box's total width (and height), making sure that the padding stays inside of the box and that it does not break.
You can read more about the box-sizing property in our CSS Box Sizing Chapter.
Images Side By Side


The grid of boxes can also be used to display images side by side:
Example
.img-container {
float: left;
width: 33.33%; /* three
containers (use 25% for four, and 50% for two, etc) */
padding:
5px; /* if you want space between the images */
}
Try it Yourself »
Equal Height Boxes
In the previous example, you learned how to float boxes side by side with an equal width. However, it is not easy to create floating boxes with equal heights. A quick fix however, is to set a fixed height, like in the example below:
Box 1
Some content, some content, some content
Box 2
Some content, some content, some content
Some content, some content, some content
Some content, some content, some content
However, this is not very flexible. It is ok if you can guarantee that the boxes will always have the same amount of content in them. But many times, the content is not the same. If you try the example above on a mobile phone, you will see that the second box's content will be displayed outside of the box. This is where CSS3 Flexbox comes in handy - as it can automatically stretch boxes to be as long as the longest box:
Example
Using Flexbox to create flexible boxes:
The only problem with Flexbox is that it does not work in Internet Explorer 10 or earlier versions. You can read more about the Flexbox Layout Module in our CSS Flexbox Chapter.
Navigation Menu
Use float with a list of hyperlinks to create a horizontal menu:
Web Layout Example
It is also common to do entire web layouts using the float property:
Example
.header, .footer {
background-color: grey;
color: white;
padding: 15px;
}
.column {
float: left;
padding: 15px;
}
.clearfix::after {
content:
"";
clear: both;
display: table;
}
.menu {
width: 25%;
}
.content {
width: 75%;
}
Try it Yourself »
More Examples
An image with border and margins that floats to the right in a paragraph
Let an image float to the right in a paragraph. Add border and margins to the image.
An image with a caption that floats to the right
Let an image with a caption float to the right.
Let the first letter of a paragraph float to the left
Let the first letter of a paragraph float to the left and style the letter.
Creating a website with float
Use float to create a homepage with a navbar, header, footer, left content and main content.
All CSS Float Properties
| Property | Description |
|---|---|
| box-sizing | Defines how the width and height of an element are calculated: should they include padding and borders, or not |
| clear | Specifies what elements can float beside the cleared element and on which side |
| float | Specifies how an element should float |
| overflow | Specifies what happens if content overflows an element's box |
| overflow-x | Specifies what to do with the left/right edges of the content if it overflows the element's content area |
| overflow-y | Specifies what to do with the top/bottom edges of the content if it overflows the element's content area |

