This article was co-authored by Ryaan Tuttle. Ryaan Tuttle is a Home Improvement Specialist and the CEO of Best Handyman, Inc. in Boston, Massachusetts. With over 17 years of experience, he specializes in building home service businesses, focusing on creating scalable and efficient brands. With the help of his global team, the companies have achieved over 10+ million in sales and received recognition through magazine features, and enjoy partnerships with wikiHow and Jobber field service software. Boston Magazine and LocalBest.com have named Best Handyman Boston the Best Handyman in Boston. Ryaan holds Construction Supervisor and Home Improvement Contractor Licenses.
This article has been viewed 58,732 times.
Got a squeaky door? WD-40 is a solid short-term solution. With a few squirts from the nozzle, you’ll have your door hinges squeak-free in no time. We’ll show you everything you need to know about using WD-40 on your door hinge. Just keep in mind, WD-40 isn’t actually a lubricant, and it will dry out eventually. As a result, we’ll also cover a variety of long-term solutions here as well.
Steps
Applying WD-40 to Home Door Hinges
-
1Use the smart straw, if available. Like any other aerosol spray, WD-40 distributes its contents as a kind of cone-shaped cloud. With the smart straw in place, however, you’ll be able to emit WD-40 in a thin precision stream. This is ideal for applying WD-40 to a door hinge.
- The smart straw is a long red tube that, in its undeployed state, remains snug against the WD-40 canister.
- If your WD-40 comes with a smart straw, snap it into place by pulling up on the gray base of the red tube. This base is located near the top of the WD-40 canister.
-
2Hold the nozzle an inch (2 cm) from the hinge. With the WD-40 smart straw in place, position the canister so that the end of the tube is about one inch (two centimeters) from the door hinge to which you wish to apply WD-40. If you’re using a WD-40 canister that doesn’t have a smart straw, identify the location of the actuator orifice (the place from which the WD-40 issues) and aim it toward the door hinge. The actuator orifice should be one inch (two centimeters) from the door hinge you wish to apply WD-40 to.
- It can also help to tap the hinge pin up just slightly and spray the WD-40 in the gap on top of the hinge. This allows the spray to penetrate the inside of the hinge and the pin.
Advertisement -
3Spray the WD-40 in quick bursts. Once you’ve positioned the smart straw or actuator orifice appropriately, you’re ready to apply the WD-40 to the door hinge. WD-40 canisters emit their contents quite quickly, so do not hold the actuator down for prolonged periods. Instead, press down on the actuator using your index finger, then release it quickly. WD-40 will leave the canister. Apply the WD-40 in quick bursts, moving from the top of the door hinge to the bottom.
-
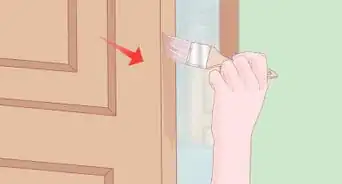
4Wipe away the excess WD-40. Clean the door hinge off. Applying WD-40 to your door hinges will cause them to attract dust and turn black.[1] After applying WD-40 to the door hinge, wipe it clean by dipping a microfiber cloth in some hot, soapy water. Wring it out, then wipe the door hinge with the cloth. To prevent rust, wipe the hinge down with a dry microfiber cloth.
- You can also use a paper towel sprayed with all-purpose cleaner.
- If you lifted up the hinge pin, remember to tap it back down when you finish spraying.


Applying WD-40 to Automobile Door Hinges
-
1Locate the actuator orifice. The actuator orifice is the hole from which WD-40 leaves the WD-40 canister. If you WD-40 canister is equipped with a smart straw (a long movable red tube), the actuator orifice will be a round yellow circle on the top of the canister’s actuator (the button you press down to utilize the WD-40). In other WD-40 canisters, however, the actuator orifice is a round black dot on the top of the canister’s actuator.
-
2Aim the nozzle at the door hinge. Point the WD-40’s actuator orifice toward your automobile’s door hinge. The actuator orifice should be about one inch (two centimeters) from the door hinge.[2]
- For a more precise spray, look at the area in the door jamb where the hinges are located. Close the door and take note of any area where metal contacts metal as the door moves. These are the areas you'll spray.
- You should also spray the door latch mechanism.
-
3Spray the WD-40 on the door hinge. When you’re ready, place your index finger over the actuator. Squeeze the actuator in a series of quick bursts across the surface of the vehicle’s door hinge. You can move from left to right, or from right to left across the hinge.
- If you have access to two door hinges, be sure to coat them both.
-
4Open and close your door several times. In order to adequately coat the internal portion of the hinge with WD-40, you’ll need to open and then close the door a few times. This ensures that it will lubricate the entire hinge mechanism. It can help to lubricate the hinge as you move the door back and forth.[3]


Trying Alternatives to WD-40
-
1Squirt 3-in-1 oil on the hinge. Using 3-in-1 oil is a great way to help displace moisture and rust in your door hinges. Aim the oil at all the moving parts of the hinge and spray carefully, then open and close the door several times to work the oil in.
- You can buy 3-in-1 oil at a hardware or home supply store.
-
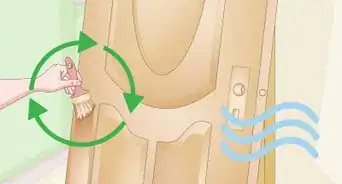
2Rub soap on the door hinge. You can use either liquid soap or bar soap. If using liquid soap, squirt a bit onto a sponge, then wipe the sponge across the surface of the door hinge. If using bar soap, apply the bar of soap directly to the hinge, especially the joints around which the hinge turns.[4]
-
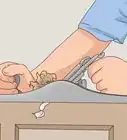
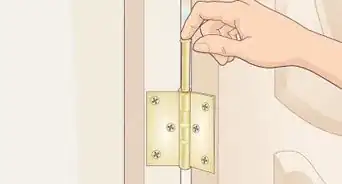
3Smear petroleum jelly over the hinge pin. Dab a clean paper towel in a tub of petroleum jelly. Remove the hinge pin from the door by placing the pointed end of a nail at the bottom of the door hinge, then tapping the nail gently upward with a hammer. The hinge pin will come out the top of the hinge. Wipe the hinge pin with the paper towel, then slide it back into the hinge.[5]
-
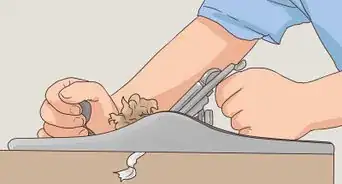
4Coat the hinge pin with paraffin wax. Light some paraffin candles. After an hour or so, remove the hinge pin on the squeaky hinge by placing the pointed end of a nail beneath the squeaky hinge, then tapping the nail gently upward with a hammer. Slide the hinge pin from the top of the hinge. Blow out the candle, then dip the hinge pin in the melted wax. After it’s well-covered in wax, slip it back into the hinge.[6]
- You can wear rubber gloves during this process if you don’t want to get wax on your hands.
Expert Q&A
-
QuestionWill this permanently get rid of the squeaking?
 Ryaan TuttleRyaan Tuttle is a Home Improvement Specialist and the CEO of Best Handyman, Inc. in Boston, Massachusetts. With over 17 years of experience, he specializes in building home service businesses, focusing on creating scalable and efficient brands. With the help of his global team, the companies have achieved over 10+ million in sales and received recognition through magazine features, and enjoy partnerships with wikiHow and Jobber field service software. Boston Magazine and LocalBest.com have named Best Handyman Boston the Best Handyman in Boston. Ryaan holds Construction Supervisor and Home Improvement Contractor Licenses.
Home Improvement SpecialistNo, eventually the WD-40 will dry out and you'll need to reapply it. For a long-term solution, you should replace the hinges with ball-bearing hinges that won't rub and squeak. -
QuestionHow do I attach the straw to the can?
 Community AnswerYou need to press and twist the straw. It is a bit challenging, but if you press it long enough, it will fit.


References
- ↑ http://lifehacker.com/5891936/when-should-i-not-use-wd-40
- ↑ http://www.vehicleservicepros.com/in-the-bay/tools-equipment/article/20843944/tech-tip-tackling-automotive-projects-with-wd40-specialist-spray-stay-gel-lubricant
- ↑ http://www.vehicleservicepros.com/in-the-bay/tools-equipment/article/20843944/tech-tip-tackling-automotive-projects-with-wd40-specialist-spray-stay-gel-lubricant
- ↑ http://www.apartmenttherapy.com/how-to-silence-16316
- ↑ http://www.apartmenttherapy.com/how-to-silence-16316
- ↑ https://www.bobvila.com/articles/how-to-fix-a-squeaky-door/
- ↑ http://www.popularmechanics.com/cars/how-to/a6064/wd-40-vs-the-world-of-lubricants/
About This Article