This article was co-authored by Abraham Schwartz and by wikiHow staff writer, Hunter Rising. Abraham Schwartz is a handyman and the owner of Fixin’ To Do, a home improvement service in Austin, Texas. Abraham specializes in both small to medium residential and commercial sized jobs, ranging from TV mounting to furniture assembly to home automation setup. Prior to starting Fixin’ To Do, Abraham worked for over 10 years as a handyman for third party services and had a lifetime of learning how to improve houses. He holds both his TSBPE Plumbing Examiners and Electrical Apprentice (TX) Licenses. In 2018 and 2019, Fixin’ To do was rated as a Top Pro by Thumbtack.
There are 11 references cited in this article, which can be found at the bottom of the page.
This article has been viewed 62,796 times.
Self-closing hinges have springs inside of them that force a door closed so you don’t have to worry about shutting it yourself. However, if your door slams or doesn’t latch properly as it closes, you may need to use a couple of tools to loosen or tighten the spring tension. For hinges that have screws on top, you may use a hex wrench to make your adjustments. If you notice a slot that has holes and a small pin on the side of the hinge, insert the tension rod that came with the hinges to tighten or loosen them. In only a few minutes, you’ll be able to change the hinge tension so your door closes at the perfect speed.
Steps
Changing Tension with a Hex Wrench
-
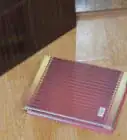
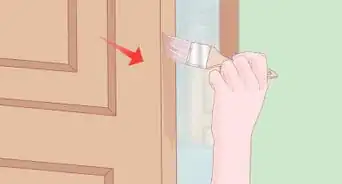
1Close the door completely. Stand on the side of the door with the hinges and shut the door until it latches. If possible, lock the door to ensure that no one opens it while you’re working, or else they could break the hinges. If you can’t lock the door, then tell other people in your home not to use the door while you’re making your adjustments.
- Avoid working on your hinges while the door is open since they will have tension and could get damaged.
-
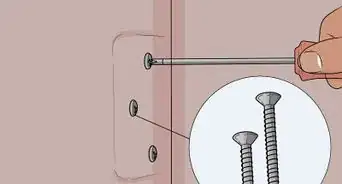
2Unscrew the locking screws from the top hinge. Check the top of the hinge to see if it has a screw, which protects the spring from being tampered with. If it does, insert a screwdriver and rotate it counterclockwise to loosen it. Set the screw aside in a place where you won’t lose it.[1]
- If your hinge doesn’t have a locking screw, then you can skip this step.
Advertisement -
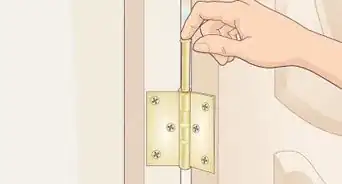
3Insert a hex wrench into the hole where you removed the screw. Push the short end of a hex wrench into the top of the hinge. If the wrench feels loose inside the hole, rotate it until it fits into the hex-shaped hole and clicks into place. Keep the long end of the wrench pointed at a 45-degree angle to the door so you have a full range of motion to make your adjustments.[2]
- You can buy hex wrench sets from your local hardware store.
- If you bought the hinges, they may have come with a hex wrench.
-
4Turn the wrench clockwise if you want the door to close faster. Press the wrench down firmly to engage the locking mechanism inside the hinge. Rotate the wrench a quarter turn clockwise until you hear it click into the new position. Only adjust the hinge by 1 position at a time so you don’t overtighten or break the hinge.
- If the hinge doesn’t rotate any further clockwise, then you already have the hinge as tight as possible.
-
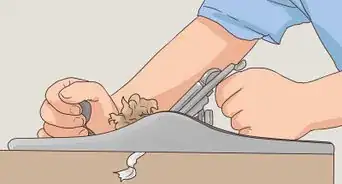
5Rotate the wrench counterclockwise if the door slams closed. Push down on the wrench so the locking mechanism in the hinge rotates freely. Move the long arm of the wrench counterclockwise until you hear it click into the next position, which is usually a quarter turn. Lift the wrench up to secure the locking mechanism.
- If the long arm of the wrench bumps into the door or jamb when you turn it, pull the wrench out of the hole and reposition it.
Tip: If you want to completely disengage the hinge so it doesn’t automatically close, turn the locking mechanism counterclockwise as far as possible.
-
6Adjust the bottom hinge to the same tension as the one on top. Remove the locking screw from the bottom hinge and insert the hex wrench in the hole. If you tightened the top hinge, turn the bottom hinge clockwise by the same amount. Otherwise, turn the wrench counterclockwise to relieve tension from the hinge.[3]
- If the door has 3 hinges, usually the ones on top and bottom are the only ones you need to adjust.
-
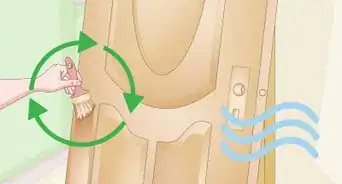
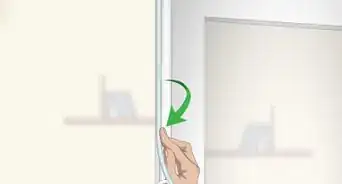
7Open the door to test if it closes without slamming. Pull the door open as far as possible and let go of it. Pay attention to how fast the door closes and if it latches shut. If it closes quickly and slams shut, loosen the tension in the hinges until it closes quietly. If the door doesn’t close far enough to latch, then tighten the hinge by 1 more position.[4]
- Only test the door after adjusting both hinges since you could damage or break them otherwise.
-
8Reinstall the locking screws on the hinges. Place the screws back inside the holes on top of the hinges. Turn them clockwise with a screwdriver until the heads are flush with the hinges.[5]
- If you don’t replace the locking screws, dust or debris can get into the hinges and make them work less efficiently.


Repositioning the Locking Pins
-
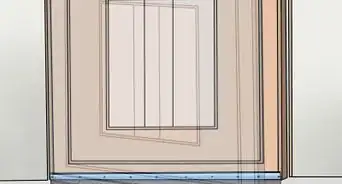
1Shut the door so you don’t damage the hinges. Close the door completely so it’s latched closed. If you can, lock the door so no one’s able to open it while you’re working. Otherwise, let other people know that you’re adjusting the hinges so they shouldn’t use the door.[6]
- Don’t make any adjustments to the hinges if you haven’t already attached them to the door and frame.
- Leaving the door open while you’re making adjustments could damage the hinges.
-
2Insert a tension rod in the rightmost hole in the top hinge’s adjustment slot. Use the small metal tension rod that came with your hinges when you purchased them. Look on the side of the hinge near the top for a horizontal adjustment slot that has a line of holes inside. Find the hole that’s furthest to the right in the adjustment slot. Push the rod into the hole far enough so it stays in place.[7]
- If you don’t have a tension rod, you may be able to use a hex wrench with a diameter smaller than the hole instead.
-
3Move the rod clockwise to loosen the tension pin. Push the rod clockwise around the hinge until it touches the left side of the adjustment slot. As you turn the rod, locate the metal tension pin inside of a hole on the right side of the adjustment slot. Keep holding the rod against the left side so it doesn’t move or shift around.[8]
- Don’t let go of the tension rod, or else it will snap back to the right side of the adjustment slot and may damage the hinge.
-
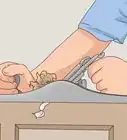
4Remove the tension pin next to the door with needlenose pliers. Hold the tension rod against the left side of the slot with your nondominant hand. Grip the end of the tension pin with needlenose pliers and pull it straight out from the hinge. Maintain your grip on the pin since you’ll be putting it back in a different hole right away.[9]
- Taking the tension pins out of the hinges will completely disengage them if you don’t want the door to close automatically.
-
5Insert the pin in the next hole on the right to make the door close faster. While still holding the tension rod against the left side, locate the new hole that’s furthest to the right. Guide the pin into the hole and push it in as far as it can go. Slowly turn the tension rod counterclockwise until the pin presses against the right side of the slot.[10]
- Only adjust the hinge by 1 hole at a time so you don’t overtighten the hinge.
-
6Place the pin in the hole left of the original position so the door shuts slower. Keep holding the tension rod against the left side of the slot. Find the hole that’s just left of where the pin was originally located. Slide the pin into the hole as far as possible before turning the tension rod counterclockwise to secure it in place.[11]
- You may need to reposition the tension rod 1 hole to the left in order to install the pin.
-
7Change the position of the bottom hinge's pin so it’s the same as the top. Put the tension rod in the rightmost hole on the bottom hinge and turn it clockwise so it presses against the left side. Remove the pin with your pliers before sliding it in the hole to the left or right depending on if you loosened or tightened the tension respectively.[12]
- The middle hinge is usually a standard one, so you don’t have to adjust it.
-
8Open the door to test if it closes completely without slamming. Pull the door open as far as possible and let go of it so it starts to close. If the door doesn’t latch shut on its own, then move the pins 1 more hole to the right to add more tension. If the door closes too quickly or slams shut, then move the pins 1 hole to the left to loosen the hinges.[13]
Warning: Don’t place the pin any further than the 4th pin to the right since it can create too much tension that will cause the door to slam and damage the spring in the hinge.[14]


Expert Q&A
Did you know you can get expert answers for this article?
Unlock expert answers by supporting wikiHow
-
QuestionHow do I adjust my door closing speed?
 Abraham SchwartzAbraham Schwartz is a handyman and the owner of Fixin’ To Do, a home improvement service in Austin, Texas. Abraham specializes in both small to medium residential and commercial sized jobs, ranging from TV mounting to furniture assembly to home automation setup. Prior to starting Fixin’ To Do, Abraham worked for over 10 years as a handyman for third party services and had a lifetime of learning how to improve houses. He holds both his TSBPE Plumbing Examiners and Electrical Apprentice (TX) Licenses. In 2018 and 2019, Fixin’ To do was rated as a Top Pro by Thumbtack.
HandymanThere are typically two screws on the self-closing mechanism, which is that tube thing on the bottom of your door. You usually turn those screws to adjust the speed. Start by trying to turn them 1/4 of the way in either direction to see how it impacts the speed of the door. There's a lot of trial and error here, so you may need to play with it a little bit.
Support wikiHow by unlocking this expert answer.
-
QuestionWhat's the point of a self-closing door?Abraham SchwartzAbraham Schwartz is a handyman and the owner of Fixin’ To Do, a home improvement service in Austin, Texas. Abraham specializes in both small to medium residential and commercial sized jobs, ranging from TV mounting to furniture assembly to home automation setup. Prior to starting Fixin’ To Do, Abraham worked for over 10 years as a handyman for third party services and had a lifetime of learning how to improve houses. He holds both his TSBPE Plumbing Examiners and Electrical Apprentice (TX) Licenses. In 2018 and 2019, Fixin’ To do was rated as a Top Pro by Thumbtack.
HandymanYou typically find these on storm doors, which are those exterior doors that go in front of your main entrances. They keep you from letting excess air out of your home.Support wikiHow by unlocking this expert answer.
-
QuestionWhat if I can't figure out how to adjust the door?Abraham SchwartzAbraham Schwartz is a handyman and the owner of Fixin’ To Do, a home improvement service in Austin, Texas. Abraham specializes in both small to medium residential and commercial sized jobs, ranging from TV mounting to furniture assembly to home automation setup. Prior to starting Fixin’ To Do, Abraham worked for over 10 years as a handyman for third party services and had a lifetime of learning how to improve houses. He holds both his TSBPE Plumbing Examiners and Electrical Apprentice (TX) Licenses. In 2018 and 2019, Fixin’ To do was rated as a Top Pro by Thumbtack.
HandymanGo online and search for the manufacturer's instructions. It may just be that the adjustment screws are in a spot you can't find. These doors are all pretty much adjusted the same way.Support wikiHow by unlocking this expert answer.
Warnings
- Avoid working on the hinges while the door is open since you could damage the springs inside them.⧼thumbs_response⧽
- Always adjust both of the hinges at the same time, or else you could wear out or break the hinges.⧼thumbs_response⧽
- Do not place locking pins further than the 4th hole in the adjustment slot since it will cause the door to slam quickly and could wear out the hinges faster.[15]⧼thumbs_response⧽
Things You’ll Need
Changing Tension with a Hex Wrench
- Screwdriver
- Hex wrench
Repositioning the Locking Pins
- Tension rod
- Needlenose pliers


References
- ↑ https://youtu.be/M4jKthX-aOA?t=59
- ↑ https://youtu.be/M4jKthX-aOA?t=77
- ↑ https://youtu.be/xvcSX6A1dJg?t=154
- ↑ Abraham Schwartz. Handyman. Expert Interview. 28 August 2020.
- ↑ https://absupply.net/pdf/McK_1500_Instructions.pdf
- ↑ https://www.midwestmanufacturing.com/MidwestWebsite/web/cms/docs/spring_hinge.pdf
- ↑ https://www.midwestmanufacturing.com/MidwestWebsite/web/cms/docs/spring_hinge.pdf
- ↑ https://www.bommer.com/BH/PDF/SpringHingeLB4300InstallationInstructions.pdf
- ↑ https://youtu.be/RPmOioJSJVU?t=28
- ↑ https://www.bommer.com/BH/PDF/SpringHingeLB4300InstallationInstructions.pdf
- ↑ https://youtu.be/RPmOioJSJVU?t=48
- ↑ https://www.bommer.com/BH/PDF/SpringHingeLB4300InstallationInstructions.pdf
- ↑ https://www.midwestmanufacturing.com/MidwestWebsite/web/cms/docs/spring_hinge.pdf
- ↑ https://www.midwestmanufacturing.com/MidwestWebsite/web/cms/docs/spring_hinge.pdf
- ↑ https://www.bommer.com/BH/PDF/SpringHingeLB4300InstallationInstructions.pdf
About This Article