This article was co-authored by Joy Cho and by wikiHow staff writer, Dan Hickey. Joy Cho is the Founder and Creative Director of the lifestyle brand and design studio, Oh Joy!, founded in 2005 and based in Los Angeles, California. She has authored six books and consulted for creative businesses around the world. Joy has lectured on business, leadership, and entrepreneurship at conferences and companies such as AltSummit, Pinterest, Target, and Hallmark, while her home and studio have been featured in magazines such as House Beautiful, Parents, and Domino. She has also been named one of Time's 30 Most Influential People on the Internet multiple times and has the most followed account on Pinterest with more than 14 million followers.
There are 14 references cited in this article, which can be found at the bottom of the page.
wikiHow marks an article as reader-approved once it receives enough positive feedback. In this case, 100% of readers who voted found the article helpful, earning it our reader-approved status.
This article has been viewed 1,339,340 times.
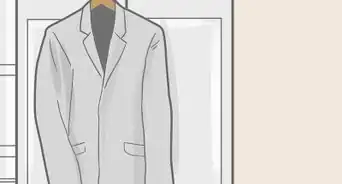
You love that worn-out denim jacket you’ve had for a decade, but you’re wondering if it needs a little pizzazz to give it new life. An iron-on patch is an easy, affordable solution to add your personal aesthetic to any piece of clothing or to cover up small holes and tears, too. In this article, we’ll show you step-by-step how to prep your garment and iron on a patch that lasts so you can rock your design for years to come. Let’s get started while the iron’s hot!
Things You Should Know
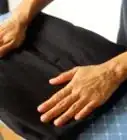
- Lay your garment flat on an ironing board, then position your patch in the exact spot you want it to stick to.
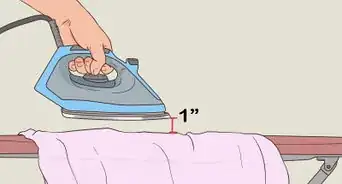
- Cover the patch with a thin cloth, then iron it with the highest heat the fabric can take for 30-60 seconds (check the iron icon on the tag for max heat info).
- Flip over the garment and iron the backside of the patch for another 30 seconds. Once the patch cools, it’s ready to wear!
Steps


Community Q&A
-
QuestionCan you put iron on patches in the wash?
 wikiHow Staff EditorThis answer was written by one of our trained team of researchers who validated it for accuracy and comprehensiveness.
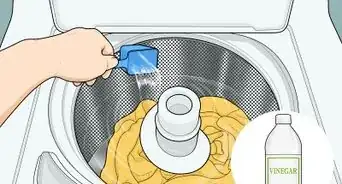
Staff AnswerwikiHow Staff EditorStaff AnswerWhile you can wash items that have iron-on patches properly attached, care must be taken. Only wash in cold to lukewarm water and where possible, hand wash the item. If washing in the machine, only use the gentle cycle. Always turn the garment with the iron-on patch inside out when washing it. Try to keep washing to a minimum, to preserve the patch and if its edges fray a lot, you may need to trim them or even stitch them back down. It is also a good idea to read the iron-on patch manufacturer’s instructions regarding washing, as this may vary from brand to brand. -
QuestionCan I iron a patch onto a luggage case?wikiHow Staff EditorThis answer was written by one of our trained team of researchers who validated it for accuracy and comprehensiveness.
Staff AnswerwikiHow Staff EditorStaff AnswerPatches can be added to luggage cases but whether or not it can be ironed in place depends on the material from which the luggage case is made. Fabric luggage cases should be fine for ironing on patches. However, leather baggage cases will require the patches to be sewn or glued on, as heat should not be applied to leather. For synthetic cases (rayon, nylon, etc.), heat will usually cause the material to melt, so it is not advised to iron on patches to such luggage. Always check the material on the case with its ironing suitability before deciding what to do. -
QuestionCan you use a hair straightener to iron on a patch?wikiHow Staff EditorThis answer was written by one of our trained team of researchers who validated it for accuracy and comprehensiveness.
Staff AnswerwikiHow Staff EditorStaff AnswerYou can use a hair straightener to seal an iron-on patch; it’s usually easier and faster than using a standard iron. You’ll need to warm it up first, position the iron patch where you want it, then clamp the warmed hair straightener over the patch on the fabric. Hold in place for about 30 to 60 seconds. Since the hair straightener is unlikely to be wide enough for all of the patch, you’ll need to move it around until all is sealed onto the fabric, each time holding the hair straightener in position for 30 to 60 seconds. If you’re concerned about the patch glue getting onto the hair straightener, fold foil around the straightener sides before heating, and remove when cooled down after use.
Warnings
- Wash the garment or accessory as little as possible to preserve the patch. Hand wash and air dry if possible. If not, turn the garment inside out and machine wash in cold water, then air dry.[15]⧼thumbs_response⧽
References
- ↑ https://www.southernliving.com/home/cleaning-and-housekeeping/laundry-symbols-meaning
- ↑ https://diymelon.com/do-iron-on-patches-come-off-in-wash/
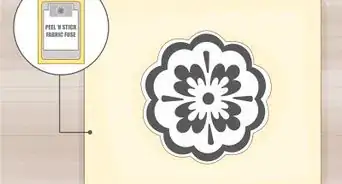
- ↑ https://www.brit.co/embroidered-patch-ideas/
- ↑ https://youtu.be/QdDnC1yEudw?t=44
- ↑ https://youtu.be/VrMDkaykbzg?t=41
- ↑ https://sewingmachinebuffs.com/how-to-iron-on-patches-without-an-iron/
- ↑ https://youtu.be/IfoOsla5-BY?t=17
- ↑ https://youtu.be/IfoOsla5-BY?t=19
- ↑ https://youtu.be/IfoOsla5-BY?t=31
About This Article

To iron on a patch, spread your garment or another fabric item on an ironing board. Peel the backing off of the patch and position it on the item, then cover it with a piece of parchment paper or thin cloth. Set your iron to the hottest temperature that’s safe for the garment and let it warm up. Move the iron over the patch while applying firm pressure for 30 to 60 seconds. Flip the garment over and iron the patched area from behind for another 30 seconds. For tips on how to wash an item with ironed-on patches, read on!