This article was written by Cory Ryan and by wikiHow staff writer, Danielle Blinka, MA, MPA. Cory Ryan is a Professional Wedding Photographer who runs Cory Ryan Photography based in Austin, Texas. She has over 15 years of photography experience and specializes in weddings and events. Her work has been featured in publications such as The Knot, Style Me Pretty, and Junebug Weddings. She received a BA in Media Production and Broadcast Journalism from the University of North Carolina - Chapel Hill.
There are 10 references cited in this article, which can be found at the bottom of the page.
This article has been viewed 2,694 times.
Ready to start making money taking photos? Being a real estate photographer is one of the easiest ways to rake in the dough as a photographer. Getting started is simple, and we’re here to walk you step-by-step through setting up a successful photography business. We’ll have you snapping photos in no time!
This article is based on an interview with our professional wedding photographer, Cory Ryan. Check out the full interview here.
Things You Should Know
- Improve your photography skills by taking photos, attending photography classes, watching online tutorials, or assisting a photographer.
- Stage the property before you photograph it, and position the camera at waist height for the perfect shot.
- Get a business license, and market yourself with a digital portfolio, business cards, and social media.
- Offer your services to real estate agents, property sellers, home builders, and interior decorators.
Steps
Building Your Skills
-
1Practice photographing homes and businesses. As a real estate photographer, it’s your job to make properties look enticing to potential buyers or renters. Additionally, you might do photoshoots for interior decorators who want to create a portfolio of their work. Start by taking pictures of your home and your friends' houses. Then, offer your services to local realtors to help you build up a portfolio.[1]
- You can also photograph businesses, usually without asking. It’s a good idea to bring along some business cards, though, in case someone asks what you’re doing.
-
2Take a photography class. You don’t need a degree to be a photographer, but you do need good photography skills. Luckily, you can find lots of classes online, sometimes for free. Complete a few classes to help you get the skills you’ll need to be a professional real estate photographer.[2]
- Try edx.org for free photography classes. You could take Digital Photography with the University of Cape Town.
- Skillshare is also a great option, but you’ll have to pay a membership fee after your free trial. You could take Real Estate Photography: How to Get Started, Real Estate Photography Masterclass, and Real Estate Photography 101.
Advertisement -
3Watch online tutorials. Take advantage of all the great photography tips you can get for free. Focus on tutorials that specifically talk about real estate photography so you build the right skills. Your bread-and-butter will be great pics of homes and buildings, so you don’t really need to know how to take a great portrait.
- YouTube is the go-to for tutorials.
- You might try Real Estate Photography Basics, How to Shoot Real Estate Photography, and How to Shoot Professional Real Estate Photography.
-
4Work with a professional photographer. Get your skills on the job by assisting a professional real estate photographer. They can offer you tips and advice, and you’ll be able to see what they actually do on the job. Contact local photographers, or reach out to one in a nearby city. Give them a list of dates you’re available so they’re more likely to say “yes.”
- Do a job shadow: Follow a professional photographer to watch what they do on a shoot.
- Be a second shot: Go to a shoot with a professional photographer and take your own set of photos so the client has more options.
- Intern: Be an apprentice to a professional photographer so you can learn from them.
-
5Rent or buy professional photography equipment. You’ll feel like a pro with a fancy camera in your hands. Along with your camera, you’ll need a couple of accessories to get you started. If you’re not ready to invest in your business, rent your equipment until you know for sure what you want to buy. You’ll need:
- DSLR Camera (alternative): DSLR cameras allow you to take professional photos with various lenses. Once you pick your camera base, you can switch out lenses and flashes to fit your needs.
- Mirrorless Camera (alternative): Mirrorless cameras are lightweight, quiet, and modern. They’re new technology, so they’re more expensive than DSLR cameras.
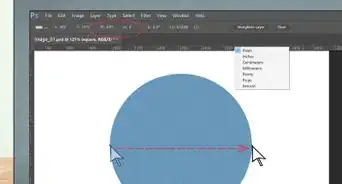
- Wide-Angle Lenses: Pick a wide-angle lens that has zoom so it’s easier to photograph tight spaces inside the properties you shoot. For most rooms, you’ll use a 24 mm lens, but get a 14 mm to 16 mm lens for small spaces and a 35 mm lens if you want to shoot fine details.[3]
- Tripod: A tripod keeps your camera steady so you can take perfect exterior and interior photos.
- Memory Cards: Get 2 or 3 memory cards with a storage capacity of at least 64 GB.
-
6Learn how to use editing software. A little editing will take your photos to the next level, helping you earn those dollar bills. Download a photo editing program and practice editing your photos. Use online tutorials to help you master the program you pick. With a little practice, you’ll be a pro in no time. Here are the best editing programs for real estate photographers:[4]
- Adobe Lightroom
- Adobe Photoshop Elements
- Photomatrix Pro 6
- Aurora HDR
-
7Improve your administration skills for the business side of photography. As a professional real estate photographer, you’ll be talking to clients and scheduling photo shoots. To make sure you meet deadlines, you’ll also need good time-management skills. Check out these handy guides to improve these office skills:[5]


Taking Professional Photos
-
1Make a shot list for your photo shoot. Your shot list includes the pictures you plan to take so that your photo shoot is successful. Start off your list by writing down everything you need to photograph. Then, write down any special property features you want to capture. Once you have an outline, talk to your client about what they want so they’ll be happy with your photos.[6] Your shot list might look like this:
- Exterior: front yard, back yard, patio.
- Living room: Wall-to-wall, fireplace.
- Kitchen: Wall-to-wall, appliance close-up.
- Hallway bathroom: Doorway shot, bathtub.
- Master bedroom: Wall-to-wall, walk-in closet, window seat.
- Master bathroom: Wall-to-wall, shower close-up.
- Bedroom 2: Wall-to-wall, closet.
- Bedroom 3: Wall-to-wall, closet.
-
2Stage the room if your client hasn’t already done so. Your job will usually be really easy because realtors often have a home stager set up the property. If they haven’t, taking a few minutes to tidy the room will help you take stellar shots. Start by removing any clutter and personal items so the room looks welcoming to potential buyers. Then, arrange the room so it looks really inviting.[7]
- Personal items like family photos make it hard for buyers to imagine themselves living there, so always move them out of your photos.
- Hopefully, the room will already be clean. If you notice any dirt or dust, it’s best to wipe it up so it won’t show up in your pictures.
-
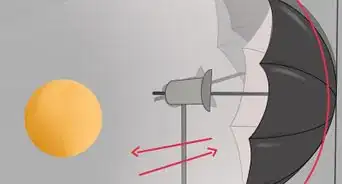
3Attach your camera flash for interior shots. As a real estate photographer, you’ll be shooting photos in lots of different light levels. Using a flash gives you the extra light you need to capture the perfect image in low-light areas.
- You may not need your flash for all of your photos.
-
4Position your camera on the tripod at waist-height. When you’re photographing properties, you want the rooms to look balanced. Holding your camera at your eye level actually distorts the dimensions a little, but you can fix that by lowering your tripod.[8]
- If you photograph special details around the property, like a stone shower, you might decide it’s best to alter the camera angle.
-
5Adjust your camera settings. You’ll take better pictures if you manually choose your camera settings. For more flexibility, set your camera’s mode to M or AV. Then, set your aperture to f/8 and change the ISO setting to 400. For bright rooms, use a matrix metering mode, but go with a spot metering mode in low-light.[9]
- You might take some test photos to figure out which settings work best on your particular camera.
-
6Photograph the property. Start by taking 3 to 5 exterior photos, including the front yard, the backyard, and any outdoor living spaces. Then, go inside to photograph all of the rooms. At a minimum, take 2 wide-angle photos in each room, corner-to-corner on each side. Then, go back and take close-ups of any special features inside the home, like a clawfoot tub or a brick fireplace.[10]
- It’s better to take more photos than you think you’ll need. You can always delete the pictures that don’t work.
-
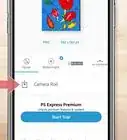
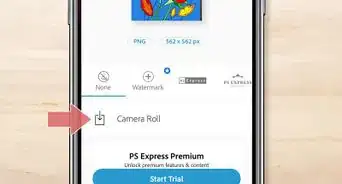
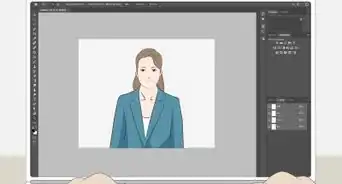
7Edit your photos to enhance them. Good photographers edit their photos to create the best image possible. Tweak your photos until you’re happy with the final result. Then, send them off to your client so you can close out the job.
- Chances are, you’ll use the same editing tricks over and over again. Pay attention to what seems to work for you so you can save time on editing in the future.


Setting Up Your Business
-
1Get a business license. As a professional photographer, you’ll need a business license to sell your services. Contact your local Licensing and Regulation department to get started. In the United States, this is usually at the state level.[11]
- For instance, in Texas, you can apply for a business license on the Texas Department of Licensing and Regulation website.
-
2Create an online portfolio. Choose your best photos to include on your website, even if you have to spend a lot of time editing each one. Try to include photos from different properties so clients think you’ve done a lot of jobs. To really catch people’s eye, try to appeal to people’s emotions. As a real estate photographer, you might include photos like these:
- A cozy kitchen with coffee cups and a plate of cookies sitting on the counter.
- A dining room with the table set for dinner.
- A kid’s room with a cute stuffie resting on the bed.
- A photo of the front door with a welcome wreath on the door.
-
3Print business cards. Handing out business cards is a great way to get your name out there. Plus, it shows everyone that you’re a total pro. Make your own business cards or order them from a printing service.[12]
- Carry your business cards everywhere because you never know when you’ll meet a potential client or business contact.
-
4Create a pricing guide. Being a photographer is fun, but it’s also work. Value your time and effort because you deserve to be paid well. To figure out how much you need to charge, calculate your costs for doing the shoot and how many hours it’ll take. Set your prices high enough that you make a profit on each job.
- When you first get started, you could base your rates on the size of the property. You might charge $75 per 500 square feet for easy calculations. A 1,500 square foot house would cost $225, while a 3,000 square foot house would cost $450.[13]
- According to the U.S. Bureau of Labor Statistics, photographers made an average of $38,950 in 2021, or about $18.73 per hour.[14]
- Your costs might include a memory card to store the photos, camera rental fees, and gas or transit fare to get to the shoot.
- Keep track of your expenses and profits for your first few jobs. If you’re not making enough money, go ahead and raise your prices. Don’t sell yourself short!
-
5Market your photography business. Selling yourself to clients is a big part of running your own photography business. In addition to your online portfolio, use social media to help you connect with clients. Share photos you’ve taken, post dates you’re available for shoots, and write about the services you offer. Create pages for your photography business on:[15]


Getting Clients
-
1Call realtors or sellers to see if they need a photographer. To find people who need your services, check out local real estate listings. Look for postings that have bad photos or minimal photos attached to them. Contact the realtor or seller to offer your services.[16]
- “I saw your listing on Zillow and would love to take some professional shots to help you sell the property faster. My fees are very competitive, and I could get the photos to you within 24 hours. Call me at 555-5555 to schedule the shoot.”
-
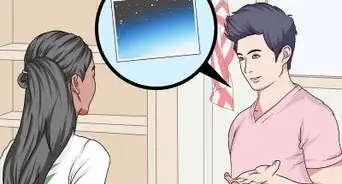
2Offer your services to realtors, home builders, and decorators. As a real estate photographer, you’ll take photos for more than just home listings. You can also do marketing shoots for property developers and home interior decorators. Contact local professionals in your area to pitch your services.
- “Your property listings are so well-written, but I think a new set of photos could help you sell these homes faster. I’m a real estate photographer, and I’d love to set up a shoot sometime soon.”
- “I’m a real estate photographer, and I’ve seen your work around town. Would you be interested in hiring me to take some promotional shots that you could use for your website or social media?”
- “I love scrolling through the photos of homes you’ve decorated. Have you ever thought of hiring a professional photographer to help you build your portfolio? I have some openings soon if you’re interested.”
-
3Go to networking events in your area. You can meet tons of potential clients when you network. To expand your professional circle, set a goal to talk to at least 5 new people each week. Additionally, attend a local photographer meetup to talk to other professionals. Be sure to bring your business cards to hand out.[17]
- Check meetup.com and Facebook groups for photographer groups near you.
-
4Ask prior clients and vendors to refer people to you. Word of mouth is often the best marketing you can get. After you finish a job, check in with your client to make sure they love your work. Then, ask them to tell other realtors, property owners, or designers about you. You might even give them a stack of your cards to hand out.
- “I’m so happy you love the photos. If you have a friend who needs a photographer, I’d appreciate a referral.”
- “I’m glad I could help. If you love my work, I’d appreciate it if you'll share my business cards with your contacts.”


References
- ↑ https://1kcreatives.com/how-do-i-become-a-real-estate-photographer/
- ↑ https://www.bls.gov/ooh/media-and-communication/photographers.htm
- ↑ https://1kcreatives.com/how-do-i-become-a-real-estate-photographer/
- ↑ https://photographyforrealestate.net/best-hdr-software-real-estate-photography/
- ↑ https://www.tipsforrealestatephotography.com/marketing/13-things-every-real-estate-photography-business-needs-to-grow/
- ↑ https://www.nyip.edu/photo-articles/business/how-to-work-with-clients-to-create-a-shot-list
- ↑ https://1kcreatives.com/how-do-i-become-a-real-estate-photographer/
- ↑ https://1kcreatives.com/how-do-i-become-a-real-estate-photographer/
- ↑ https://www.styldod.com/blog/best-camera-setup-real-estate-photography
- ↑ https://1kcreatives.com/how-do-i-become-a-real-estate-photographer/
- ↑ https://www.nerdwallet.com/article/small-business/how-to-start-a-photography-business
- ↑ https://www.entrepreneur.com/growing-a-business/meeting-new-clients-and-contacts-through-networking/225777
- ↑ https://photographyforrealestate.net/my-formula-for-pricing-real-estate-photography-2/
- ↑ https://www.bls.gov/ooh/media-and-communication/photographers.htm
- ↑ https://www.inc.com/dakota-shane/how-often-you-should-post-on-social-media-according-to-10-studies.html
- ↑ https://1kcreatives.com/how-do-i-become-a-real-estate-photographer/
- ↑ https://www.entrepreneur.com/growing-a-business/meeting-new-clients-and-contacts-through-networking/225777
About This Article