This article was co-authored by Amy Harrison, a trusted member of wikiHow's volunteer community. Amy Harrison has over five years of experience working directly with poultry. She has worked on a rural chicken farm built around marketing free-range eggs, where she managed the care for the poultry year-round. She has experience breeding chickens and quail, caring for newborn poultry, handling their health issues, and managing their dietary needs.
This article has been viewed 31,136 times.
Learn more...
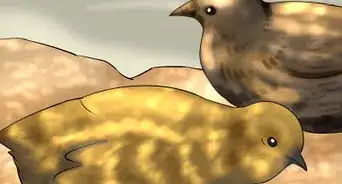
Quails can sometimes get dirty from time to time, considering they are ground-dwelling birds. Although the likelihood that you will need to bathe your quail is slim (as they are capable of keeping themselves clean), you might have to step in to help your quail keep clean. This article will teach you how to bathe your quail.
Steps
Deciding on Bathing Your Quail
-
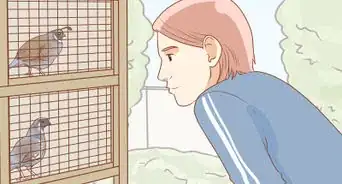
1Decide whether you need to bathe your quail. You should only ever bathe an animal if they need to be bathed. Constant cleaning is unhealthy and dangerous for any kind of pet. Their immunity levels can lower and certain chemicals in shampoos and soaps can irritate and dry their skin.
- If your quail desperately needs to be washed, or if advised by an avian vet, you can decide that it is necessary to bathe your bird.
-
2Understand the risks associated with bathing your quail. It's good to be knowledgeable on what can go wrong when you decide to clean your quail. Your bird's immunity levels lower when soaked with water, making them more prone to illnesses such as a cold, and they could also accidentally inhale the water. Soaps and shampoos can also irritate and dry out your quail's skin and get rid of the important oils on their feathers.
- This is why you shouldn't randomly decide your quail needs a bath when they actually don't. If your quail seems smelly to you, there's usually nothing to be concerned about and it's a poor reason to bathe your bird.
Advertisement -
3Determine what the substance is that you need to clean off. Is it dirt or gum? If it is a tougher substance that won't easily come off, you will need to seek a vet for help. Coarse scrubbing in an attempt to get it off will harm your quail's feathers.
-
4Examine your quail's physical state. You should never attempt to bathe a quail that is weak or ill. If you attempt to bathe an already unhealthy quail, you will put them in a life-threatening position. You need to seek veterinary care to help your quail get better.


Bathing Your Quail
-
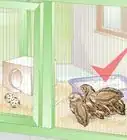
1Place your quail inside a warm room. You should bathe your quail in a warm area free from drafts. Alternatively, turn a heater on until the room has warmed up to a fair temperature. Never attempt to bathe a quail in the cold. They are prone to sickness this way.
- A bathroom is not ideal as the tiles make the room a lot colder. Unless you can find a heater that will easily heat the room, then don't use the bathroom. Instead, use a warm living room or bedroom.
-
2Get rid of other pets and threats. The room should be a safe and secure space for your quail. They should feel calm in their surroundings. If there is a chance your quail suddenly escapes, will they be safe in the room?
- Remove other pets from the room. Even a friendly animal can scare a small quail. Cats and dogs should be removed from the premises and so should other noisy birds such as budgies.
- Ensure there are no small children in the room. You may be using objects to preen your guinea pigs that shouldn't be touched by young children.
- Close all windows, doors and ensure the room is draft-free. Quails are more prone to illness if cold air can get into the room.
-
3Use a damp flannel or sponge to clean your quail. Before you attempt to give your quail a bath, you can always try to get rid of any dirt on your quail with a damp flannel or sponge. If this step doesn't work, move onto bathing your quail.
-
4Fill a shallow bucket with lukewarm water. The water should come up to the halfway length of your quail's body but not too deep. Be cautious with the water as your quail can easily inhale it.
-
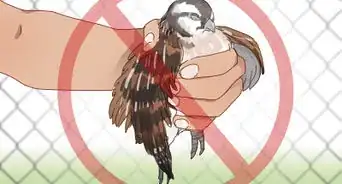
5Firmly hold your quail and slowly place them in the water. Cup both hands over your quail's body and slowly place them in the lukewarm water. Use one hand to continue firmly holding the quail and your other to wipe away any dirty substances stuck to your quail. The water alone should clean any dirt on your quail.
-
6Refrain from using soap unless necessary. The chemicals in soaps and shampoos can irritate your quail's skin and remove important oils on their feathers, thus leading to dry and irritated skin.
- If the dirt isn't coming off with plain water, consider using a safe, gentle soap to remove it. Gently scrub the dirt with your finger and a slight drop of soap. A tiny drop of baby shampoo should be safe to use.
-
7Never wash your quail's face or ear region. These should be kept dry and away from the water. If you attempt to wash your quail's face and ear region, they are prone to inhaling water and irritating their eyes, nose, and ears. If there is dirt stuck to your quail's face, contact a vet for professional advice.
-
8Gently wrap the quail in a warm towel. Wrap the body of your quail, leaving their head exposed, and allow them to sit in the towel. Gentle blot away at your quail's feathers, partially drying them. Stroke along the feathers.
- Remember that at this stage, you should ensure that your quail is kept warm in a heated room.
- A blow dryer can be used to attempt to dry the quail's feathers, but it's not recommended as the heat can be too hot and stressful for your bird.
-
9Leave your quail in the towel to air dry. Your quail should be happily sitting in the towel. Not all the water can be dried through using a towel, so you will need to allow the quail to air-dry and preen itself as it does. Your quail should stay indoors until fully dry.
-
10Clip the wing feathers. Wing clipping isn't necessary, it can help prevent your quail from flying away or out of their cage. Get a friend to firmly hold the quail and then spread out their wing. Clip the tips of the flight feathers on both wings. Avoid cutting too close to the bone area.
- Wing clipping is an easy process, but if you're a little unsteady, you can always book an appointment with a bird groomer or veterinarian, especially if your bird is jumpy.
-
11Trim your quail's nails. Overgrown nails will need to be filed back or cut down. Take the opportunity to trim them now. You will need sharp nail clippers and watch out to not cut the quick. The quick is the red bloodline that is visible in the nail.
-
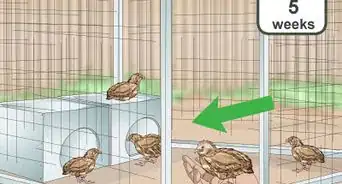
12Return your quail to their cage. Once dry and clean, your quail should be ready to be returned home. Avoid returning your quail to a dirty cage. Make sure he/she won't get dirty all over again by being returned. Never return a wet quail that hasn't fully dried yet.


Preventing Your Quail from Getting Dirty Again
-
1Take the opportunity to clean your quail's pen. If dirty, you should opt towards cleaning the housing of your quail to keep them clean. It will benefit both you and your bird. Whilst the quail is currently not in their home, quickly clean it up.
- If you're using water to clean their home, do not place your quail back inside until both they and their housing are dry.
-
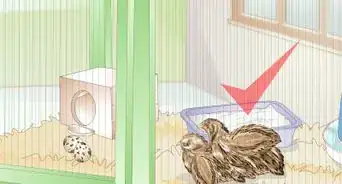
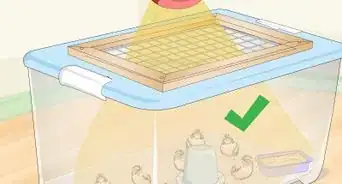
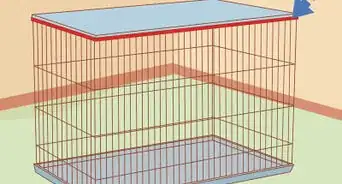
2Consider their type of housing. A large guinea pig cage is adequate for quails as it has a solid and clean bottom. In most cases they can be a lot cleaner than pens which are housed on the garden floor. Keep note of a few factors that will determine your quail's living conditions.
- A small cage will quickly get dirty compared to one with plenty of space to roam.
- Of course, placing your quail's pen on dirt will only set yourself up for failure. When winter time rolls in, that dirt will turn into wet mud. Grass or a solid floor bottom would be a cleaner option.
-
3Spot clean. Spot cleaning is a term used when you clean little patches of dirt around the cage daily. This can be sweeping up a pile of droppings or soiled bedding and rinsing the food and water dishes each day. Spot cleaning can be effective in making their cage stay clean and their bedding last.
-
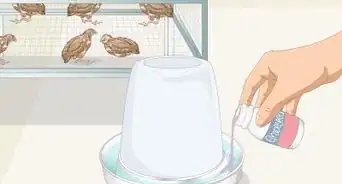
4Disinfect the cage at least every two weeks. It's important that you perform a deep clean at least fortnightly as quails can make a lot of mess. Disinfect all around the cage including their water and food dishes. Add new bedding and sweep up the droppings.
-
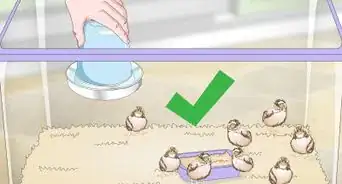
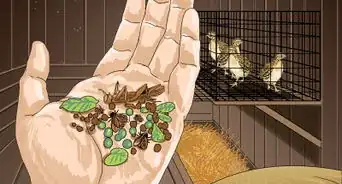
5Allow for dust-bathing. Dust-bathing is your quail's way of keeping clean and grooming themselves naturally. Provide them with a shallow tub or dry dirt or sand and they will be encouraged to dust bathe. It's great for their feathers and health!


Community Q&A
-
QuestionDo I pour the dust on them or just leave them to do it alone?
 Community AnswerYou can just place the dust in an area that your quail can access and let them bathe themselves.
 -
QuestionHow old does my baby quail have to be to bathe?
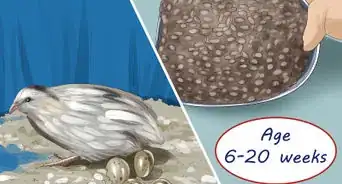
 Amy HarrisonTop AnswererYour quails should be at an age where they have all of their feathers, so approximately 4 - 6 weeks. Young quail don't have a high immunity. It's also unnecessary to bathe quail unless they have a really tough substance on their feathering, as they can keep themselves clean.
 -
QuestionHow do I remove thicker dirt without hurting it?Amy HarrisonTop AnswererIf you struggle to remove the substance, then it is recommended to see a vet. They might be able to cut the feathers or clean the dirt off themselves in a manner that won't hurt the quail.
Warnings
- Avoid contact with water around the face and beak. Your quail can easily inhale water.⧼thumbs_response⧽
- Some soaps will completely rid your quail from the natural oils in their feathers and skin - thus drying and irritating it. Refrain from using any sort of shampoo or soap.⧼thumbs_response⧽
- Never return your quail back to their cage still wet. They are prone to illness and catching a cold.⧼thumbs_response⧽