This article was co-authored by Matthew Rava and by wikiHow staff writer, Hannah Madden. Matthew Rava is an Auto Repair Expert and the Co-founder & Head of Marketing of Brakes to You. He specializes in auto repairs that concern brakes. Matthew earned a BS from West Chester University of Pennsylvania.
There are 12 references cited in this article, which can be found at the bottom of the page.
wikiHow marks an article as reader-approved once it receives enough positive feedback. In this case, several readers have written to tell us that this article was helpful to them, earning it our reader-approved status.
This article has been viewed 339,086 times.
Are your brakes feeling soft, spongy, or less responsive than usual? This could be due to air in the brake lines. Bleeding your brakes gets rid of any air in the line, leading to a smoother, easier stop. In this article, we’ll walk you through the process of bleeding your brakes so you can do it yourself safely. Keep in mind that bleeding your brakes incorrectly could lead to unresponsive brakes, which is very dangerous. If you do not have mechanical experience or if you have a newer vehicle or one with an anti-lock brake system (ABS), have a professional mechanic bleed your brakes.
Steps
Safety Information
-
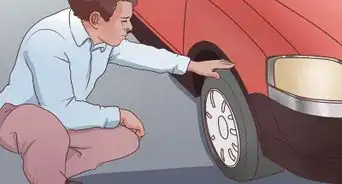
1Get your car inspected if the pedal is spongy. A spongy brake pedal could mean that your brake pad has worn thin, leading to a low level of brake fluid. When the brake fluid gets low, it introduces air into the line that can make your brake pedal feel springy. If you’re not a car expert, take your car to a mechanic to get inspected before you attempt to bleed the brake lines.[1]
- In general, brake lines need to be bled every 2 to 3 years.
- A spongy or sinking brake pedal can also be caused by a hydraulic problem, like a failing master cylinder, a leaking rear wheel cylinder, a bad caliper or bad ABS. It’s important to rule out these dangerous possibilities via professional inspection before proceeding.
-
2Consult your owner’s manual before starting. Your specific vehicle may have a different process for bleeding the brake lines. Before you start, always consult your owner’s manual to see if there are any instructions you need to follow.[2]
- Always consult the owner’s manual before buying brake fluid, since different vehicles need different types.
- You cannot bleed the brakes yourself on newer vehicles that have an anti-lock brake system (ABS). If your vehicle has ABS, you need a scan tool to electronically bleed the brakes, so take your vehicle to a reputable mechanic.
Advertisement -
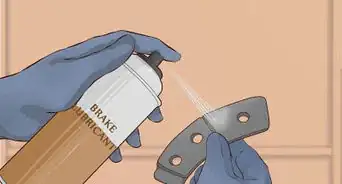
3Wear gloves and safety goggles when handling brake fluid. Brake fluid is corrosive, and it can cause skin and eye irritation. Since you’ll be handling a lot of brake fluid throughout this process, be sure you wear gloves and safety goggles the entire time.[3]
-
4Call a friend to help you bleed the brakes. Bleeding brake lines is typically a 2-person job. Before you start, make sure you have a friend nearby who can help you out. All they’ll need to do is press down on the brake pedal when you tell them to.[4]


Preparing Your Vehicle
-
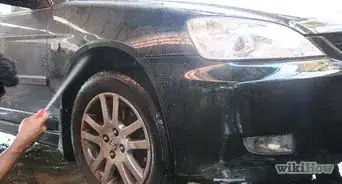
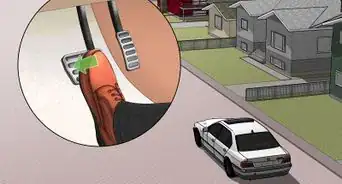
1Turn the engine off and keep the car off throughout the process. It’s important to keep yourself safe while bleeding your brake lines. Before you start, turn off your engine and leave your vehicle off.[5]
-
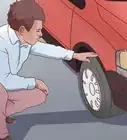
2Jack up your car and remove the wheels. Make sure your car is on solid, flat ground. Use 2 jacks on either side of the car to lift the car up into the air. Once your car is raised, remove the hubcaps and then remove all 4 wheels.[6]
-
3Release the hood and locate the master cylinder brake fluid reservoir. It's a fist size (or larger) transparent container that is bolted to the firewall on the driver’s side of the car. You can find it by looking for the threaded cap on the very top.[7]
- The master cylinder is usually easy to access—in most vehicles, it’s near the top of the engine.
-
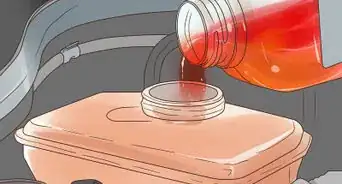
4Remove most of the fluid from the master cylinder. Clean the cylinder with a paper towel before uncapping it to remove most of the dirt and grime. Take the cap off the master cylinder and grab a turkey baster. Siphon most of the brake fluid out of the cylinder, leaving only about 1 in (2.5 cm) of fluid to cover the bottom.[8]
- Brake fluid is corrosive and can eat through the paint on your car. If any spills, clean it up with a rag right away.
-
5


Bleeding the Lines
-
1Start with the wheel furthest from the master cylinder. Usually, this is the right rear wheel. While it’s not incredibly important which order you go in, starting with the furthest wheel helps you remember which lines you’ve bled and which ones you haven’t yet.[10]
- Work your way back toward the driver’s side, going right rear, left rear, right front, left front.
-
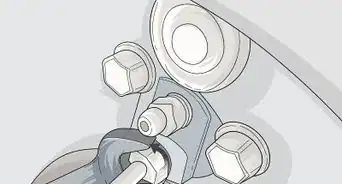
2Loosen the bleeder screw with a wrench. The bleeder screw is on top of the caliper, or the drum brake wheel cylinder, where your wheel would normally be. You can find it by looking for the small rubber cap on top. Grab a standard wrench and carefully twist the screw a half turn to loosen it, but don’t open it up all the way just yet.[11]
-
3Slide a bleeder hose onto the bleeder screw. Remove the rubber cap from the bleeder screw. Grab a bleeder hose, which is a plastic hose, and slide one end onto the bleeder screw. Point the other end into an empty plastic bottle.[12]
- Any plastic bottle will do, such as a water or soda bottle. Just make sure you can throw the bottle away when you’re done, since it will be holding your waste brake fluid.
-
4Turn the wrench to open the valve. Grab your wrench again and place it on the bleeder screw. Twist it counterclockwise to open the bleeder valve. You’ll notice almost immediately that the hose fills up with fluid and starts pumping into your empty plastic bottle.[13]
- Remember, brake fluid is corrosive. If any spills throughout this process, clean it up right away.
-
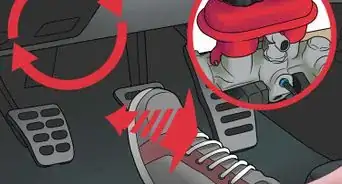
5Have a friend press down on the brakes inside the car. Grab a buddy and have them sit in the car while you work. After you’ve opened the bleeder valve, have them press down on the brake pedal as hard as they can. You’ll notice that more brake fluid gets pushed into the hose as they do this.[14]
-
6Close the bleeder valve with the wrench. While your friend has the brake pedal pressed down to the floor, turn the wrench clockwise to close the bleeder valve again. Be sure that your friend keeps the brakes pressed to the floor the entire time.[15]
-
7Have your friend pump the brakes inside the car. Pumping the brakes refills the master cylinder with brake fluid. While the bleeder valve is still closed, ask your friend to pump the brake up and down 2 to 3 times.
-
8Open the valve again. Tell your friend to stop pumping the brakes, then turn the wrench counterclockwise to open the valve again. This will force more fluid into the hose and the plastic bottle.[16]
-
9Ask your friend to press down on the brakes again. Once the valve is opened back up, tell your friend to push the brake pedal all the way down to the floor again. Have them keep steady pressure until you notice the stream of brake fluid slowing down.[17]
-
10Continue until there is no more air in the bleeder hose. You may have to do this process (opening the valve, having a friend press the brakes, closing the valve, and pumping the brakes) 4 to 5 more times. Keep an eye on the hose leading into the plastic bottle. Once there are no more air bubbles, this brake line has been fully bled.[18]
- You’ll also notice the brake fluid turn from dark to clear. This is a good sign, and it means that new brake fluid is being forced through the system.
-
11Close the bleeder valve and remove the hose. Turn the wrench clockwise to close the bleeder valve. Then, pop off the hose and remove it from the bleeder valve.[19]
-
12Fill the master cylinder with more brake fluid. Never let the master cylinder get more than halfway empty. Once you’re done with one brake line, check out the master cylinder and top it off to the fill line again.[20]
-
13Bleed the brakes from all 4 bleeder valves on your car. Now that you’ve bled the right rear line, head over to the left rear line and repeat the entire process again. Then, bleed both front lines, and don’t forget to refill your master cylinder every time.[21]
-
14Fill the master cylinder and cap it off. Once all 4 lines have been bled, head back to the master cylinder and add more brake fluid to fill it up. Put the cap back on and then close your hood, because you’re done bleeding the brakes!


Cleaning Up
-
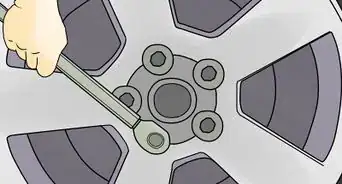
1Put the wheels back on your car. While your car is still lifted, slide the wheels back onto the stud bolts of the car. Slide the lug nuts back onto the bolts and tighten them by hand, then use a lug wrench to tighten each nut as much as you can. Once you lower the car back down, use the lug wrench to tighten each nut one more time.[22]
-
2Lower your car down from the jacks and tighten the lug nuts. Slowly twist each jack on either side of your car to lower your car to the ground. When your wheels are just barely touching the ground, grab your lug wrench and use it to tighten all of the nuts one more time. Then, lower the jacks all the way and remove them from underneath your car.[23]
- Once the jacks are out from underneath the car, you can put your hubcaps back on.
-
3Dispose of the old brake fluid by pouring it into kitty litter. Brake fluid is both toxic and flammable, so it can’t go into the regular garbage or be poured down a drain. Instead, fill a paint tray with kitty litter, then pour the old brake fluid into the litter. Leave the kitty litter uncovered for a couple of days to let the litter absorb the brake fluid, then throw the litter into the trash.[24]
- Some states and counties may require you to take old brake fluid to a hazardous waste facility, even if you’ve poured it into kitty litter. Check your local laws to make sure.
-
4Test your brakes to make sure they work. Bleeding brake lines incorrectly can lead to unresponsive brakes. Before you take your car out again, test your brakes on a flat, level surface to make sure they work. Your brake pedal should feel strong and responsive, not soft and spongy.[25]
- If your brakes still feel soft and spongy or if you notice any problems after bleeding them, have your car towed to a mechanic shop. There’s a chance they might need to be bled again, or your vehicle has a different brake problem that needs to be fixed.


Warnings
- Bleeding your brakes incorrectly can lead to unresponsive brakes, which is incredibly dangerous. If you are not qualified to bleed your brakes on your own, take your car to a mechanic.⧼thumbs_response⧽
Things You'll Need
- Jack stands
- Turkey baster
- Wrench
- Brake fluid
- Bleeder hose
- Disposable waste container
- Soft cloth

References
- ↑ https://centricparts.com/getmedia/706cc24c-0466-4d28-9e1d-7b54d9ec66a4/Centric_and_APC_Technical_Whitepaper_C7-How-to-Bleed-Brakes-8-2018_1.pdf
- ↑ https://www.popularmechanics.com/cars/how-to/a1495/how-to-bleed-brakes/
- ↑ https://www.poison.org/articles/brake-fluid
- ↑ https://www.popularmechanics.com/cars/how-to/a1495/how-to-bleed-brakes/
- ↑ https://centricparts.com/getmedia/706cc24c-0466-4d28-9e1d-7b54d9ec66a4/Centric_and_APC_Technical_Whitepaper_C7-How-to-Bleed-Brakes-8-2018_1.pdf
- ↑ https://www.popularmechanics.com/cars/how-to/a1495/how-to-bleed-brakes/
- ↑ https://centricparts.com/getmedia/706cc24c-0466-4d28-9e1d-7b54d9ec66a4/Centric_and_APC_Technical_Whitepaper_C7-How-to-Bleed-Brakes-8-2018_1.pdf
- ↑ https://www.youtube.com/watch?v=n1NvtUwfRJc&t=121s
- ↑ https://www.popularmechanics.com/cars/how-to/a1495/how-to-bleed-brakes/
- ↑ https://centricparts.com/getmedia/706cc24c-0466-4d28-9e1d-7b54d9ec66a4/Centric_and_APC_Technical_Whitepaper_C7-How-to-Bleed-Brakes-8-2018_1.pdf
- ↑ https://centricparts.com/getmedia/706cc24c-0466-4d28-9e1d-7b54d9ec66a4/Centric_and_APC_Technical_Whitepaper_C7-How-to-Bleed-Brakes-8-2018_1.pdf
- ↑ https://centricparts.com/getmedia/706cc24c-0466-4d28-9e1d-7b54d9ec66a4/Centric_and_APC_Technical_Whitepaper_C7-How-to-Bleed-Brakes-8-2018_1.pdf
- ↑ https://www.youtube.com/watch?v=tl1Q-AhfgjU&t=155s
- ↑ https://www.youtube.com/watch?v=tl1Q-AhfgjU&t=165s
- ↑ https://www.popularmechanics.com/cars/how-to/a1495/how-to-bleed-brakes/
- ↑ https://centricparts.com/getmedia/706cc24c-0466-4d28-9e1d-7b54d9ec66a4/Centric_and_APC_Technical_Whitepaper_C7-How-to-Bleed-Brakes-8-2018_1.pdf
- ↑ https://centricparts.com/getmedia/706cc24c-0466-4d28-9e1d-7b54d9ec66a4/Centric_and_APC_Technical_Whitepaper_C7-How-to-Bleed-Brakes-8-2018_1.pdf
- ↑ https://www.youtube.com/watch?v=n1NvtUwfRJc&t=449s
- ↑ https://centricparts.com/getmedia/706cc24c-0466-4d28-9e1d-7b54d9ec66a4/Centric_and_APC_Technical_Whitepaper_C7-How-to-Bleed-Brakes-8-2018_1.pdf
- ↑ https://www.youtube.com/watch?v=n1NvtUwfRJc&t=485s
- ↑ https://centricparts.com/getmedia/706cc24c-0466-4d28-9e1d-7b54d9ec66a4/Centric_and_APC_Technical_Whitepaper_C7-How-to-Bleed-Brakes-8-2018_1.pdf
- ↑ https://www.youtube.com/watch?v=314HE4aMG-g&t=496s
- ↑ https://www.youtube.com/watch?v=314HE4aMG-g&t=695s
- ↑ https://wasteadvantagemag.com/disposing-of-brake-fluid/
- ↑ https://www.readersdigest.ca/cars/maintenance/how-check-brakes/
About This Article

To bleed brake lines, park the car in a flat spot and engage the emergency brake so that you can drain and replace the brake fluid from the master cylinder reservoir. Then, go to your right rear wheel and loosen the bleeder screw. Let the fluid drain until it runs clear. Then, have someone press the brakes to the floorboard while you close the bleeder screw. Repeat this process three times, making sure you don't run out of brake fluid. For advice from our Mechanic reviewer about how to test your brakes, scroll down!