This article was co-authored by Ndeye Anta Niang. Ndeye Anta Niang is a Hair Stylist, Master Braider, and Founder of AntaBraids, a traveling braiding service based in New York City. Ndeye has over 20 years of experience in African hair including braiding box braids, Senegalese twists, crochet braids, faux dread locs, goddess locs, kinky twists, and lakhass braids. Ndeye was the first female of her tribe in Africa to move to America and is now sharing her knowledge of African braids passed on from generation to generation.
This article has been viewed 206,473 times.
Braiding your hair with thread, also called a hair wrap, is an easy way to add some temporary fun to your hair. All you need is hair long enough to braid, embroidery floss, and an elastic band. Depending on the method you use to secure it, the braid can stay in for as long as you want—from a few hours to a few months. Grab some thread and get to braiding!
Steps
Braiding Your Hair
-
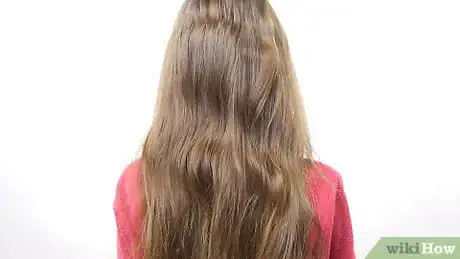
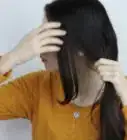
1Comb your hair thoroughly. First, decide where you want the braid. Use a comb to section off a neat square 1–2 centimeter (0.4–0.8 in) across. It's advisable to position the braid a few centimeters away from your parting so that the top will not be visible.[1]
- Make sure to wash your hair with shampoo and conditioner before you start braiding—this helps it to not tangle. If it's still tangled after washing, use a detangler while brushing from the tips to the roots of your hair.
-
2Tie the rest of your hair back with the scrunchie. You can also use a hair band if that’s easier for you. This will make it easier to focus on your braid. As you do this, it’s a good idea to secure any wispy strands around your sectioned hair out of the way with bobby pins.[2]Advertisement
-
3
-
4Make your braid last longer by using an extra hair elastic. If you want your braid to last as long as possible (a few months), take an extra hair elastic and tie it about 1 centimeter (0.4 in) from the top of the plait. Hold the plait flat against your head as you do this, or your braid will stick up in the air. If you only want to keep it a short while, don't use the hair elastic.[4]
Adding the Thread
-
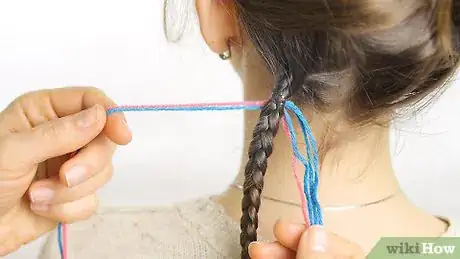
1Hold the 3 strands of embroidery floss by their ends. Pass the ends through the hair above the elastic, or through the top of the plait next to the scalp. Pull them through until the same length of thread hangs on each side.[5]
- The length of the strands depends on the length of your hair. You should use enough floss so that it extends several inches (cm) past your own hair.
-
2Count 6 strands next to your braid. You should now have 6 strands of thread next to your plait. Select 2 (different colors will create a striped effect), pull them to the left of the plait, and smooth the other 4 down next to it.[6]
-
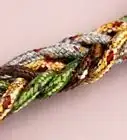
3Begin braiding the threads. Hold them so you can see strand A on the left, strand B in the middle, and the plait with the rest of the thread on the right. Pass B over the plait and bring it back to the middle. Then, pass A underneath B, then over the plait, and into the middle position. Next, pass B underneath A, over the plait, and into the middle position. Repeat these steps until you reach the end of your hair.[7]
- You must wrap the thread as tightly as possible, so that it sits horizontally across the plait, leaving no visible hair.
- You can either stop braiding at the end of your hair, or continue past it, keeping the 4 unused strands on the right hand side.
-
4Add beads to the end if you wish. If you wish to add beads, just slip them over the end of the braid. Then, tie an overhand knot at the bottom of the braid. Make sure it's big enough that the beads won't slip off.[8]
-
5Cut off any excess thread. Make sure not to cut off any hair when you cut off the excess thread. If there’s enough thread left, you can save it for a future craft project.[9]
Removing the Braid
-
1Cut off the thread's knot with scissors. To remove your braid, take a pair of sharp scissors, and cut off the knot. This will cause the thread to fall away from the plait. Then cut off the elastic if used, or just pull the thread away from the top of the hair.[10]
-
2Separate the thread. When undoing the braid, you will need to separate the different bits of thread. You can begin undoing the braid once the strands of thread have been separated. Continue until your braid is completely undone.[11]
-
3Wash your undone hair. This is especially important if your hair has been under the thread for more than a few weeks. First, comb out your hair thoroughly, as it may have become knotted during the unbraiding process. Then, wash, condition, and dry your hair as normal.[12]
Community Q&A
-
QuestionDo I use more colors for longer hair?
 Community AnswerNo, you would just use a longer piece of thread. If you want more colors, just add more thread.
 -
QuestionHow long should the thread for the braid be?
 Community AnswerMake the thread approximately twice the length of your hair.
 -
QuestionHow do I make pretty patterns like the professionals do?
 Community AnswerYou just need to practice you techniques. Take your time and see if you can find internet videos that can give you help.
Warnings
- Be careful when brushing your hair, as the bristles may snag in the braid if it gets in the way.⧼thumbs_response⧽
- If the braid is left in for a long time, your hair will grow at the top, and this is prone to matting. Once you've removed the braid, gently work out the tangles with a comb. Shampooing and conditioning your hair will help with this.⧼thumbs_response⧽
Things You'll Need
- Comb
- Mirror (not hand-held)
- A small hair elastic (snag-free rubber band)
- Hair gel
- Hair scrunchie and kirby grips (or other hair clips)
- Embroidery floss in 3 contrasting colors, cut to 4 times the length of the hair you want to braid
- Scissors
- Beads for the end (optional)
References
- ↑ https://www.youtube.com/watch?v=cIT5niaLPLA&t=1m3s
- ↑ https://www.youtube.com/watch?v=cIT5niaLPLA&t=1m3s
- ↑ https://www.youtube.com/watch?v=cIT5niaLPLA&t=1m5s
- ↑ https://www.youtube.com/watch?v=cIT5niaLPLA&t=1m5s
- ↑ https://www.craftyarncouncil.com/HairWrap.html
- ↑ https://www.craftyarncouncil.com/HairWrap.html
- ↑ https://www.craftyarncouncil.com/HairWrap.html
- ↑ https://www.craftyarncouncil.com/HairWrap.html
- ↑ https://www.craftyarncouncil.com/HairWrap.html
About This Article
Braiding your hair with thread can add some extra color and style to your hair. Start by braiding your hair like normal. Then, tie one hair elastic at the bottom and one at the top of the braid. Pass 3 threads through the top hair tie and pull them down so you have 6 ends that are all even. To braid the thread around your hair, you’ll need to use 2 of the threads as strands and group the other 4 with your braid as a 3rd strand. Hold the strands so you can see strand A on the left, strand B in the middle, and the plait with the rest of the thread on the right. Pass B over the plait and bring it back to the middle. Then, pass A underneath B, then over the plait, and into the middle position. Next, pass B underneath A, over the plait, and into the middle position. Repeat these steps until you reach the end of your hair. Finally, cut off any excess thread and enjoy your gorgeous braid. To learn how to add beads to your braid, read on!
