This article was co-authored by Scott Johnson. Scott Johnson is the Owner and Lead Design Consultant for Concrete Creations, Inc., an award-winning landscape and design company based in the San Diego, California metro area. He has over 30 years of experience in the pool and landscape construction industry and specializes in large estate outdoor environment construction projects. His work has been featured in San Diego Home & Garden Magazine and on Pool Kings TV Show. He earned a BS degree in Construction Management with an emphasis in Architecture and CAD design from Northern Arizona University.
There are 15 references cited in this article, which can be found at the bottom of the page.
wikiHow marks an article as reader-approved once it receives enough positive feedback. In this case, 100% of readers who voted found the article helpful, earning it our reader-approved status.
This article has been viewed 406,524 times.
Koi are beautiful, ornamental fish that can live for a long time in the right conditions. Building your own koi fish pond in your garden can sound like a difficult task, however, with a bit of planning and patience, it won't take too long at all! Plan out the size and depth of the pond first, and then dig the hole and line it with a pond liner. Install all of the necessary equipment such as a filtration system and an aerator to keep the koi happy and healthy.
Steps
Planning out the Pond
-
1Choose a pond that is a minimum of 12 feet (3.7 m) long by 10 feet (3.0 m) wide. This is an ideal and popular size for a backyard, hobby koi fish pond. A pond of this size generally holds 10 mature fish, giving them enough space to thrive and for the pond to not look overcrowded.[1]
- Keep the width of the pond 13 feet (4.0 m) or under, as otherwise, it will be difficult to catch the fish using a net if you need to.
-
2Make your koi pond 3–4 feet (0.91–1.22 m) deep. A good size for a hobby koi pond is 3–4 feet (0.91–1.22 m) deep. Some ponds for koi that are raised for competitions reach a depth of 6–8 feet (1.8–2.4 m), however, for beginners and hobby koi enthusiasts, having a deeper pond isn't necessary.[2]
- It's important that the pond is a minimum of 3 feet (0.91 m) as this makes it less likely to fully freeze over during winter.[3]
- Once you have determined the size and depth of the pond, you will be able to calculate the estimated volume. To calculate the volume of the pond in cubic feet, multiply the depth by the width by the length. To calculate the volume of the pond in gallons, multiply the volume in cubic feet by 7.5. You will need these volume measurements for the upkeep of the water quality in the pond.
- A lot of birds and turtles like fish. So you should be careful.
- To prevent turtles and birds from wiping out all the beautiful fish, make sure the pond is deep enough so the fish can hide and make hiding spots at the bottom.
- You can put masonry blocks or something with holes where they can hide.
Advertisement -
3Choose an accessible location for your koi pond. Walk around your garden and pick where you would like the pond to go. Make sure that the site is very accessible so that you can easily bring in all of the materials for the pond and have enough space to work.[4]
- Some people like to have a koi fish pond located close to their home and viewable from a window, while others prefer to have the pond set back into the garden so that you can take a walk to reach it.
-
4Clear the site where you are planning to put the pond. Once you have decided on the size, depth, and location of the pond, get the area where your working area ready. Move any vegetation or furniture out of the way. Pull up any pavers that may be covering the ground. Make sure that there is enough room around the site so that you can work there easily.[5]
-
5Map out the shape of the pond on the ground. Mark out the dimensions of your pond directly onto the ground. Choose a shape for the pond to be based on the dimensions that you have decided. Use either rope, a garden hose, or spray paint to make sure that you are happy with the size and location of the pond.[6]
- Koi ponds are often rectangles, L-shaped polygons, or irregular, round shapes.


Constructing the Pond
-
1Dig the hole for the pond. Use your measurements and plan to start digging the hole for your koi fish pond. Use a sturdy shovel and get a friend to help you if possible, as this will make the process go a lot faster. Dig the sides of the pond so that they slope gently downwards towards the center if possible.[7]
- The widest part of the pond is at the top.
-
2Line the pond with a tough plastic or rubber liner. Order a one-piece pond liner from a home improvement or landscaping supplier. Install the liner as per the manufacturer's directions. Have several people help you to roll it out over the pond. Make sure that it overlaps the edges of the pond by at least 3 feet (0.91 m) so that it can be adequately secured in place.[8]
- Remove any sharp rocks or stones that you see in the hole before you lay the liner to prevent the liner from being damaged.
- A liner in one piece will prevent the pond from leaking.
-
3Place rocks over the liner around the edge of the pond. Use large stones and rocks to completely cover the liner that is at surface level, leaving only the hole for the pond exposed. Stack and overlap the rocks using whatever design that you prefer. Make sure that at least 1 foot (0.30 m) of the liner is exposed beyond the edge of the rocks, as you will need this to prevent rainwater from getting into the pond.[9]
-
4Dig a 3 in (7.6 cm) high ridge around the edge of the rocks. Once you are happy with the final layout of the rocks and stones, dig a ridge around the edge. Use a spade to shift the dirt into a ridge formation up against the rocks. Make sure that the liner reaches onto the ridge.[10]
- The end result will look like a small ridge running along the entire outline of the pond. The ridge will be just beyond the rocks along the edge.
- This prevents rainwater, soil, lawn chemicals, and grass clippings from reaching the pond water.


Adding and Adjusting the Water
-
1Fill the pond with water. Use a garden hose to fill up the koi fish pond. If the water isn't fresh or spring water, use a dechlorinator, a carbon charcoal filter, or a water conditioner to remove the chlorine. You can purchase these chlorine treatments from pond or fish supply stores. Always treat chlorinated water before adding it to the pond if there are fish already in it.[11]
- Contact your water supplier if you are unsure about the water quality.
- Chlorinated water is toxic for fish such as koi.[12]
-
2Ensure the pH of the water remains between 7 and 8.6. Use a water testing kit to test if the pH and dissolved nutrients are at the right levels for the fish. Adjust the parameters of the water if the testing kit shows that it is necessary. This helps the koi to stay happy and healthy.[13]
- It is a common problem to have dissolved nutrient levels that are too high. Avoid overfeeding the koi and overstocking the pond, and change the water gradually if necessary.
- If you need to change the water in the pond, do it in amounts of 10% to 20% of the total volume. Otherwise, the fish may go into shock.[14]
-
3Keep the temperature of the pond around 65 °F (18 °C). Measure the temperature of the pond regularly with a thermometer. Use a pond heater as well as an aerator if necessary. If you find that the pond is getting too warm, very gradually add cold water to slowly reduce the temperature in the pond.[15]
- Koi can survive in water that is 34–90 °F (1–32 °C), but they do best at 65 °F (18 °C).
- Never change the water temperature of the pond all at once, as this can cause the koi to go into shock which can be deadly.[16]


Installing Equipment and Adding Koi
-
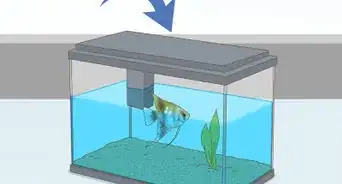
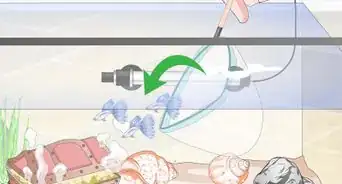
1Install a filtration system into the koi fish pond. Purchase a filtration system from a pond equipment supplier and follow the installation directions closely. All pond filtration systems involve a bottom drain, a settling chamber, mechanical filtration, and biological processing. This keeps the pond clean and the water quality high so that the koi stay healthy.[17]
- Set up the filtration system box right next to the koi pond. Dig it into the ground slightly. Install the individual parts in the pond as per the installation directions.
- The settling chamber makes it easy for you to remove debris from the pond to keep it clean. An ideal settling chamber size for koi fish ponds is 40 in (1.0 m) deep and 40 in (1.0 m) in diameter.
- The mechanical filtration part of the system will catch debris as it floats through the water.
- Biological filtration is the addition of beneficial bacteria into the pond. This reduces the levels of ammonia and nitrite in the water which are toxic for koi.
-
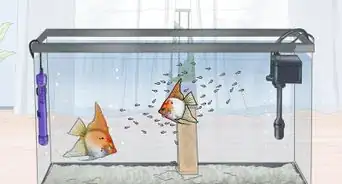
2Place an aerator in the pond. A pond aerator will keep the pond water moving at all times. This keeps the water stirring, oxygenates the pond, and promotes gas exchange. It also prevents the pond water from freezing during colder months.[18]
- A pond aerator is an ideal and economical substitute for a pond heater.
- The size of the pond aerator that you need depends on the size of your koi pond. Know the volume, shape, and depth of your koi pond before you purchase an aerator and choose one that is designed for the size of your koi pond.
-
3Turn on the filtration system and aerator. Once your pond is full of water, start preparing the water for the koi by getting the filtration system and aerator up and running. Always do this before adding the koi to the pond.[19]
-
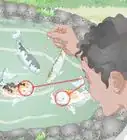
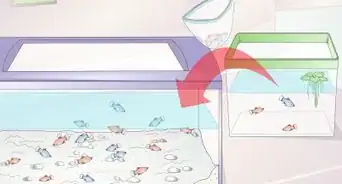
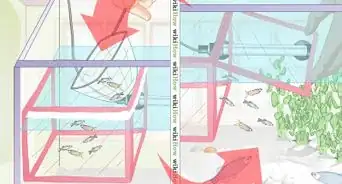
4Put the koi into the pond once it is set up. Keep the koi in the water and in the plastic bag that they were purchased in. Float the plastic bag in your koi pond for 30 minutes so that they can adjust to the temperature change. Then add a bit of pond water into the plastic bag, tie it up, and let it float for an additional 30 minutes to help the koi adjust to the pond water.[20]
- After the koi have been given time to adjust, open the plastic bag again and release them into their new pond.
- Don't let the plastic bag float continuously in direct sunlight, as this could cause the koi to overheat. Place a towel over the bag if there isn't a shady spot.
-
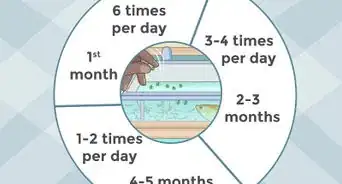
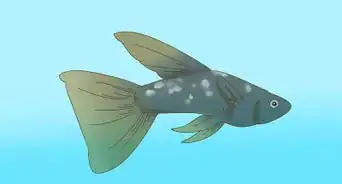
5Care for the koi. Feed the koi specialty pellets regularly and treat any health problems that arise. Maintain the water quality in the pond and keep it clean, so that the koi stay happy and healthy![21]


Community Q&A
-
QuestionIs a cemented pool suitable for koi?
 Aussie JCommunity AnswerYes, but they're expensive and you must let them cure for a month, as they can raise the pH of the water.
 -
QuestionI notice the second method (digging your own) doesn't appear to use a filtration system. Is this intentional or would one still be required?
 NickCommunity AnswerYou would still need to use one. Without the filter, the ammonia from the fish feces builds up and there is little oxygen left in the water for the fish. The filter removes the ammonia and puts more oxygen in the water. It keeps the fish alive.
 -
QuestionWould wild animals or house cats come and eat the Koi? Like your Koi pond is an outdoor fish grill free-charge and they eat them. What should you do?
 Kaitlyn WislangCommunity AnswerKoi that live in outdoor ponds can be predated. Make sure that the pond is over 3 ft deep, as this will make it much more difficult for the predators to catch the koi. Use predator repellents in your garden to prevent them from getting in. Floating vegetation can also give the koi places to hide.
Things You'll Need
- Measuring tape
- Rope or garden lime
- Shovel
- Pond liner
- Stones and rocks
- Filtration system
- Aerator
- Garden hose
- Dechlorinator
- Water testing kits
- Thermometer
- Towel

References
- ↑ https://youtu.be/2DvH7FlW3Z0?t=69
- ↑ https://youtu.be/2DvH7FlW3Z0?t=36
- ↑ https://www.todayshomeowner.com/how-to-keep-koi-fish-in-a-pond-during-freezing-weather/
- ↑ https://youtu.be/2DvH7FlW3Z0?t=79
- ↑ https://youtu.be/2DvH7FlW3Z0?t=79
- ↑ https://youtu.be/YC-RVqsEmsU?t=179
- ↑ https://www.familyhandyman.com/landscaping/backyard-ponds/pond-how-to-build-a-low-maintenance-pond/view-all/
- ↑ https://www.familyhandyman.com/landscaping/backyard-ponds/pond-how-to-build-a-low-maintenance-pond/view-all/
- ↑ https://youtu.be/8s5a0zaCagM?t=142
- ↑ https://www.familyhandyman.com/landscaping/backyard-ponds/pond-how-to-build-a-low-maintenance-pond/view-all/
- ↑ https://www.aquascapeaddiction.com/articles/how-to-make-tap-water-safe-for-ponds
- ↑ https://www.aquascapeaddiction.com/articles/how-to-make-tap-water-safe-for-ponds
- ↑ http://www.koihealth.info/understanding-ph.html
- ↑ http://www.koihealth.info/water-changes.html
- ↑ https://animals.mom.me/temperature-should-keep-koi-fish-tank-11405.html
- ↑ http://www.koihealth.info/water-changes.html
- ↑ http://www.watergardenersinternational.org/beginners/joel5.html
- ↑ https://www.todayshomeowner.com/how-to-keep-koi-fish-in-a-pond-during-freezing-weather/
- ↑ http://www.koihealth.info/water-changes.html
- ↑ https://empressofdirt.net/add-fish-garden-pond/
- ↑ https://www.koi-fish.com/koi-care/koi-fish-beginners-guide.html
- ↑ https://www.aqualog.de/en/lexikonkategorie/profile-goldfishes-koi/
About This Article

To build a koi pond, choose an accessible spot that can accommodate a pond that's at least 12 feet long and 10 feet wide with a depth of 3-4 feet. Next, use a rope or spray paint to mark the desired pond shape on the ground. Then, dig up the ground with a shovel until you reach your desired depth and line the bottom of the hole with a plastic or rubber liner. Finally, weigh down the liner around the edges with rocks and dig a 3-inch ridge around the edges of the rocks. To learn about adding water and installing equipment, read on!