This article was co-authored by wikiHow staff writer, Eric McClure. Eric McClure is an editing fellow at wikiHow where he has been editing, researching, and creating content since 2019. A former educator and poet, his work has appeared in Carcinogenic Poetry, Shot Glass Journal, Prairie Margins, and The Rusty Nail. His digital chapbook, The Internet, was also published in TL;DR Magazine. He was the winner of the Paul Carroll award for outstanding achievement in creative writing in 2014, and he was a featured reader at the Poetry Foundation’s Open Door Reading Series in 2015. Eric holds a BA in English from the University of Illinois at Chicago, and an MEd in secondary education from DePaul University.
wikiHow marks an article as reader-approved once it receives enough positive feedback. In this case, 80% of readers who voted found the article helpful, earning it our reader-approved status.
This article has been viewed 59,905 times.
Learn more...
Building a model lung is a fun way to participate in a science fair, complete an assignment for class, or simply learn more about how the human body works. Creating a model lung is simple, and uses materials that you probably already have sitting around in your home. To make a model lung, you’ll need a plastic bottle, some straws, a few balloons, hot glue, and a pair of scissors. A utility knife will also make cutting through your bottle cap easy.
Steps
Cutting Your Bottle and Straws
-
1Punch a hole in the bottom portion of your bottle with scissors. Use a utility knife to make a small incision, no bigger than 1 inch (2.5 cm) in the side of your plastic bottle, 4–5 inches (10–13 cm) above the bottom. The incision should be horizontal– in other words, perpendicular to the bottle’s length.
- A 20 fluid ounces (590 ml) bottle works best, but you can use a slightly larger plastic bottle as well.
Safety Tip: Take the proper safety precautions when using a utility knife. Cut away from you, keep your hand away from the knife and use a newer, sharper blade so that you don’t have to apply as much pressure. If you don't feel comfortable using a utility knife, ask an adult for help.
-
2Cut the bottle into two pieces horizontally with your scissors. Insert one of the scissor blades into the incision that you made so that half of your scissors are inside of the bottle. Hold the bottle firmly in your non-dominant hand, and cut all the way around the side of the bottle with your scissors so that you end up with two halves—one half with the bottle cap and one half with the base. Discard the bottom half of your plastic bottle.
Tip: Rotate the bottle with your nondominant hand while you cut to make it easier.
Advertisement -
3Use your utility knife to cut an opening in the bottle cap. Hold the bottle cap in place with your nondominant hand and carefully puncture the top of the bottle cap with the tip of your utility knife. Once the tip of the blade is inserted into the plastic, rotate the cap with your nondominant hand while you carve a small circle into the cap by holding the knife at an 80-degree angle.[1]
- You may need to use a drill bit to puncture your hole if the bottle cap is too thick for a utility knife. In this case, use clamps to secure the bottle cap in place. If you don't feel comfortable using a drill, ask an experienced adult for help.[2]
- You’ll be inserting a straw through this opening, so don’t make the hole too big!
-
4Test your bottle cap by trying to fit a plastic straw inside. Take a plastic straw and try to squeeze it through your bottle cap. If the straw fits and doesn’t fall out of the opening, your bottle is ready to go. It’s okay if the straw is a little snug inside the hole. A tighter fit is going to be easier to work with than a looser fit.
-
5Cut a plastic straw in thirds with your scissors. Hold the straw in your non-dominant hand and cut it in thirds. Cut at an angle that’s perpendicular to the straw so that the places where you cut are even and flat. Use your scissors to cut each end of the straw’s sections at a 45-degree angle to make them pointy.[3]


Adding Your Balloons and Straws
-
1Slide the pointed edges of two pieces of straw into the bottom of a larger straw. Squeeze the tip of each straw and slide each inside the same opening at the bottom of an uncut straw. The two smaller sections that you already cut will rely on the tension inside the opening to keep them in place. Make sure the sections of straw are resting at a 45-degree angle away from the larger straw and are symmetrical.[4]
-
2Glue the junction where your three straws meet with a hot glue gun. Put a piece of paper down before using hot glue to cover the junction where your three straws meet. This will ensure that no air escapes when you’re using your lung. Wait 2-3 minutes to let the hot glue dry.[5]
- You can use electrical tape or duct tape if you don’t have any hot glue. Just don’t wrap it so tightly that you constrict the movement of air in the straw.[6]
Tip: Don’t use too much glue. If any hot glue gets inside of the straws, it could block air from flowing.
-
3Add hot glue to the inside lip of two balloons and put them on the straws. Put a dollop of hot glue inside each balloon near the top of each balloon’s opening. Slide them over each of the branching straws so that the longer length of straw is still open. Squeeze the section where you added hot glue against each straw for 15-30 seconds so that they’re sealed over the opening of each straw.[7]
- Blow into the open end of your straw to test it. If the balloons expand, you’re ready to continue. If you hear air coming out, identify the leak and cover it with hot glue.
- You can also use rubber bands or tape to keep your balloons attached to the straw, but the seal may end up being too tight.


Finishing and Using Your Model Lung
-
1Slide the open end of your straw through the bottle cap. You may need to pinch the opening of your straw to fit it through the hole as you slide it up through the bottle cap. Slide it until each balloon is inside the case of your bottle. Screw the bottle cap tight if it wasn’t already screwed on, and seal the area where your length of straw and bottle cap meet with hot glue.[8]
- You’ll have a long length of straw sticking out through the top of your bottle cap. You only need 2–3 inches (5.1–7.6 cm) of straw sticking out to make your lung work, so feel free to trim the rest of it off with your scissors.
-
2Cut another balloon near the neck with your scissors. Pinch the top of the balloon between your index and middle finger on your non-dominant hand. Pull-on the bottom of the balloon with your thumb and ring finger to stretch it out. With the scissors in your dominant hand, cut the balloon about 1.5 inches (3.8 cm) from the top near the section where the balloon’s neck begins to fan out.[9]
-
3Slide the balloon that you cut over the bottom of your bottle. Spread the balloon out with both hands and stretch it evenly over the bottom of the bottle. It may take a couple of attempts since the plastic and the balloon are both flexible. Use a rubber band or tape to secure the balloon to the bottle by wrapping it around the area where they meet.
-
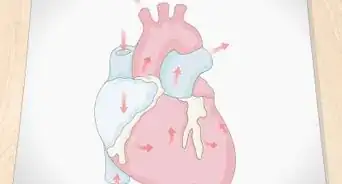
4Pull on the skin of the balloon at the bottom to use your lung. When you pull on the balloon that’s covering the opening on the opposite side of the bottle cap, you’ll notice that the two balloons inside inflate and deflate as you tug on it. This happens because the pressure inside of the bottle is pulling on the balloons and allowing them to take in air—just like your lungs![10]
Did You Know?: You can simulate a sick lung by putting a little water inside of your straw and seeing how the lung reacts!


Community Q&A
-
QuestionWhat is the whole point of this project?
 ths 130028Community AnswerThis project helps students understand the mechanism of breathing. It shows how the lungs inflate when the diaphragm is brought down and air is brought in and vice versa.
 -
QuestionHow is this related to science?ths 130028Community AnswerThis is a biology model related to the mechanism of breathing. It is related to biology, the science of living organisms.
-
QuestionWhat happens to the smaller balloons inside?ths 130028Community AnswerThe balloons in the interior of the model will inflate when the skin at the bottom is pulled down and air is brought in, just like a real lung. Similarly, it will deflate when we let go of the skin and air is pushed out.
Things You’ll Need
Cutting Your Bottle and Straws
- Scissors
- Plastic bottle
- Utility knife
Adding Your Balloons and Straws
- Scissors
- 2 plastic straws
- 2 balloons
- Hot glue
- Glue gun
Finishing and Using Your Model Lung
- 1 balloon
- Scissors
- Tape or rubber band


References
- ↑ https://www.kiwico.com/diy/stem/anatomy-biology/lung-model
- ↑ https://ctsciencecenter.org/blog/science-at-play-make-your-own-lung-model/
- ↑ https://www.kiwico.com/diy/stem/anatomy-biology/lung-model
- ↑ https://www.kiwico.com/diy/stem/anatomy-biology/lung-model
- ↑ https://www.kiwico.com/diy/stem/anatomy-biology/lung-model
- ↑ https://youtu.be/lmy2AXoLZ-4?t=182
- ↑ https://youtu.be/lmy2AXoLZ-4?t=182
- ↑ https://youtu.be/lmy2AXoLZ-4?t=365
- ↑ https://youtu.be/lmy2AXoLZ-4
About This Article