wikiHow is a “wiki,” similar to Wikipedia, which means that many of our articles are co-written by multiple authors. To create this article, 20 people, some anonymous, worked to edit and improve it over time.
There are 11 references cited in this article, which can be found at the bottom of the page.
This article has been viewed 224,959 times.
Learn more...
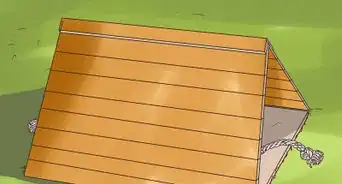
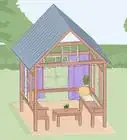
A child's playhouse is a wonderful place for creative play. Building a playhouse is a great family project that everyone will enjoy participating in. Your children will love having their own playhouse and will delight in planning and decorating their house with you. Follow these steps to learn how you can build a playhouse.
Steps
Building a Playhouse out of Wood
-
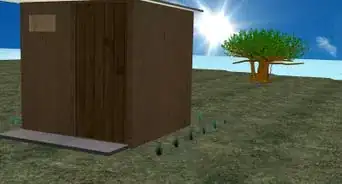
1Gather your materials. This is the most extensive and time-consuming method of building a playhouse, but it offers the best results. There is quite a long list of supplies though, so make sure you have gathered them all before you start building.[1]
- The materials you will need include 2x8 boards, 2x4 boards, ¾” plywood, 3” galvanized screws, 1”x6” decking planks, wood siding, quarter-round molding, shingles, and roofing nails.
- You will need an assortment of tools including a circular saw, a jigsaw, a reciprocating saw, a drill, a level, a framing square, a hammer, a straight edge, a utility knife, and tape measure.
- An option is to include plexiglass to create real windows rather than open-air spaces in your playhouse.
-
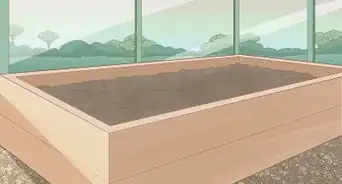
2Choose a location. The playhouse will measure 6x8 feet, and will need at least that much space plus a little extra room for an entrance. This playhouse is meant to be outdoors, but could certainly be placed indoors if you desired.[2]Advertisement
-
3Create the base. To build the base of the playhouse, you will be using your 2x8 boards and then covering it with the decking planks. This base will form the platform for the playhouse to sit on, and will also prove a 2’ porch in front of the entrance.[3]
- Form a 6x8 foot rectangle by measuring and cutting your 2x8 foot boards. Cut the two side boards to be one inch short so that they can fit between the two longest boards perfectly.
- Use your 3” screws to butt-joint the boards together, creating an empty rectangle.
- To add stability to the floor, use an additional two 2x8 foot boards to create floor joists. These should be cut to fit the space running lengthwise in the center floor, making the base four boards running the distance of 8 feet (2.4 m), and two boards on the ends running 6 feet (1.8 m). Use your three inch screws to secure these to the sides.
- To cover the foundation and create the floor, measure and cut your 1”x6” deck planking to fit the base widthwise (the shorter distance). Use enough that they cover the entirety of the base, with no spaces between each board. Use your 3” screws to make sure they are completely attached.
- Cut off any excess boards with your circular saw.
-
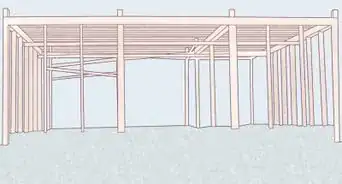
4Create the wall frames. To build the walls of the playhouse, you must first make empty frames for the sides to attach to. Measure 1” in on the perimeter of the base, because the wall frames will sit on the floor rather than being attached to the outside.[4]
- To make the back frame, first measure the boards which will create the top and bottom. These should be cut from your 2x4 boards, and measure 7’11” so that it doesn’t overlap the edge of the floor. Then take five 2x4 boards and measure them to 3’9” so that they will join evenly with the other frames without overlapping the desired 4’ width. Attach two of the 3’9” boards to the edges of the two 7’11” boards, creating an empty rectangle, Then add in the three support beams to the center of the rectangle, evenly spaced between them to create four smaller empty sections.
- Create the front wall frame by doing the same process explained above in making the back wall frame. In addition to that, add a cross-board six inches below the topmost board between your choice of two studs. This will create the frame for the door.
- Make the side walls by taking your 2x4 boards and cutting four of them (two for each side wall), to a length of 3’9”. Take four additional 2x4 boards and cut them to be 3’4” for the top and bottom of the sides. Use your galvanized screws to attach these, creating two rectangular sides. For each side, cut two 3’9” boards to add to the center of the frames for support. Add these to the centers of each side frame and attach them with the screws.
- In each of the side frames, measure 9” from the top and bottom and add a board to fit between the studs here. This will create the frame for two side-windows.
-
5Attach the wall frames to the base. Starting with the back wall, stand it upright on the edge of the baseboards. Use multiple galvanized screws to secure it to the floor. Then, move to the side walls; attach these to the floor first, and then to the edges of the rear wall with more screws. The last wall to be added is the front wall. Remember, this one will have a two-foot space in front for a porch. Screw it into the floor and then to the two sides, making sure that it fits smoothly with the other wall frames.[5]
-
6Build the roof. Once the wall frames are firmly attached to the floor, you can move onto making the roof for the playhouse. To do this, first create a frame, and then cover it with plywood.[6]
- Measure the ridgeboard, the board that will run lengthwise through the center of the triangle-shaped roof, to 7’11”.
- Cut the struts, the supportive edge of the roof, out of 2x4 boards to 14” long. Miter these to the correct angle to fit against the ridgeboard and the top of the wall frames.
- Create the eight rafters made from 2x4 inch boards. You will use four of each of these boards in the centers of the roof between the struts to give support to the roof. Miter these to fit the angle of the ridgeboard and the top of the wall frames.
- Begin by attaching the struts to the ridgeboard, and then add the rafters. Attach this roof frame to the tops of the wall frames. There should be two empty isosceles triangle shapes at the ends of the frame, above the two side walls.
- Cut plywood to fit the roof. You will attach shingles to the top of the plywood, so make sure the entirety of the roof frame is covered (excluding the side triangles). Screw these pieces to the top of the frame once you’ve gotten the correct measurements.
- Screw the rafter and struts to the frame directly above the studs to add extra support to your playhouse structure.
-
7Finish the walls. Use your wood siding to add the outer edge to your walls. Measure the wall frames to make sure you get the correct size, and then cut the wood to fit. The two side pieces should be in the shape of a pentagon to include the triangle-shapes formed by the roof.
- Screw the walls into the frame along the support beams.
- Mark out the space for the windows and door. Use a jigsaw to cut out these pieces, sanding the rough edges when you finish. If you chose to use plexiglass for the windows, insert them now. Finish the windows (with or without the plexiglass) with the quarter round molding around the edges.
-
8Shingle the roof. Line up the first row of shingles along the edge, and then have all adjacent rows of shingles slightly overlap each other. Use four roofing nails per shingle to attach them to the plywood roof. Because the ridge board will be exposed, cut the sheets of shingles into individual pieces and turn them sideways. Nail them to the ridge board so that the entire roof is covered. Use your utility knife to cut off any excess shingles.[7]
-
9Finish your playhouse. At this point, the building-process of your playhouse has been completed. Now you can add the finishing touches to it to make it unique. Paint the outside, add window-box planters, and put small-sized furniture inside. Enjoy your completed playhouse!
Building a Playhouse out of PVC Pipes
-
1Gather your supplies. You will need seven 10 foot (3.0 m) ¾” PVC pipes, ten converter pieces, a PVC pipe cutter, and fabric and a sewing kit or sewing machine to create the cover.
- The ten converter pipe pieces all need to measure ¾”. You will need four T’s, four 45 degree angle elbows, and ten 3-way connectors.
-
2To get fabric that will be big enough to cover the entire playhouse without spending a lot of money, buy sheets or unlined curtains. You can buy these new or find them used and give them a good washing before use.[8]
- You may choose to use ribbons to sew to the inside of the fabric so that the tent portion can be tied on and removed to be washed whenever you desire.
-
3Create the frame. The frame will consist of a base and a top, four supporting beams, and a triangular roof piece. They will be put together.
[9]- To create the base and the top, cut the pipe into four pieces that measure 6 feet (1.8 m) long, and four pieces that measure 4 feet (1.2 m) long. Connect them into two large, separate rectangles with the 3-way connectors on each corner.
- Slide a t-shaped connector facing upwards on each of the four corners of the top piece for the roof to connect to. You may have to cut 1–2 inches (2.5–5.1 cm) off the pipe to make room for these connectors to connect to the corners.
- Create the support beams to form the walls. These can be cut at your discretion to meet your preferred ceiling height. You will need to cut four pieces of pipe all of an equal length. Attach them to the two corner slots at the top and bottom of the pipe, forming a large empty cube.
- Make the roof. To do this, cut four additional pieces of pipe the same length as the sides. Fit them together at a right (90 degree) angle, creating two large ‘L’ shapes. You will need to use the 3-way corners to fit them. Then, cut another piece of pipe 6 feet (1.8 m) long, and run this down the center between the two L’s. Attach the entire roof structure to the base by putting them in the T-shaped slots on the top rectangle.
- Make sure all the connections between the pipes are strong, and you are finished with the structure!
-
4Make the tent covering. Using the fabric you got, take a measurement of all the sides and the roof. Cut these pieces, and use a sewing machine to stitch all the sides together in the same shape as your playhouse.[10]
- It may be easier to attach the tent to the playhouse if you make it a little larger than the real size. This way, slipping it over the pipes and removing it for cleaning will be a cinch.
- Sew 6-inch ribbons to the inside of the tent perpendicular to the seams, so that when the tent is placed on the pipe-frame they can be tied on to allow movement.
- Cut a slit from the bottom till ¾ of the way up one of the sides to create a tent-flap style door.
- If you want, you can cut holes in the sides to act as windows. Feel free to use a thick, clear plastic as play-glass to fill these holes.
-
5Slide the tent over the pipes. Once you have completely sewn the tent pieces together, you are finished! This can be used indoors or outdoors, and the fabric covering can easily be removed to wash.
Making a Playhouse out of a Table and Fabric
-
1Gather your supplies. For this project, you can choose to use a table that is of use in your house, or to procure a table especially for this project. You will also need several yards of fabric (enough to cover all sides of the table), scissors, and decorations (optional).
-
2Measure your table. In order to get an accurate cover for your table, you must have a list of all the measurements. Take a measurement of the length, width, and height. Make sure to write these down to keep track of them.
-
3Measure your fabric. You will be making the playhouse out of five pieces of fabric. You need one to fit the top of the table (length x width), two to fit the long sides (length x height), and two to fit the short sides (width x height).
- When you’ve gotten all the measurements done, cut the pieces of fabric out.
- At this point, cut out rectangular sections to act as windows and doors in the playhouse. These can be as numerous as you desire, placed wherever you want.
-
4Sew the fabric pieces together. Lay the pieces of fabric out in their correct shape/order on the floor, to make sure you are sewing them correctly. They should make a large cross-like shape. Then, use a sewing machine to stitch the fabric together along the seams.
-
5Decorate the fabric. If you want your playhouse look a little bit more exciting than just some fabric over a table, use sharpies, embroidery floss, or other pieces of fabric to give the fabric the appearance of a house. Draw on gingerbread trim, flower boxes under the windows, and a wood-grain texture on the walls.
-
6Finish off your playhouse. When you have done all the decorating you desire, throw the fabric tent over the table to complete your playhouse. Feel free to fill the inside with small pieces of furniture or toys, and enjoy![11]
Making a Playhouse out of Cardboard
-
1Gather your materials. For this, you will need 1-2 large cardboard boxes, all-purpose glue, wrapping paper or wallpaper, packing tape, and a box cutter or scissors.
[12] -
2Prepare your box. Start by cutting off extraneous pieces so that the box lies upside down on the ground and has no bottom (or top, if it is right-side up). Tape all the seams and loose areas to make sure that it won’t fall apart.
-
3Add color to the sides. To give your playhouse a better appearance than just a cardboard box, cover the sides one at a time with an all-purpose glue and a wrapping paper or wallpaper of your choice.
[13] -
4Cut out the doors and windows. Use a box-cutter or scissors to cut a small door from the bottom of one of the sides, and as many windows as you would like.
- You can choose to cut only three sides of the door, leaving one “hinged” side attached so that the door can be open and closed instead of just an empty space.
- You can add clear plastic or cellophane on the inside of the box to give the appearance of windows on the outside.
-
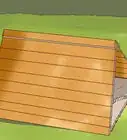
5Create a roof. To do this, cut two large triangle pieces of cardboard out from another box or a spare piece, making them the width of the house Then, cut out two large rectangles the same length as the box and height as the triangles.
- Attach the four roof pieces together with glue and tape.
- cut out cardboard “shingles” in small rectangles or semi-circles and glue these in an overlapping pattern over the top of the triangle. Cut off any extras that go over the edge.
- If you want, you can use spray paint to give the roof a bit of color.
-
6Put your house together. Once the roof is finished, glue and tape it to the top of the cardboard box. You are finished! Feel free to add any further decorative touches, or enjoy it as-is.[14]
Community Q&A
-
QuestionI'm going into middle school, so I will need a place to just do my homework in peace and quiet. Which one should I build?
 Community AnswerI would recommend the wooden one, you could put it outside away from people.
 -
QuestionIs there any way to make a playhouse that has room for a lot of people, such as adults, friends and pets?
 Community AnswerYes. You could double or triple the measurements, if you want.
 -
QuestionI am a 12 year old and I want to make a really cool playhouse but I don't have the things for it can you help me?
 Community AnswerYes, maybe you could learn to knit and knit some blankets or you could look around the house and find some things. Ask your parents for things that they are not using around the house and if you can put them in your playhouse.
References
- ↑ https://www.newlifeonahomestead.com/how-to-build-a-wood-playhouse/
- ↑ https://www.youtube.com/watch?v=1odKlfrfoCw
- ↑ https://www.diy.com/ideas-advice/how-to-build-a-wooden-playhouse/PROD_npcart_100674.art
- ↑ https://www.thegardenglove.com/how-to-build-a-backyard-playhouse/
- ↑ https://www.thegardenglove.com/how-to-build-a-backyard-playhouse/
- ↑ https://www.thegardenglove.com/how-to-build-a-backyard-playhouse/
- ↑ https://www.thegardenglove.com/how-to-build-a-backyard-playhouse/
- ↑ https://www.youtube.com/watch?v=yzW3n5hpEes
- ↑ https://dukesandduchesses.com/diy-plan-make-pvc-pipe-playhouse/
About This Article
To build a playhouse, start by building the base of the playhouse by making a square with 2x8 wooden boards and covering it with decking planks. Then, build frames for the walls on each side of the playhouse using 2x4 boards. Once you've built the frames, attach them to the base with galvanized screws. Next, use more 2x4 boards to build the rafters and roof and then attach the roof to the top of the wall frames. Finally, finish the walls by covering the frames with wooden siding. To learn how to make a playhouse out of PVC pipes, scroll down!
