This article was co-authored by Melinda Meservy. Melinda Meservy is a Plant Specialist and the Owner of Thyme and Place, a botanical boutique offering plants and gifts in Salt Lake City, Utah. Before starting her own business, Melinda worked in process and business improvement and data analytics. Melinda earned a BA in History from the University of Utah, is trained in lean and agile methodologies, and completed her Certified Professional Facilitator certification. Thyme and Place offers indoor plants and containers, a fully stocked potting bench, and tips on plants to suit your space and lifestyle.
wikiHow marks an article as reader-approved once it receives enough positive feedback. This article received 21 testimonials and 100% of readers who voted found it helpful, earning it our reader-approved status.
This article has been viewed 447,047 times.
Some people seem to naturally have a green thumb, or a gift for gardening, and their homes are filled with luscious, healthy greenery. If you aren’t one of those people, don’t worry – there are plants that even you can keep alive! The Boston fern is one of those plants. It’s one of the most popular ferns to grow, and its long, feather-like branches add vibrancy to any space. You can help your Boston fern flourish inside or outside of your home with just a little bit of knowledge and some TLC.
Steps
Creating the Proper Environment
-
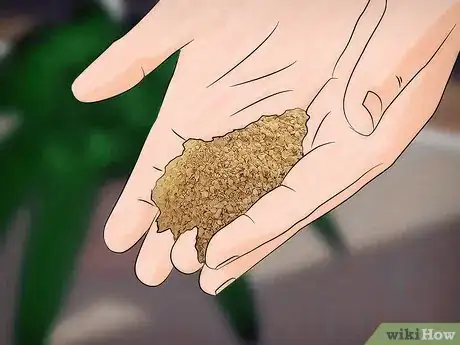
1Gather your potting supplies. Boston ferns will do best in a potting mixture of peat moss, sand, and garden soil. You can buy all of these at your local gardening store. Your final mixture should be even parts of each ingredient.[1] The pot should be big enough for your fern to sit comfortably without it's roots being near the drainage holes, but without a lot of extra space that could accumulate "root rot."[2]
-
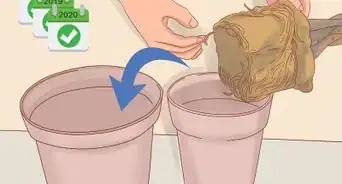
2Pot your fern. Put your mixture and plant into the clean pot with drainage holes in the bottom.The fern can be planted about half of the way to the top of the pot so that the roots have space in the soil. Fill in the rest of the pot with more potting mixture, leaving about 1 inch( 25.4 mm) of space from the top.[3]Advertisement
-
3Place your fern outdoors in a warm, humid environment.[4] In many places, the summers are warm and humid enough to provide the perfect environment for a Boston fern. They do best in environments with humidity levels of at least 50 percent. If your daytime temperatures are between 65 to 75 degrees Fahrenheit (18 to 24 degrees Celsius), and your nighttime temperatures are between 55 and 65 degrees Fahrenheit (13 to 18 degrees Celsius), your Boston ferns will thrive outdoors.[5] You can place them on your porch or patio, and they should do well.
- The cooler temperatures at night will help to prevent fungus from developing.
-
4Put your Boston fern in an appropriate room indoors. If you are keeping your Boston fern indoors, whether permanently or just for the winter months, you will need to be careful about making sure it has adequate humidity. The very best thing to do is to place it in a room with a humidifier. Keep your house between 65 to 75 degrees Fahrenheit (18 to 24 degrees Celsius), and put it in a cooler room at night.[6]
- If you don’t want to invest in a humidifier, there are other options. You can place your fern in a saucer filled with small stones and water. The water will create humidity as it evaporates.
-
5Provide your fern with low to moderate indirect sunlight.[7] Boston ferns do best when receiving indirect, filtered sunlight. If they’re outdoors, place them somewhere where they will get sunlight through tree branches, or cracks in a porch roof. If they’re indoors, place them near a window. You don’t want your fern to be in shade, but you don’t want them to be in direct sunlight. It’s a delicate balance.[8]
Keeping Your Fern Healthy
-
1Keep the soil moist. Just like sunlight, you want to provide your Boston fern with enough water, but not too much. Water it with lukewarm water so that the soil is completely damp but not soaked. During warm weather months, you’ll need to water it more frequently. Make sure that the soil is never completely dry.[9]
- In the wintertime, the fern is not in “growing season.” You can be less vigilant about watering it, and it's actually good to let the soil become dry to the touch before watering again. As new growth appears, start watering the fern more often so that the soil is continuously damp.
-
2Feed your ferns every couple of months. Boston ferns don’t require much, but it is helpful to feed them every two months or so during the warmer time of the year. Purchase houseplant food at your local gardening supply store. Read the instructions on the packaging, and dilute it so that it is half as strong for your fern.
- During the winter months, you can skip these feedings.
-
3Trim discolored or leafless fronds. Fronds are the branch-like pieces that extend from the plant, covered in leaves. Older leaves may become discolored or lose their leaves, which isn’t the most aesthetically pleasing. Use sharp, clean scissors to remove the fronds all the way at the base. This will allow new, healthy fronds to grow.[10]
- The best time to prune your Boston fern is in the spring or summer, during growing season.
-
4Protect your fern from insects. Luckily, Boston ferns aren’t typically a target for insects, but they can occasionally attract bugs. Don’t use anything too harsh on your fern. Spray it with a mild insecticide or a natural insect repellant, and observe. Hopefully, this will be all you need to control any potential pests.[11]
-
5Keep your ferns in a dormant state during winter. Fortunately, there are things you can do to ensure that your boston ferns will live through the winter. Once the temperature drops below 40 degrees Fahrenheit (4.4 degrees Celsius), bring your plants inside. It’s okay if they turn brown and shed; this is normal. Water them sparingly once per week and don’t fertilize them at all during this time of year.[12]
Expert Q&A
Did you know you can get expert answers for this article?
Unlock expert answers by supporting wikiHow
-
QuestionHow often do Boston ferns need to be watered?
 Maggie MoranMaggie Moran is a Professional Gardener in Pennsylvania.
Home & Garden Specialist
-
QuestionDo ferns need a lot of sunlight?
 Maggie MoranMaggie Moran is a Professional Gardener in Pennsylvania.
Home & Garden Specialist
-
QuestionWhy are the leaves on my Boston fern turning brown?
 Maggie MoranMaggie Moran is a Professional Gardener in Pennsylvania.
Home & Garden Specialist
References
- ↑ https://www.doityourself.com/stry/bostonferns
- ↑ http://www.gardeningknowhow.com/houseplants/boston-fern/boston-fern-repotting.htm
- ↑ http://www.gardeningknowhow.com/houseplants/boston-fern/boston-fern-repotting.htm
- ↑ Melinda Meservy. Plant Specialist. Expert Interview. 18 August 2020.
- ↑ http://www.houseplantsexpert.com/boston-fern-care-indoors.html
- ↑ https://www.doityourself.com/stry/bostonferns
- ↑ Melinda Meservy. Plant Specialist. Expert Interview. 18 August 2020.
- ↑ https://www.doityourself.com/stry/bostonferns
- ↑ https://www.doityourself.com/stry/bostonferns
- ↑ http://www.gardeningknowhow.com/houseplants/boston-fern/trimming-boston-ferns.htm
- ↑ http://homeguides.sfgate.com/spray-ferns-36868.html
- ↑ Melinda Meservy. Plant Specialist. Expert Interview. 18 August 2020.
About This Article
To care for a Boston fern, first make sure it's in a place that gets indirect sunlight. Keep the soil damp, and water the fern if the soil feels dry. Boston ferns thrive in high humidity, so if you live in a dry climate, run a humidifier or place it on a tray filled with pebbles and water to raise the humidity. You should also fertilize Boston ferns once a month during the spring and summer and once every 2-3 months during the winter. Use a water-soluble fertilizer diluted to half strength. If the fronds turn yellow, it’s a sign that it’s not getting enough water or humidity. By keeping it hydrated and fertilized, you’ll have a healthy fern for years to come! For more tips, like how often to fertilize your Boston ferns, keep reading!


