This article was co-authored by wikiHow Staff. Our trained team of editors and researchers validate articles for accuracy and comprehensiveness. wikiHow's Content Management Team carefully monitors the work from our editorial staff to ensure that each article is backed by trusted research and meets our high quality standards.
There are 11 references cited in this article, which can be found at the bottom of the page.
This article has been viewed 43,010 times.
Learn more...
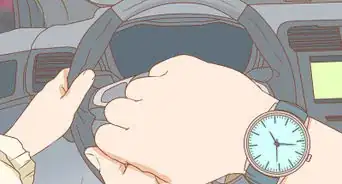
If you’re driving along and suddenly your car’s steering wheel doesn’t seem very responsive, the tie rod ends could be the problem. Tie rods are what causes the front wheels in your car to move at the same time. Bad tire rods cause the steering wheel to loosen, your tires to wear out unevenly, and even your car to veer when you take your hands off the wheel. Although these problems sound a little frightening, checking a tire rod isn’t difficult at all. If you find a bad tire rod, you can even replace it on your own to get back on the road again.[1]
Steps
Jacking up a Car
-
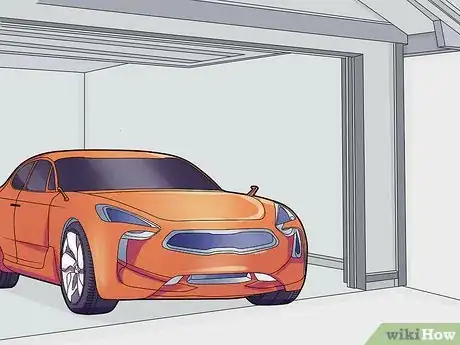
1Park your car on a hard, level surface so you can jack it up safely. Move it to an area that is away from street traffic. Make sure you also have plenty of room to move outside of the car. If you have room in your garage, for instance, put it there. Otherwise, you could try your driveway or even an empty parking lot.[2]
- You will have to jack up the car to access the tie rods, and it isn’t safe to do on soft surfaces like grass or dirt.
- Choosing a level surface prevents the car from rolling forward while you’re under it.
-
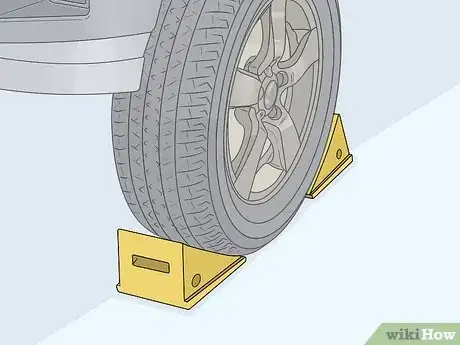
2Place wheel chocks behind the rear tires to stop them from moving. Purchase a few pairs of these small blocks to prevent the rear wheels from moving. Wedge them underneath the tires from behind. Set another one in front of each rear wheel.
- Wheel chocks, along with everything else you may need to check tie rods, are available online and at most auto parts stores.
- If you don’t have plastic chocks, you can use pieces of scrap wood, but make sure the car can’t move at all.
Advertisement -
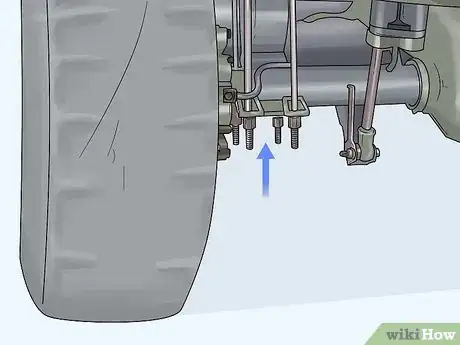
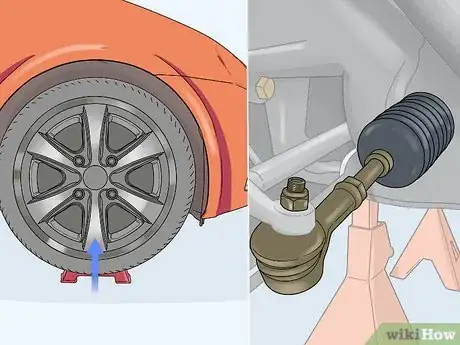
3Locate safe jack points behind the front wheels. If you look underneath the car, you may be able to see a small seam in the metal frame. You can easily slide a jack underneath these points to lift up the wheels. Another option is to use the jack pad underneath the engine on the front of your car. If you plan on doing it this way, you can lift up both wheels at the same time rather than doing them one at a time.[3]
- Make absolutely sure the jack is underneath one of the jack points! If you position it incorrectly, you could damage vital car parts.
- If you’re unsure where the jack points our, check your car’s owner’s manual. They can be in slightly different spots for each vehicle, but use them to prevent frame damage.
-
4Use a jack to lift up one of the wheels. Slide the jack underneath the car so its top is right underneath the jack point. Crack the jack’s handle clockwise until the wheel is off the ground. Make sure you have enough room to reach behind the wheel. You can leave the other wheel alone until you’re ready to test the tie rod on that side.[4]
- For accuracy, test the tie rod while the wheel is still on. This can only be done while the wheel is off the ground. You can remove the wheel afterward to further inspect it.
-
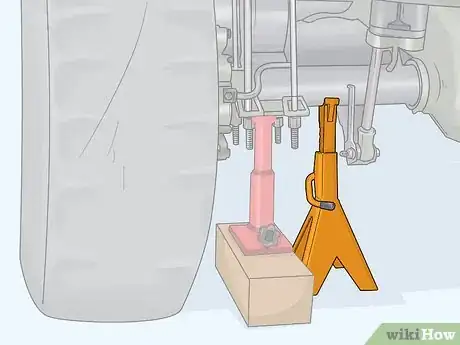
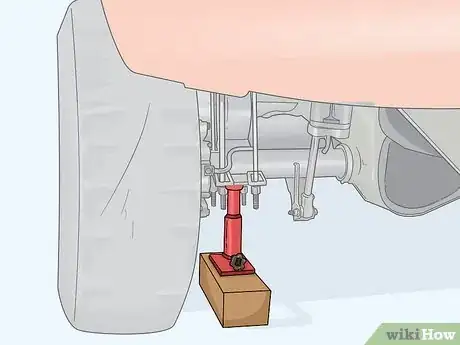
5Position a jack stand behind the jack for more stability. Working underneath a car isn’t safe without a jack stand. Slip the jack stand underneath the jack point, then raise it until it’s touching the bottom of the vehicle. Make sure it’s firmly lodged in place so it can help bear the weight. If you have both wheels lifted at the same time, place a stand behind each of them.[5]
- Jack stands help keep the car supported, even if it happens to fall off the jack.
- You don’t have to remove the jack, but you can if it’s in your way. The stand will keep the car supported.
Testing the Outer Tie Rod
-
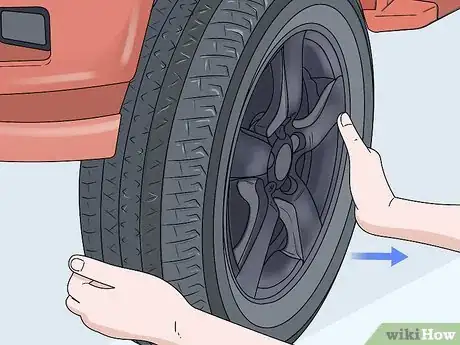
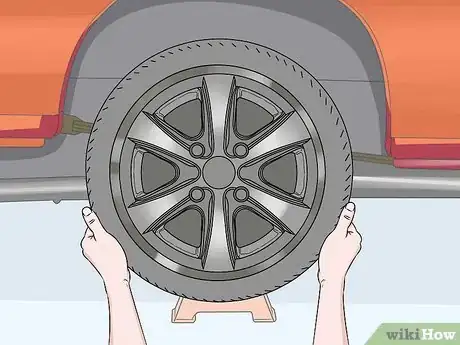
1Shake the tie rod by hand to see if it feels loose. Kneel in front of the tire, placing your hands along its sides. Get a good grip on the rubber. Then, push in with your left hand. Pull it back and push in with your right hand. Keep alternating this way to test the tire.[6]
- No matter how big your muscles are, you can’t move a tire much when its tie rod is still good.
- Replace the tie rods if the wheel feels loose or squeaks. Normally, you won’t be able to move the wheel very much just by shaking it. If you notice that it seems floppy and it wobbles back and forth, then the tie rod could have a problem.
-
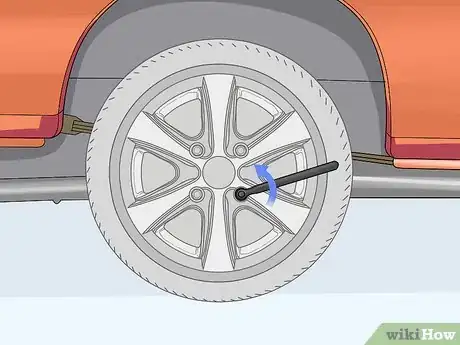
2Lower the car to loosen the wheel’s lug nuts. Testing the tie rod is much easier when the wheel is off, but you can’t remove the wheels without loosening the lug nuts. To do this safely, the car has to be on the ground. Get a tire iron or another tool to break loose the nuts. Instead of removing them, give them about a quarter-turn counterclockwise.[7]
- The lug nuts take a bit of force to loosen, so they are hard to loosen while the car is jacked up.
- Keep the lug nuts on so that the wheel doesn’t come off while the car is on the ground. If it does, you will have a hard time
-
3Jack the car up again to further test the tie rod. Lift the car back up so the wheel is off the ground. Put the jack stands back to stabilize the vehicle. Make sure you have plenty of room to move backward so you can pull the wheel away from the tie rods.[8]
- Having to raise and lower the car can seem like extra work, but it’s important for safety. You can’t get an accurate test while the rod is off, but you also can’t loosen the lug nuts while the car is jacked up.
-
4Pull the wheel backwards with both hands to remove it. Unscrew the lugnuts by turning them counterclockwise by hand. After setting them aside, place your hands on the wheel’s sides. Grip the back end and pull the wheel toward you. Alternate pulling it on the left and right until it comes off the car.[9]
- If you’re having a hard time removing the lug nuts, work them with a tire iron or wrench.
- If your tire is stuck, tap its rim with a rubber mallet. It helps break free a rusted tire, but you usually have to pull it with a lot of force as well.
-
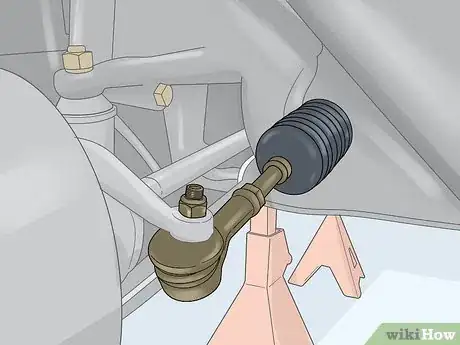
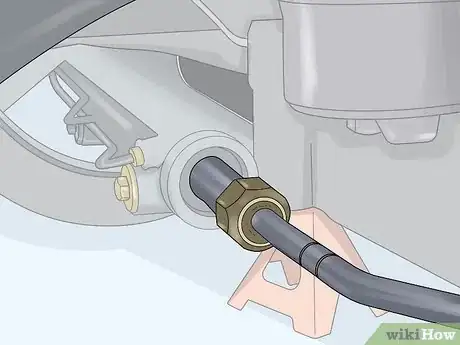
5Locate the thick, metal tie rod with a black cap that's connected to the wheel. Cars have an inner and outer tie rod on both front wheels. If you look behind the wheel, you will see a thin, metal rod running from the wheel to what looks like a black spring. The outer tie rod is the black or silver part threaded onto the tire end of the metal rod. It connects to a round cap secured to the wheel with a nut.[10]
- The cap both protects the tie rod and secures it to the wheel. If the cap isn’t there, the tie rod won’t last too long, either.
-
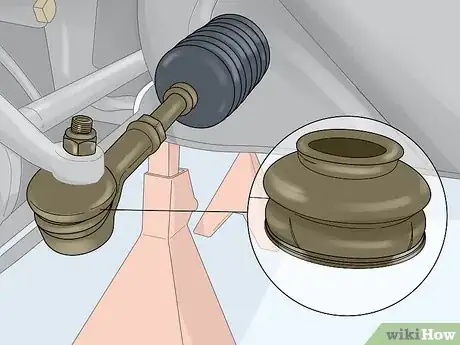
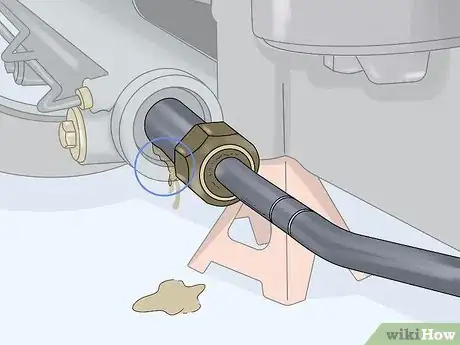
6Inspect the boot on the outer tire rod for breaks or tears. The plastic cap on the end of the tire rod is there to protect it from damage. If you notice a tear on it, gently pull it apart with your hands. Look for grit from dirt and other debris inside. It ruins the tie rod, so replace it to keep your car running.[11]
- The boot is replaceable, but it isn’t worth replacing unless you catch tears when they are new. If you wait, dirt gets in and you have to replace the whole outer rod.
-
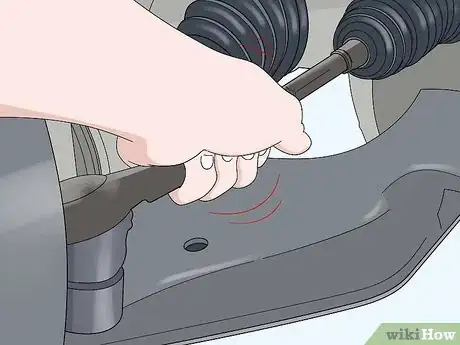
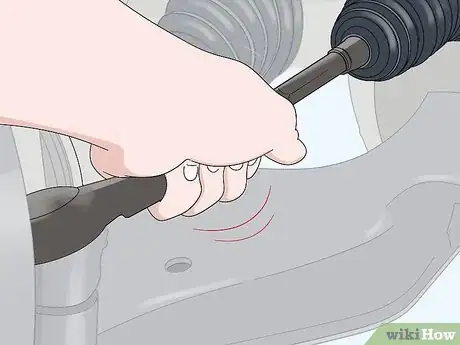
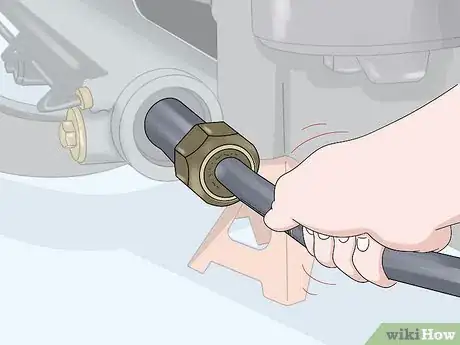
7Shake the tie rod by hand to test its fit. Place your hand right next to the boot. While keeping a firm grip on it, attempt to shake it left and right. It shouldn’t move very easily. If it seems loose, then your tie rod has gone bad and is no longer safe to use.[12]
- Listen for squeaking, clicking, and other unusual noises. These are also good signs that your tie rod needs replacing.
- If you are able to access the rod without moving the wheel, watch it while someone else shakes the wheel. Getting a good view of the rod can be tough, but it can give you a better idea about how loose it is.
-
8Check the tie rod on the other front wheel for damage using the same process. If you only have one jack, put the wheel back and attach the lug nuts. Lower the wheel down with the jack before moving to the opposite wheel. After jacking it up, repeat all the tests as needed to determine if that rod has gone bad as well.[13]
- If both rods look like they are wearing out, replace them both for your own safety. They often wear out at the same time. They cost about $20 to $95 USD.
- The rods don’t have to be replaced at the same time. If one of the rods looks like it’s in good condition, you can keep it.
Checking the Inner Tie Rod
-
1Remove the wheel if it is on the car. The inner tie rod is a little difficult to reach with the tire in the way. While the car is on the ground, loosen the lug nuts with a tire iron, but don’t remove them. Use a jack to raise the tire off the floor, then unscrew the lug nuts by hand. Finally, pull the tire toward you to get it off of the vehicle.[14]
- Make sure your car is stable on jack stands before reaching underneath it.
- You can reach the inner rod while the wheel is on, but it’s tricky. With the wheel off, the rod is much easier to spot and reach.
-
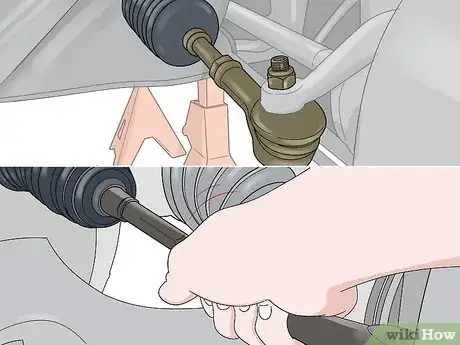
2Find the thinner inner tie rod connected to the outer one. Follow the outer tie rod from the wheel to the middle part of the car. The outer rod is like a sleeve that the inner rod plugs into. It’s end is threaded as well, so you can use that to better see where the two connect. The opposite end of the inner rod connects to a black, plastic cap called a rack boot that kind of looks like a spring.[15]
- The inner tie rod is always smaller than the outer one. It’s always connected to the end of the inner rod.
-
3Look for cracks, leaks, or other signs of damage in the area. Check the parts around the inner rod as well. Take a look at the rack boot joining the rod to the car’s steering shaft. If the tie rod looks damaged, replace the whole thing. If the rack boot has a tear, pull it open gently to inspect it for debris. Replace it if the tie iron looks dirty.[16]
- The rack boot can be replaced, saving you from having to get a new tie iron. However, this only works if the tie iron is still in good shape.
- Keep in mind that the inner tie irons wear out far less frequently than the outer ones. If your car has a problem, it will most likely be the outer rod, the rack boot, or even the steering column before it is the tie rod.
-
4Shake the tie rod to test its movement. Reach underneath the car toward the exposed metal rod behind the wheel well. Pull it left and right to see how much it moves. It should stay relatively still. If it seems to sway a lot, then it needs to be replaced.[17]
- It’s normal for the inner tie rod to spin without making much noise. If you hear popping or other noises coming from anywhere but the rack boot, then something is wrong with it.
-
5Jack up the other front wheel to test its inner tie rod. Replace the wheel first before removing the jack. Take it to the jack point behind the other wheel. After raising the car, reach underneath it to get a hold on the inner rod. Inspect it to make sure it looks undamaged, then shake it to see if it wobbles or makes noise.[18]
- The inner tie rod is a little more difficult to remove than the other one. It requires a tie rod separator to detach it from the outer rod. Take it to a mechanic if you are unable to do it on your own.
- Replacement inner tie rods cost about $25 to $109.
- You don’t have to change out both inner rods at the same time or replace them when you’re installing new outer rods.
Warnings
- Working underneath a vehicle is dangerous, so always park on a flat, hard surface. Make sure the vehicle is well-supported on jack stands.⧼thumbs_response⧽
Things You’ll Need
Jacking up a Car
- Wheel chocks
- Jack
- Jack stands
- Work gloves
Testing the Outer Tie Rod
- Tire iron
- Jack
- Work gloves
Testing the Outer Tie Rod
- Tire iron
- Jack
- Work gloves
References
- ↑ https://www.aa1car.com/library/steering_rack_inner_sockets.htm
- ↑ https://www.popularmechanics.com/cars/how-to/a3663/4283377/
- ↑ https://www.automd.com/42/how-to-replace-an-outer-tie-rod-end/
- ↑ https://www.popularmechanics.com/cars/how-to/a3663/4283377/
- ↑ https://www.popularmechanics.com/cars/how-to/a3663/4283377/
- ↑ https://www.popularmechanics.co.za/how-to-fix/replacing-tie-rod-ends/
- ↑ https://www.automd.com/42/how-to-replace-an-outer-tie-rod-end/
- ↑ https://www.automd.com/42/how-to-replace-an-outer-tie-rod-end/
- ↑ https://www.youtube.com/watch?v=brI2feYiEi8&feature=youtu.be&t=45
- ↑ https://www.popularmechanics.co.za/how-to-fix/replacing-tie-rod-ends/
- ↑ https://www.aa1car.com/library/steering_rack_inner_sockets.htm
- ↑ https://www.youtube.com/watch?v=Vj9oDHj3EjI&feature=youtu.be&t=107
- ↑ https://www.youtube.com/watch?v=6M2D_XtuXZQ&feature=youtu.be&t=49
- ↑ https://www.aa1car.com/library/steering_rack_inner_sockets.htm
- ↑ https://www.youtube.com/watch?v=brI2feYiEi8&feature=youtu.be&t=49
- ↑ https://www.aa1car.com/library/steering_rack_inner_sockets.htm
- ↑ https://www.youtube.com/watch?v=n3P26ggg5OU&feature=youtu.be&t=160
- ↑ https://www.youtube.com/watch?v=n3P26ggg5OU&feature=youtu.be&t=182
- ↑ https://www.testingautos.com/car_care/when-replace-tie-rod-end.html
