This article was co-authored by Gevorg Grigorian. Gevorg Grigorian is an Appliance Repair Specialist and the Owner of G and R Appliance Repair in Los Angeles, California. With over 12 years of experience, Gevorg specializes in residential and commercial appliance repairs as well as heating, ventilation, and air conditioning (HVAC) services. Gevorg holds a BS in Business Administration and Management from California State University-Northridge.
There are 12 references cited in this article, which can be found at the bottom of the page.
wikiHow marks an article as reader-approved once it receives enough positive feedback. In this case, 86% of readers who voted found the article helpful, earning it our reader-approved status.
This article has been viewed 696,224 times.
Exposure to high levels of microwave radiation can cause health problems due to extreme heat, such as cataracts and burns. While most microwave oven leaks are too small to create such significant health risks, be on the safe side and test any microwave that appears damaged or that is more than nine years old. Testing at home is cheap and easy, but keep in mind that it only gives you a rough estimate.
Steps
Detecting Leaks Directly
-
1Find a light bulb that reacts to microwaves. Certain objects react to microwave frequencies:
- A straight fluorescent light bulb (not a compact one)[1]
- A neon "NE-2" bulb from an electronics store, powered and hooked up to a voltage divider so it is just barely glowing[2]
- Cheap, consumer-grade microwave testers are often inaccurate, but fine as a first test[3]
- A professional-grade microwave tester can cost several hundred dollars USD.[4] This is only necessary in professional contexts.
-
2Darken the room. If you are using a light bulb, dim the lights so you'll be able to see the bulb glow. Skip this step if you are using a microwave testing device.Advertisement
-
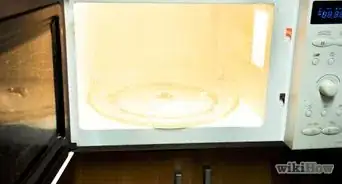
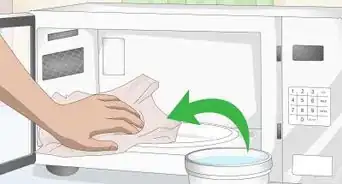
3Put a glass of water in the microwave. Running an empty microwave exposes the magnetron (the part that actually creates the microwaves) to high power levels, which can damage or destroy it. A small glass of water (roughly 275 mL / a little over 1 cup) will reduce this risk, while still leaving plenty of un-absorbed microwaves to test for leaks.[5]
- This is especially important for older microwaves, which may have lower quality shielding around the magnetron.[6]
-
4Turn on the microwave. Set it to run for one minute.
-
5Move the object slowly around the microwave. Hold the light bulb or tester at least 5 cm (2 inches) away from the surface of the microwave, including the handle. Move the object slowly (about 2.5 cm / 1 inch per minute) around the door seal and any areas that look damaged.[7]
- The microwave's power decreases rapidly with distance. Consider testing it at the distance you normally stand from the microwave, for instance the edge of the kitchen counter.
- If the microwave stops before you are done, replace the glass of water and run the oven for another minute.
-
6Look for a reaction. If your microwave leaks, the fluorescent tube will glow, or the neon bulb will become noticeably brighter. Electronic testers react in different ways, so check the manual. If the tester displays a measurement, anything about 5 mW/cm2 at a distance of 5 cm (2 inches) is cause for concern.[8] All of these methods are just quick tests, even the consumer-grade tester. These results do not necessarily mean your microwave is dangerous, but it does mean it's worth taking steps to address the problem.


Using a Laptop's WiFi Connection
-
1Find two WiFi-enabled devices. Some WiFi networks use roughly the same frequency as microwave ovens (about 2.4 GHz), so the oven's shielding should block the WiFi too.[9] To test whether the oven can do this as intended, you'll need a laptop that fits inside your microwave, plus a second device that can connect to your home WiFi network.
- The instructions below assume you are using two computers, but you can use WiFi-enabled phones instead if you know how to use them to ping each other.
- You can use Find my iPhone to ping an iPhone or an iPad or Find my Device to ping an Android. Make sure that the device's data is turned off and that the device is connected to a 2.4 GHz connection.
-
2Set your WiFi to 2.4GHz. If you're not sure how to change your WiFi frequency, access your router settings and look for the "802.11 mode" info (usually under advanced settings):[10]
- 802.11b or 802.11g means you are on a 2.4 GHz network. Continue to the next step.
- 802.11a or 802.11ac means you are on a 5 GHz network. Some routers give you the option to switch to another standard. If your router does not have this option, this test won't work.
- 802.11n can operate on either frequency. Look for the frequency setting and set it to 2.4GHz. If the router produces two WiFi networks, one of these is 2.4Ghz.
-
3Unplug your microwave from the power socket. Remove the whole electric plug from the wall socket rather than simply turning off the switch. You'll be putting your computer inside the microwave, and the last thing you want is to accidentally turn the oven on.
-
4Prepare the computer. Turn your laptop on and connect to the local WiFI connection. Check the energy saver or display settings so the computer won't go to sleep while it's in the microwave.
-
5Find your computer's IP address. You'll need this to send a signal to your laptop. Here's how to find it:
- Windows: Open Control Panel. Go to Network and Sharing... → View network connections → select your WiFi connection → click the chevron to expand (if necessary) → View status of this connection → Details. Look for the number next to "IPv4."[11]
- Mac: Open System Preferences. Click Network. Select WiFi on the left and find your IP address on the right.
-
6Place the laptop in the microwave. Do not turn the microwave on! You're just testing whether the microwave's shielding can block the WiFi signal.
-
7Ping from the other device. Open Command Prompt (on Windows) or Terminal (on Mac). Type ping, then a space, then your computer's IP address. For example, type ping 192.168.86.150.
-
8Wait for a response. If the ping is answered, the computer has successfully returned the signal through the microwave door. This means your microwave is leaking. If the packets time out, the microwave has blocked the signal from returning. This is not a guarantee that your microwave isn't leaking (since the microwave in operation produces much more powerful waves), but it is a good sign.
- Microwaves are legally allowed to leak a certain, safe amount. If your router is in the same room as your microwave or on the other side of a wall, a working ping doesn't necessarily mean a dangerous leak. As a rough estimate, a router with a strong signal strength (-40 dBm) should be at least 20 feet (6m) from the microwave (based on US and Canada regulations).[12] [13] [14]


Fixing a Leak
-
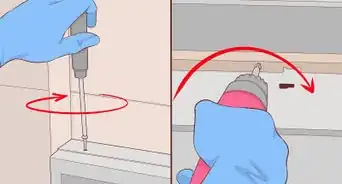
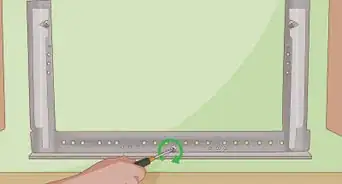
1Check the seals around the door. Microwave leaks are often the result of worn or broken elements on the microwave oven's door. If you have detected a leak, look for these common causes:
- Cracks on the hinges
- Worn areas or cracks on the seal
- Dents or breaks in the door itself
- Broken door hinges or door that fails to close firmly
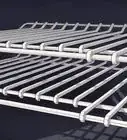
- Damage to the metal mesh of the door (especially holes wider than 4.7 in / 12 cm)
- Broken door latch that does not immediately turn off the oven when you open the door.[15]
-
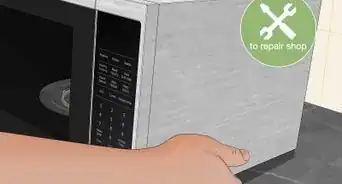
2Take the microwave to a professional repair shop. An electronics repair shop has access to much more accurate microwave testing equipment. Its staff can confirm whether your microwave is safe, and identify the problem in need of repair.
- You may be able to convince a repair shop to rent you the testing equipment for a smaller fee.[16] However, these devices do require calibration and training to use, so hiring a professional may give more accurate results.
-
3Report a leaking microwave. If your microwave is leaking, especially if it is new and undamaged, consider contacting the manufacturer. In the United States, all manufacturers are required to pass on your report to the FDA.[17] You can also report it to the FDA directly at this form.
- Outside of the US, report the issue to consumer safety organizations or government health departments.
-
4Understand the danger. Microwave radiation is the same kind of "radiation" as visible light and radio waves, not the ionizing radiation that can cause cancer or radioactivity. The only known risk of a leaking microwave is the high levels of heat it produces. This is most dangerous to the eye (where it can lead to cataracts) and the testes (where it can cause temporary sterility).[18] Extreme levels of microwave radiation can cause skin burns. If you do not notice any symptoms and you stop using the leaking microwave, lasting damage is very unlikely.


Expert Q&A
Did you know you can get expert answers for this article?
Unlock expert answers by supporting wikiHow
-
QuestionIs it common for radiation to leak out of a microwave?
 Gevorg GrigorianGevorg Grigorian is an Appliance Repair Specialist and the Owner of G and R Appliance Repair in Los Angeles, California. With over 12 years of experience, Gevorg specializes in residential and commercial appliance repairs as well as heating, ventilation, and air conditioning (HVAC) services. Gevorg holds a BS in Business Administration and Management from California State University-Northridge.
Appliance Repair ExpertIt's not very common. You only really need to be concerned if the glass door on your microwave is damaged in any way.
Support wikiHow by unlocking this expert answer.
Warnings
- These methods are not fail safe and should not replace a competent technician using proper equipment to test for leaks.⧼thumbs_response⧽
- Do not disassemble the microwave without training. Microwaves contain an extremely high voltage (about 2,000 volts and 0.5 amps), which can seriously injure or kill you if touched.⧼thumbs_response⧽
- Do not turn the microwave on while the netbook is inside.⧼thumbs_response⧽
Things You'll Need
- Microwave oven
- Fluorescent tube, NE-2 neon bulb, microwave tester, or two WiFi-connected devices
- Repair store if there is a problem


References
- ↑ http://www.academia.edu/29636200/Microwave_Excitation_of_Fluorescent_Lamps
- ↑ http://www.repairfaq.org/sam/micfaq.htm#micmicleak
- ↑ https://web.archive.org/web/20110501123509/http://www.fda.gov/Radiation-EmittingProducts/ResourcesforYouRadiationEmittingProducts/ucm252762.htm
- ↑ http://www.repairfaq.org/sam/micfaq.htm
- ↑ http://www.fda.gov/downloads/Radiation-EmittingProducts/RadiationEmittingProductsandProcedures/HomeBusinessandEntertainment/UCM119038.pdf
- ↑ http://www.repairfaq.org/sam/micfaq.htm
- ↑ http://www.fda.gov/downloads/Radiation-EmittingProducts/RadiationEmittingProductsandProcedures/HomeBusinessandEntertainment/UCM119038.pdf
- ↑ http://www.fda.gov/Radiation-EmittingProducts/ResourcesforYouRadiationEmittingProducts/ucm252762.htm
- ↑ http://hypertextbook.com/facts/1998/HowardCheung.shtml
- ↑ http://www.radio-electronics.com/info/wireless/wi-fi/ieee-802-11-standards-tutorial.php
- ↑ https://support.microsoft.com/en-us/help/15291/windows-find-pc-ip-address
- ↑ https://www.ccohs.ca/oshanswers/phys_agents/microwave_ovens.html
- ↑ http://www.fda.gov/Radiation-EmittingProducts/ResourcesforYouRadiationEmittingProducts/ucm252762.htm
- ↑ https://www.adriangranados.com/blog/dbm-to-percent-conversion
- ↑ http://www.fda.gov/downloads/Radiation-EmittingProducts/RadiationEmittingProductsandProcedures/HomeBusinessandEntertainment/UCM119038.pdf
- ↑ http://www.repairfaq.org/sam/micfaq.htm
- ↑ http://www.fda.gov/Radiation-EmittingProducts/ResourcesforYouRadiationEmittingProducts/ucm252762.htm
- ↑ http://www.fda.gov/Radiation-EmittingProducts/ResourcesforYouRadiationEmittingProducts/ucm252762.htm
- ↑ Gevorg Grigorian. Appliance Repair Expert. Expert Interview. 30 July 2020.
About This Article

To check your microwave for leaks, turn the lights off, put a cup of water in the microwave, and run it for one minute. As it runs, hold a straight florescent lightbulb 5 cm from the surface of the microwave and move it 2.5 cm a minute. If the bulb begins to glow, you’ll know you’ve found a leak. If the bulb doesn't glow, replace the water in the microwave and repeat the process until you’ve tested the entire area. Keep reading to learn how to fix a leaking microwave.