This article was co-authored by wikiHow Staff. Our trained team of editors and researchers validate articles for accuracy and comprehensiveness. wikiHow's Content Management Team carefully monitors the work from our editorial staff to ensure that each article is backed by trusted research and meets our high quality standards.
There are 9 references cited in this article, which can be found at the bottom of the page.
This article has been viewed 22,833 times.
Learn more...
Making your own soap is a great way to create a truly unique bath product. Not only do you get to choose what goes into handmade soap, but the customization possibilities are endless. You can add fragrances and other extras, such as dried flower petals. Color is another option; without it, your homemade soap will be white, ivory, or tan, depending on the base that you used. Check out the tips below to learn how to color handmade soap using different dyes, colorants, and pigments.
Steps
Coloring Handmade Soap with Liquid Dye
-
1Purchase a liquid dye specifically formulated for soap making. You can buy liquid dyes for soap making at a craft store in the soap making aisle.[1] Do not use fabric dye or dye meant for candle making. They are not the same thing and are not skin-safe.
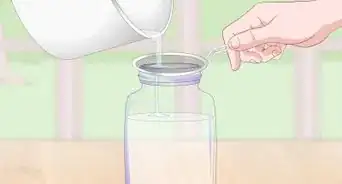
- Some liquid dyes need to be mixed with distilled water first. Read the instructions that came with the dye to find out how to do this and what amounts to use.[2]
-
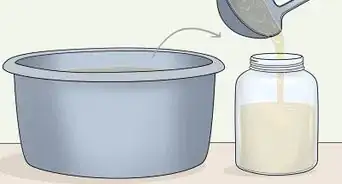
2Prepare a batch of soap, but don’t pour it into molds yet. How you prepare the soap depends on the recipe or package instructions, so read carefully! Leave the soap in the container that you mixed it in.
- For melt and pour soap, just cut into blocks, place it into a glass measuring cup, and heat it in the microwave until it’s fluid, about 1 minute.[3]
- For cold process soap, the “trace” stage occurs after you’ve mixed the oils and lye together. It should be thick enough so that you can draw thin lines across it with a spoon.[4]
Advertisement -
3Blend any desired fragrances into the soap. Use only essential oils or soap making fragrance oils for this; do not use candle making fragrance oils as they are not skin-safe.[5]
- Fragrances are very potent, so a couple of drops are all you really need.
- If you are making cold process soap, use a soap making calculator to determine the correct proportions.
-
4Add a few drops of your dye into the soap. Most dyes from the craft store come with included droppers, but the kind that you have to mix first don’t. In this case, use an eyedropper.
- A little bit goes a long way. About 1/2 mL (0.1 teaspoon) of liquid color will be enough for 1 pound (450 g) of soap.[6]
-
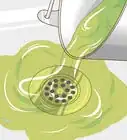
5Stir the dye into the soap, then add more if desired. Use a stainless steel spoon or a rubber spatula to do this. You can mix the dye thoroughly into the soap, or part-way to create a marbled effect.[7]
- If the soap is not dark enough, add another 1 to 2 drops of dye, and stir again.
- At this point, you can add other extras too, such as exfoliants or dried flower petals.
-
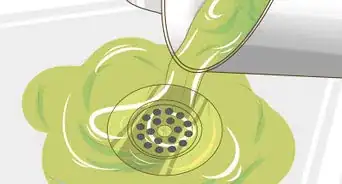
6Pour the soap into the molds, then allow it to dry and cure, if needed. How long this takes depends on what type of soap you are making. Melt and pour soap is ready to use once it hardens, but cold process soap requires a curing time.
- Melt and pour soap is ready to use in about 2 hours. Just pop it out of the mold and lather up![8]
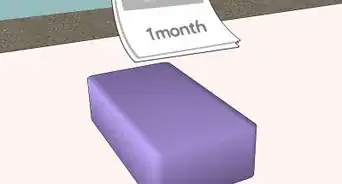
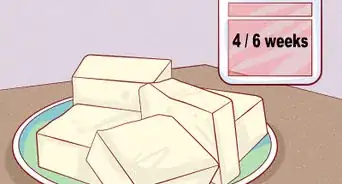
- Cold process soap requires about a week to harden, and then 4 to 6 weeks to cure.


Using Color Blocks for Melt and Pour Soap
-
1Purchase a soap making color block. You may be able to find these in a well-stocked craft store, but you might have better luck online. Do not use color blocks meant for candle making; they are not skin-safe and can cause severe skin reactions.[9]
- Color blocks are only suitable for melt and pour soap. They are essentially colored blocks of melt and pour soap base.
- This method is not suitable for cold process soap because the color blocks have already cured while the rest of the soap has not.
-
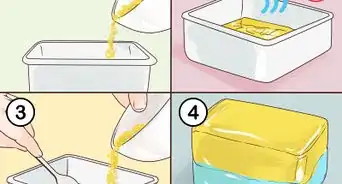
2Melt a batch of melt and pour soap. Cut your soap base into chunks, then put the chunks into a glass measuring cup. Microwave the cup for the time recommended on the soap packaging, about 1 minute. You can melt as much soap as you want, depending on the size and amount of your molds.[10]
- Most soap making molds state how much soap they need to be filled.
- You don't have to use a professional, loaf-style mold for this. Craft stores sell lots of unique molds for individual soaps.
-
3Mix in any desired fragrance oils or essential oils. Essential oils are natural, but if you choose to use fragrance oils, they must be labeled for soap making. A couple of drops is all you really need, but check the label to find out how much you need as each fragrance/brand is different.[11]
- Use a stainless steel spoon or a rubber spatula to slowly stir the fragrance into the soap.
-
4Shave a small amount of the color block over the soap. Hold the color block over your melted soap, then shave off a few slithers. The color block is soft, so you can use any kind of blade you want for this: the knife you used to cut the soap, a craft blade, or even a vegetable grater.[12]
- A little bit goes a long way, so only shave off a few slithers. Remember, it's easier to add more color, but impossible to take color away.
-
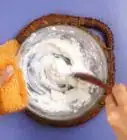
5Stir the color into the soap. Because the colored soap slithers are so small, they should melt quickly and easily in the hot soap base. Use the same spoon that you stirred the soap with in the beginning, and keep stirring until the color is consistent; you can also use a rubber spatula instead.
- Alternatively, stop stirring early for a swirled or marbled look!
- If the color is not deep enough for you, add some more color block shavings into the soap, then give the soap base another stir.
-
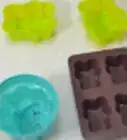
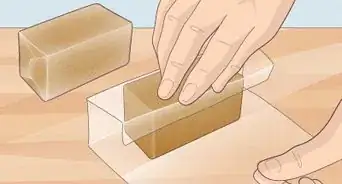
6Transfer the soap into molds, then allow it to dry and cure. Your soap is ready for pouring at this point, but you can also enhance it by adding extras, such as dried flower petals or even exfoliants. Once you've added everything you want to into the soap, pour the soap into soap making molds.[13]
- Most melt and pour soap bases don't require a curing time. Once they have dried and hardened, pop them out of the molds and use them.


Using Pigment Powders to Color Handmade Soap
-
1Choose a pigment powder, mica, or natural powder. Natural powders are things like oxides, clays, and spices. Synthetic pigments are similar color-wise, but they're made in a lab. Most mica pigments are natural, but they tend to bleed into other colors.[14] Here are some popular color choices:[15]
- Red: madder root, sandalwood powder, or Moroccan red clay
- Orange/salmon: cayenne pepper or paprika
- Yellow: safflower powder, calendula petals, or turmeric
- Green: French green clay
- Brown: ground cloves, nutmeg, or all spice
- Purple: alkanet root
-
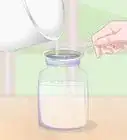
2Mix 1 teaspoon of pigment with 1 tablespoon (15 mL) of lightweight oil for cold process soap. Pour 1 tablespoon (15 mL) of a lightweight oil into a small dish, then add 1 teaspoon of your desired powdered pigment. Stir the two together until the color is consistent and no lumps remain.[16]
- Skip this step if you are making melt and pour soap.
- Great oil choices include avocado and sweet almond. Avoid solid oils, like coconut oil.
- If you are using clay as your natural colorant, it would be better to stick with distilled water instead. Don't use tap or filtered water.
- This is enough to color 3 pounds (1.4 kg) of soap. You probably won't use all of the dye, however.
-
3Stir 1 teaspoon of pigment into 1 tablespoon (15 mL) of rubbing alcohol for melt and pour soap. Pour 1 tablespoon (15 mL) of 99% isopropyl alcohol (rubbing alcohol) into a small dish. Stir in 1 teaspoon if your desired pigment powder. Keep stirring until the color and texture are even.[17]
- Skip this step if you're making cold process soap from scratch.
- If you're using clay, stick with distilled water instead. Avoid tap or filtered water, however.
- This is enough to dye 3 pounds (1.4 kg) of soap. Keep in mind that you don't have to use all of your dye.
-
4Prepare a batch of cold process soap and bring it to trace. Trace is a soap making term for the specific stage soap enters after you mix the oils and lye together. It refers to when the mixture is thick enough that you can "trace" lines through it using a spoon.
- If you're making melt and pour soap, melt it in a large measuring cup in the microwave for about 1 minute, or until it's fully melted.[18]
- At this point, you can add in any essential oils or soap making fragrance oils you desire.[19]
-
5Stir the dye into the soap gradually until you get the shade you want. Start with 1 teaspoon of dye for every 1 pound (450 g) of cold process soap, or 1/4 teaspoon of dye for every 1 pound (450 g) of melt and pour soap. A little bit goes a long way, so you may not even use all of your dye.[20]
- If you're using straight mica for melt and pour soap, you may see bubbles form. If that happens, mist them with rubbing alcohol.
- If the soap is coming out speckled, use an immersion blender to mix the pigment into it.[21]
-
6Add any extras, pour the soap into molds, and allow it to harden. At this point, you can stir extras into your soap, such as exfoliants or dried flower petals. Once you have everything mixed in, pour the soap into soap making molds, then set it aside so that it can harden and cure. Refer to your recipe to find out how long this will take.
- Melt and pour soap requires a few hours to harden, depending on the temperature in the room, and no curing time.
- Cold process soap requires a couple of days to harden, after which you can cut it. Once you've cut it, set it aside on a wire rack for a couple of weeks to cure.


Warnings
- Keep your soap out of direct sunlight to prevent the colors from fading. Depending on the color and dye, it can take just a few hours for the fading to take place![26]⧼thumbs_response⧽
- The color of the oil may affect the color of the dye. For example, if your recipe uses olive oil, your soap will already have a greenish-yellow tint to it.[27]⧼thumbs_response⧽
- Never use candle making dyes or candle making fragrance oils for soap. They may look the same, but they are not skin-safe.[28]⧼thumbs_response⧽
Things You'll Need
Adding Liquid Dye to Soap
- Soap making dye
- Soap base (cold process or melt and pour)
- Spoon or spatula
- Soap making mold
Using Color Blocks for Melt and Pour Soap
- Soap making color blocks
- Knife
- Melt and pour soap base
- Spoon or spatula
- Soap making mold
Mixing Colored Powders with Oil
- Soap making pigments
- Lightweight oil or 99% isopropyl alcohol
- Small bowl
- Small spoon
- Soap base
- Spoon or spatula
- Soap making mold


References
- ↑ http://www.pbs.org/parents/crafts-for-kids/handmade-soaps/
- ↑ https://www.soapqueen.com/bath-and-body-tutorials/tips-and-tricks/diluting-bramble-berry-labcolors/
- ↑ https://www.brit.co/how-to-color-block-soap/
- ↑ https://www.soapqueen.com/bath-and-body-tutorials/tips-and-tricks/talk-it-out-tuesday-colorants/
- ↑ www.soap-making-resource.com/soap-making-dye.html
- ↑ https://www.soapqueen.com/bath-and-body-tutorials/tips-and-tricks/talk-it-out-tuesday-colorants/
- ↑ http://www.pbs.org/parents/crafts-for-kids/handmade-soaps/
- ↑ http://www.pbs.org/parents/crafts-for-kids/handmade-soaps/
- ↑ https://www.soapqueen.com/bath-and-body-tutorials/tips-and-tricks/talk-it-out-tuesday-colorants/
- ↑ https://www.brit.co/how-to-color-block-soap/
- ↑ https://www.favecrafts.com/Soaps/Scenting-and-Coloring-Melt-and-Pour-Soap-Like-a-Pro
- ↑ https://www.soapqueen.com/bath-and-body-tutorials/tips-and-tricks/talk-it-out-tuesday-colorants/
- ↑ https://www.brit.co/how-to-color-block-soap/
- ↑ https://www.soapqueen.com/bath-and-body-tutorials/tips-and-tricks/talk-it-out-tuesday-colorants/
- ↑ http://www.soap-making-resource.com/soap-making-dye.html
- ↑ https://www.soapqueen.com/bath-and-body-tutorials/tips-and-tricks/talk-it-out-tuesday-colorants/
- ↑ https://www.soapqueen.com/bath-and-body-tutorials/tips-and-tricks/talk-it-out-tuesday-colorants/
- ↑ https://www.brit.co/how-to-color-block-soap/
- ↑ www.soap-making-resource.com/soap-making-dye.html
- ↑ https://www.soapqueen.com/bath-and-body-tutorials/tips-and-tricks/talk-it-out-tuesday-colorants/
- ↑ https://www.lovinsoap.com/coloring-soap-quick-start-guide/
- ↑ https://www.soapqueen.com/bath-and-body-tutorials/tips-and-tricks/how-to-get-vibrant-colors-in-soap/
- ↑ https://www.soapqueen.com/bath-and-body-tutorials/tips-and-tricks/how-to-get-vibrant-colors-in-soap/
- ↑ https://www.soapqueen.com/bath-and-body-tutorials/tips-and-tricks/how-to-get-vibrant-colors-in-soap/
- ↑ https://www.lovinsoap.com/coloring-soap-quick-start-guide/
- ↑ https://www.soapqueen.com/bath-and-body-tutorials/tips-and-tricks/how-to-get-vibrant-colors-in-soap/
- ↑ https://www.soapqueen.com/bath-and-body-tutorials/tips-and-tricks/how-to-get-vibrant-colors-in-soap/
- ↑ https://www.favecrafts.com/Soaps/Scenting-and-Coloring-Melt-and-Pour-Soap-Like-a-Pro
About This Article