This article was co-authored by wikiHow Staff. Our trained team of editors and researchers validate articles for accuracy and comprehensiveness. wikiHow's Content Management Team carefully monitors the work from our editorial staff to ensure that each article is backed by trusted research and meets our high quality standards.
wikiHow marks an article as reader-approved once it receives enough positive feedback. This article received 11 testimonials and 100% of readers who voted found it helpful, earning it our reader-approved status.
This article has been viewed 412,293 times.
Learn more...
Melt and pour soap is the easiest method of making homemade soap. Because the soap base has already been made and prepared for you, you do not have to worry about working with lye, like you would with cold or hot process soap. It is fast and easy to prepare for both children and adults alike. Best of all, there are no curing times involved, and the soap is ready to use once it hardens!
Things You Should Know
- Slice your soap base into 1-in (2.54 cm) chunks and melt them in the microwave in 30-second increments.
- Let the soap cool down before adding in any extra ingredients, like pigment powder or essential oils.
- Pour the soap into molds and let it cool for 12-24 hours. Don't freeze or refrigerate the soap to speed things up.
- Pull the edges away from the mold and flip the mold over to release your newly-made soap.
Steps
Basic Melt and Pour Soap Recipe
-
1Cut the soap base into 1-inch (2.54-centimeter) chunks with a clean, sharp knife. The size and shapes of the chunks do not have to be exact. Cutting the soap into chunks will simply help it melt faster and smoother.[1]
- You can find melt and pour soap bases in arts and crafts stores and online. White or clear glycerin are the most popular choices. For a more luxurious bar of soap, try one of the following melt and pour soap bases: goat's milk, olive oil, or shea butter.
- Do not use a plain bar of soap for this; it is not the same thing and it will not melt easily.
-
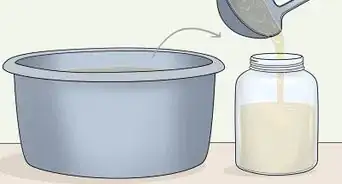
2Melt the soap base in the microwave. Place the soap chunks into a microwave-safe dish. Heat the chunks at 30-second intervals, stirring between each one, until they are melted. The melted base should be smooth and liquid-y, with no lumps or chunks.[2] If you don't have a microwave, then do the following:
- Fill a saucepan with 2 inches (5.08 centimeters) of water.
- Set a glass, heat-safe bowl on top.
- Place the soap into the bowl and bring the water to a simmer.
- Allow the soap to melt over low heat, stirring it occasionally.
Advertisement -
3Allow the soap base to cool to 120°F (49°C). Once the soap has melted, set it down on the counter, and allow it to cool of slightly If you melted the soap over the stove, take the bowl off of the saucepan, then set it down onto a heat-safe surface.
- Adding dyes and fragrances to too-hot soap can affect the final color/fragrances.
-
4Stir in soap making dye or pigment powder, if desired. Use ⅛ teaspoon of dye or pigment powder per 1 pound (450 grams) of soap. You can add more later, if you want, but be aware that it may stain your skin.[3]
- If you are using pigment powder, stir it into 2 to 3 teaspoons of liquid glycerin first, then add the glycerin to the soap base.
- If you are using liquid dye, 3 to 6 drops will be enough for 1 pound (450 grams) of soap.[4]
- Make sure that you use dyes made for soap making. Other types of dye, such as candle dye, are not skin safe.
-
5Stir in some fragrance oils or essential oils, if desired. You can combine different oils to create a unique fragrance, or you can use just one type. Once again, make sure that you use oils that are either safe to use on skin or are labeled for soap making. Do not use candle fragrance oils, as they can irritate the skin. Listed below are the recommended amounts:[5]
- Fragrance oil: 1 tablespoon (15 milliliters) total per 1 pound (450 grams) of soap.
- Essential oil: ½ tablespoon (7.5 milliliters) total per 1 pound (450 grams) of soap.
-
6Pour the soap into your desired soap making molds. You can find soap making molds alongside the other soap making supplies in the arts and crafts store. You can get them in either plastic or silicone. If you can't find any, you can use silicone baking, chocolate, or cupcake molds instead.
- You can use a larger, traditional mold, if you want to, but you will need to cut the soap into slices after you de-mold it.
- If you are using a plastic soap making mold, you may want to coat the inside with petroleum jelly.
-
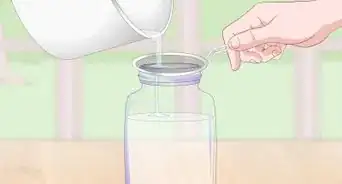
7Gently tap the mold. This will send any air bubbles to the surface. If you see air bubbles, lightly spray the surface of the soap with rubbing alcohol.
-
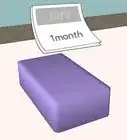
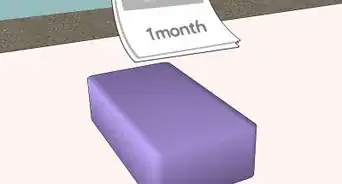
8Allow the soap base to cool for 12 to 24 hours. Do not get impatient and put it into a fridge or freezer.
-
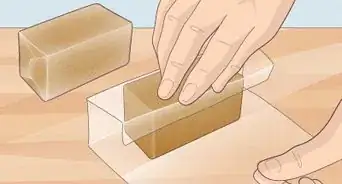
9Release the soap from the mold. Gently pull the edges of the mold away from the soap, then turn the mold upside-down, and pop the soap out. If the soap gets stuck in the mold, stick it in the freezer for 15 to 30 minutes, then rinse the outside of the mold under hot water for a few seconds.[6]
- If you used one big mold, you will need to cut the soap into smaller bars/slices after you remove it from the mold.
-
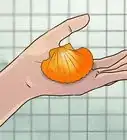
10Allow the soap to finish drying, if needed. Unlike traditional cold or hot process soap, melt and pour soap is ready to use. This is because it has already saponified and does not need to be cured. The edges may still be damp after you remove it from the mold, however. If this happens, simply let it sit out on a wire cooling rack for about an hour or so.


Soap Add-Ins
-
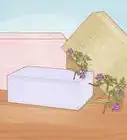
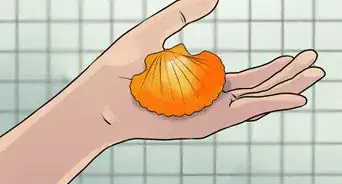
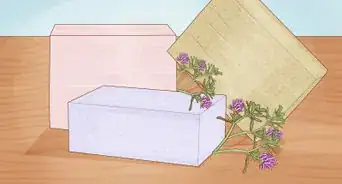
1Create texture with dried herbs or flowers. Dried lavender, chamomile, and rose petals are great choices, but you can use others as well. You will need 1 to 2 ounces (6 to 12 grams) per 1 pound (450 grams) of soap. Add the herbs or flowers into the mold, before adding the soap. This way, they won't lose their color as much.
- You can also sprinkle the herbs or flowers onto the soap, after you have poured it into the mold, instead.
- Keep the application in mind. Herbal soaps work great as a hand soap, but they may be too scratchy for the tub or shower.
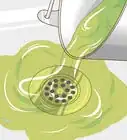
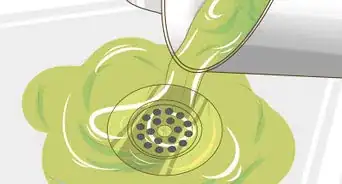
- Chop larger petals into smaller pieces so that they don't clog the drain.
-
2Use spices for fragrance, texture, and color. With just 1 tablespoon (15 grams) of ground spices, you can take your soap to a whole new level! Stir the spice into the soap after you take it off heat, along with any other colors or fragrances you might be using. Great choices include cinnamon, pumpkin pie spice, and ground tumeric.[7]
- Consider limiting your fragrance or omitting it entirely.
-
3Use butters for extra moisture. You will need them into the soap base as it is melting. Do not use regular butter made from cow's milk, or it will go rancid. Instead, try one of the following butters: cocoa, shea, mango, or vegetable. You will need 1 to 2 tablespoons (15 to 30 grams) per 1 pound (450 grams) of soap.[8]
- Cocoa and shea butter are both great for adding a creamy lather to the soap.
- Mango butter is great for calming irritated skin, treating sunburn, and reducing dryness.
-
4Add some extracts for additional benefits. Extracts are not the same thing as essential oils or fragrance oils. While some of them may add fragrance to your soap, they are mostly used for their specific properties. Plan on using 1 to 2 tablespoons (15 to 30 milliliters) of extract per 1 pound (450 grams) of soap; add them alongside your dyes and fragrances. Listed below are common extracts and their benefits:[9]
- Chamomile extract is calming and good for relieving stress. It is also antiseptic and anti-inflammatory.
- Grapefruit seed extract is a natural disinfectant. It is filled with vitamins A, C, and E.
- Green tea extract can help sooth sunburns, irritations, and acne.
- Guava fruit extract contains vitamins A, B, and C. It is especially good for aging skin.
- Papaya fruit extract is good for both dry and oily skin. It helps make your skin softer and smoother.
-
5Make you soap more exfoliating with additions such as ground oatmeal. Stir it into the soap base, right before you add it to the mold. In most cases, you will need to use 1 to 2 tablespoons (15 to 30 grams). Listed below are some popular choices:[10]
- Jojoba beads and ground oatmeal are both gentle exfoliants, suitable for sensitive skin.
- Fine-grained sea salt and sugar are medium-strength exfoliants.
- Coffee grounds and strawberry seeds are coarser exfoliants. Limit yourself to 1 to 2 teaspoons.
-
6Add a rubber soap making stamp into a plain mold before pouring the soap. Some soap making molds come with pretty designs already embedded into them. Some of them, however, come as plain circles, ovals, squares, or rectangles. If you want a fancier bar of soap, place a soap making rubber stamp into the mold (design-side-up) before pouring the soap. You can find soap making rubber stamps alongside the rest of the soap making supplies in the arts and crafts stores. They are rubber sheets with raised designs, like ink stamps.
- Match the shape of the stamp to the shape of you mold. Use a circle stamp for a round mold, and a square stamp for a square mold.
- If the rubber stamp is stuck to the soap after you de-mold it, simply peel the stamp away.
-
7Add a surprise into clear, glycerin soap. This is a great idea for kids soap. Place a small, plastic toy, like a fish or spider, into the soap mold. Pour the soap into the mold, over the toy, then let it set. When you de-mold the soap, the toy will be embedded inside.[11]
- This is not recommended for solid-colored or opaque soap; the toy will not show up.
-
8Stir two different colors together to make swirled soap. Melt your soap as usual, then split it into two batches. Add a different color and fragrance to each batch. Pour the melted soap, one color at a time, into the mold, then gently stir it together to create swirls. Do not over-stir the soap, however, or the colors will mix.[12] If you want your soap to be white with colored swirls in it, do the following:[13]
- Make your soap base as usual, but omit the dye.
- Pour the soap into the mold.
- Add a drop of dye into each corner and the middle.
- Stir the drops together using a toothpick.
-
9Pour differently-colored bases at different times to create layers. Prepare a half-batch of soap, and pour it into your mold. Prepare your next layer using the rest of the soap. Wait for the first layer to form a thick skin, then score it with a fork. Pour the second layer on top, and let the soap harden.
- Spray each layer with rubbing alcohol while it is still wet to reduce bubbles.
- This method works better with larger soap molds. De-mold the soap once it's hard, then slice it into smaller bars to show off the layers.


Community Q&A
-
QuestionCan I use food coloring to dye my soap?
 Community AnswerYou can try, but be aware that the dye may not mix into the soap base well and that it may stain your skin. Soap making dye is made specifically for soap and does not come off on skin.
 -
QuestionCan I add water while double-boiling?
 Community AnswerAdding water may affect the way the soap hardens. Do not add it to the mixture.
 -
QuestionHow do you keep the soap so fluid after heating while working with the design?
 Community AnswerUse a good quality soap base. The better the original soap base you use, the better the finished soap will be, and it will make pouring easier.
Warnings
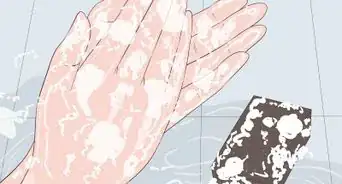
- Be careful with dyes and fragrances if you have sensitive skin.⧼thumbs_response⧽
- The soap base will be very hot; handle it with care.⧼thumbs_response⧽
Things You'll Need
- Sharp knife
- Cutting board
- Microwave-safe bowl
- Rubber spatula or stirring spoon
- Melt and pour soap base
- Soap making dyes or pigment powder
- Liquid glycerin (if using pigment powder)
- Soap making fragrance oils or essential oils
- Soap making mold
- Spray bottle filled with 99% isopropyl alcohol (rubbing alcohol)


References
- ↑ http://www.soapqueen.com/bath-and-body-tutorials/melt-and-pour-soap/free-beginners-guide-to-soapmaking-melt-and-pour/
- ↑ http://www.soapqueen.com/bath-and-body-tutorials/melt-and-pour-soap/free-beginners-guide-to-soapmaking-melt-and-pour/
- ↑ https://www.newdirectionsaromatics.com/blog/articles/how-to-make-soap.html
- ↑ http://www.happinessishomemade.net/10-minute-gift-idea-diy-pumpkin-spice-soap/
- ↑ https://www.newdirectionsaromatics.com/blog/articles/how-to-make-soap.html
- ↑ https://www.newdirectionsaromatics.com/blog/articles/how-to-make-soap.html
- ↑ http://www.happinessishomemade.net/10-minute-gift-idea-diy-pumpkin-spice-soap/
- ↑ https://www.newdirectionsaromatics.com/blog/articles/how-to-make-soap.html
- ↑ https://www.newdirectionsaromatics.com/blog/articles/how-to-make-soap.html
- ↑ https://www.newdirectionsaromatics.com/blog/articles/how-to-make-soap.html
- ↑ http://www.happinessishomemade.net/spooky-spider-soap-halloween-craft/
- ↑ https://www.soapqueen.com/bath-and-body-tutorials/tips-and-tricks/tips-for-swirling-melt-pour-soap/
- ↑ http://www.happinessishomemade.net/peppermint-soap-holiday-diy-gift-idea/
- ↑ https://www.newdirectionsaromatics.com/blog/articles/how-to-make-soap.html
- ↑ http://www.soapqueen.com/bath-and-body-tutorials/melt-and-pour-soap/free-beginners-guide-to-soapmaking-melt-and-pour/
- ↑ http://www.soapqueen.com/bath-and-body-tutorials/melt-and-pour-soap/free-beginners-guide-to-soapmaking-melt-and-pour/
About This Article

To make melt and pour soap, start by purchasing a melt and pour soap base from your local arts and crafts store, and melting it in your microwave in 30-second intervals until you have a smooth liquid. Then, let the soap base cool to 120°F before adding ⅛ teaspoon of dye or pigment powder per pound of soap to color it. You can also add ½ tablespoon of essential oil if you want your soap scented. Next, pour the soap base into a mold, let it sit for 12-24 hours until it's solid, then turn the mold upside down to pop the soap out. To learn how to use rubbing alcohol to get rid of air bubbles in your soap, keep reading!