This article was co-authored by wikiHow Staff. Our trained team of editors and researchers validate articles for accuracy and comprehensiveness. wikiHow's Content Management Team carefully monitors the work from our editorial staff to ensure that each article is backed by trusted research and meets our high quality standards.
This article has been viewed 64,428 times.
Learn more...
Making soap is a fun hobby that can potentially earn you money if you sell your soap at craft shows or online. In order to make soap, however, you must have a mold in which to pour the liquid soap so that it can harden. Molds can be made from any number of inexpensive items. You can make a basic rectangular mold from plywood, a cylinder mold from a PVC pipe, or a clam-shaped mold using two seashells.
Steps
Making a Rectangle Mold
-
1Gather your materials. To start making a rectangular shaped mold, first gather your materials. You should be able to find the materials for this mold at most craft stores. For this mold, you'll need the following:
-
2Trim the wood down, if necessary. You may not find craft wood cut into the exact dimensions you need. You should be able to ask someone at the store to trim the wood down for you.[6] If this option is not available, you can cut most craft wood on your own with a small handsaw.[7]
- Measure the wood using a ruler or measuring tape. Draw a line marking the dimensions with a pen or pencil. Use your handsaw to gently saw along that line.
- If the sides are rough, use sandpaper to smooth them down. Sand paper is rated by grit number. The higher the grit number, the stronger the sandpaper. As craft glue is fairly soft, you do not need a high grit sandpaper for your soap mold. Stick to grit levels below 100, as anything above a 100-level grit is best used on large furniture.[8]
Advertisement -
3Create a rectangle out of the sides. Once your wood is cut into the proper dimensions, you can begin assembling your mold. To start, assemble the sides of the wood to form a rectangle.
- The 12" by 4" boards make up the longer sides of the rectangle. The 3 1/2" by 4" sides make up the shorter sides. The shorter sides will fit inside the longer sides.[9]
- Take the 12" by 4" boards. Place a line of wood glue along each 4" side. Then, place the 3 1/2" by 4" sides between the 12" by 4" boards, creating a rectangle-shape with your boards. Use the wood clamps to secure while the wood is drying.[10]
-
4Glue the bottom piece in place. Once the glue is dry to the touch, and the rectangle feels secure without the wood clamps, you can add the bottom board. The 3 1/2″ x 11″ board fits inside the rectangle. Run some wood glue along each side of the bottom board and then place it inside the rectangle. Use wood clamps to secure the board in place.[11]
- If your board feels flimsy, use a cordless screwdriver to place four screws into the board where the sides connect. This will further secure the board, as wood glue may loose strength over time.[12]
-
5Let dry. Once you've assembled your board, set is aside and let it dry. To be 100% sure everything is dry, it's best to set your board aside overnight before use.
-
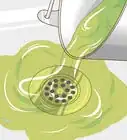
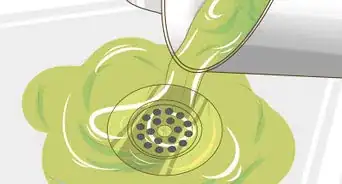
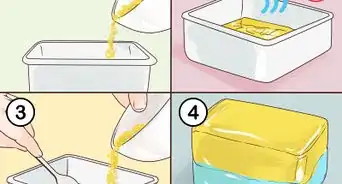
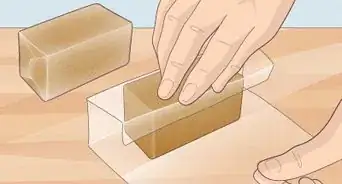
6Use your mold to make soap. Once you're done creating your board, you can use it to make soap. Make sure to line your board first, as liquid soap will stick to wood. You can use parchment paper or trash bags to line your board.[13]
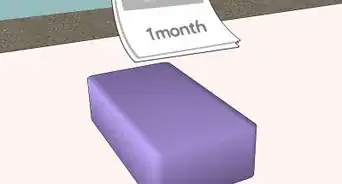
- It can take soap anywhere from a few hours to a few days to set. It depends on the soap recipe you're using. Once the soap is set, simply remove it from the board. Set it aside for 3 to 4 weeks to allow it to dry completely.[14]
-
7Address leaks. In the event your box leaks, examine the area where the leak is occurring. You can seal this area up with masking tape, duct table, or extra wood glue. Also, you can deal with leaks by lining the box with parchment paper before use.


Making a Cylinder Mold
-
1Gather your supplies. If you want round-shaped bars of soap, you can make a cylinder mold. Make sure you get your liquid soap ready before preparing a cylinder mold, as you'll be pouring the soap in as you go along. To start, gather your supplies, most of which you can find at a local craft store. You will need the following:
- A PVC pipe
- A wooden cutting board
- Masking tape
- Heavy duty wax paper or baking paper
- Old towels
- A ladle
- Plastic wrap[15]
-
2Cover one end of the PVC pipe with wax or baking paper. Wrap the wax or baking paper around the end of the pipe, making sure to cover completely so no soap leaks out. Then, take the masking tape and wrap it around the end of the pipe. Use a few layers of tape to make sure the wax paper is secure. You can also use rubber bands.[16]
-
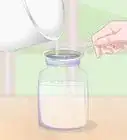
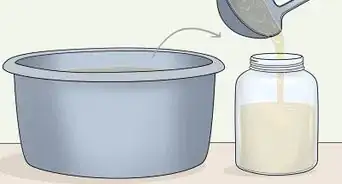
3Fill with liquid soap. Set your pipe down vertically. Use your ladle to transfer liquid soap into the pipe. Do not fill the pipe completely. Stop when you're about 2 inches (5 cm) away from the top of the pipe.[17]
-
4Cover the other end of the pipe with plastic wrap. Tightly wrap the plastic wrap around the other end of the pipe. Use a few pieces of tape or a rubber band to secure the plastic wrap. You want to keep the soap insulated during the curing process.[18]
-
5Wrap the mold towels. Use old towels that you do not mind damaging. Soap may leak out, causing stains or odors. Wrap the mold in enough towels to cover the pipe completely, preventing outside air from getting into the mold.[19]
-
6Cool the soap. Set the mold aside for 48 hours, or as long as your soap recipe indicates it will take for the soap to dry. At this point, the soap should be cool enough to remove. Choose a safe place to keep the mold, away from children and animals. You want to make sure the mold is not moved or disturbed during the drying process.[20]
-
7Remove carefully. Once the soap is dry, you can remove it from the mold. This can be a little tricky. You should be able to push the soap through the pipe using a bottle or jar. If you have trouble removing the soap, consider lining the mold with parchment paper ahead of time the next time you use this method. This may make the soap slide out easier.[21]


Creating a Clam Mold
-
1Obtain seashells. A clam mold can be a fun, creative shape if you want to do something a little different than round or square-shaped cuts. You will need a few seashells, large enough to contain about half a cup of liquid soap. You can purchase seashells online or at a craft store. If you live near the ocean, you can collect seashells yourself.[22]
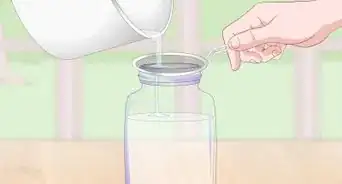
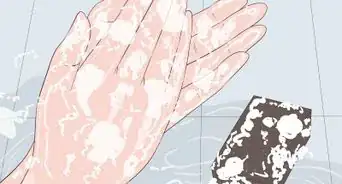
- If you're using seashells you find, scrub thoroughly with antibacterial soap and rinse before use.[23]
-
2Pour soap into the shells. Once your seashells are chosen and prepared, pour the liquid soap into each shell. Set the shell on a flat surface and, if necessary, hold the shell down to prevent spilling. Do not fill the seashell to the brim. Leave about half an inch of wiggle room at the top.[24]
-
3Wrap the shells with plastic wrap. Take some plastic wrap. Wrap each mold in a few layers of plastic wrap, making sure to use enough layers prevent outside air from getting in and to keep the soap from leaking.[25]
-
4Place the molds in a box and cover. Once the molds are secured in plastic wrap, place the shells in a box. You can use any box you can find, like a shoebox. Cover the box with plastic wrap. This helps insulate the soap, quickening the drying process.[26]
-
5Store the box until the soap molds dry. Choose a safe place, away from children or animals, where the box is unlikely to be disturbed. Your soap recipe should indicate how long the soap should take to try. Usually, it takes around 24 to 28 hours.[27]
-
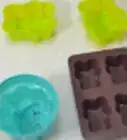
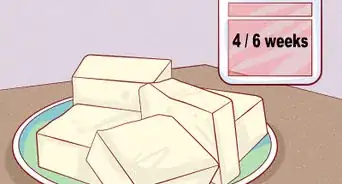
6Remove the soap from the mold. After 24 to 48 hours, remove each mold from the shells. Place the shells on a drying rack. They should be fully dry in 4 to 8 weeks.[28]


Community Q&A
-
QuestionCan we use plastic disposable cups to put the mixed/melted soap in to harden?
 Community AnswerYes. But ensure that they are greased or smoothened, or you will not be able to remove the soap.
 -
QuestionDoes the liquid soap have to be home-made?
 Community AnswerNo, you can try buying it online, or in a store. Michael's, The Craft Store and WalMart are some great places to look.
Warnings
- If you're using lye-based soaps, make sure to wear protective gloves⧼thumbs_response⧽


References
- ↑ http://soapdelinews.com/2013/06/how-to-make-a-soap-mold-for-cold-process-soap.html
- ↑ http://soapdelinews.com/2013/06/how-to-make-a-soap-mold-for-cold-process-soap.html
- ↑ http://soapdelinews.com/2013/06/how-to-make-a-soap-mold-for-cold-process-soap.html
- ↑ http://soapdelinews.com/2013/06/how-to-make-a-soap-mold-for-cold-process-soap.html
- ↑ http://soapdelinews.com/2013/06/how-to-make-a-soap-mold-for-cold-process-soap.html
- ↑ http://soapdelinews.com/2013/06/how-to-make-a-soap-mold-for-cold-process-soap.html
- ↑ http://www.soap-making-essentials.com/making-wood-molds.html
- ↑ http://www.todayshomeowner.com/video/how-to-choose-the-right-sandpaper-grit-for-the-job/
- ↑ http://soapdelinews.com/2013/06/how-to-make-a-soap-mold-for-cold-process-soap.html
- ↑ http://soapdelinews.com/2013/06/how-to-make-a-soap-mold-for-cold-process-soap.html
- ↑ http://soapdelinews.com/2013/06/how-to-make-a-soap-mold-for-cold-process-soap.html
- ↑ http://soapdelinews.com/2013/06/how-to-make-a-soap-mold-for-cold-process-soap.html
- ↑ http://soapdelinews.com/2013/06/how-to-make-a-soap-mold-for-cold-process-soap.html
- ↑ http://soapdelinews.com/2013/06/how-to-make-a-soap-mold-for-cold-process-soap.html
- ↑ http://frugalkiwi.co.nz/2010/12/pvc-pipe-soap-mould/
- ↑ http://frugalkiwi.co.nz/2010/12/pvc-pipe-soap-mould/
- ↑ http://frugalkiwi.co.nz/2010/12/pvc-pipe-soap-mould/
- ↑ http://www.soap-making-resource.com/unique-soap-molds.html
- ↑ http://frugalkiwi.co.nz/2010/12/pvc-pipe-soap-mould/
- ↑ http://frugalkiwi.co.nz/2010/12/pvc-pipe-soap-mould/
- ↑ http://frugalkiwi.co.nz/2010/12/pvc-pipe-soap-mould/
- ↑ http://www.soap-making-resource.com/unique-soap-molds.html
- ↑ http://www.soap-making-resource.com/unique-soap-molds.html
- ↑ http://www.soap-making-resource.com/unique-soap-molds.html
- ↑ http://www.soap-making-resource.com/unique-soap-molds.html
- ↑ http://www.soap-making-resource.com/unique-soap-molds.html
- ↑ http://www.soap-making-resource.com/unique-soap-molds.html
- ↑ http://www.soap-making-resource.com/unique-soap-molds.html
About This Article

To make a soap mold, start by getting some 1/2 inch thick craft wood from your local craft store. Then, cut the wood so you have two 12 by 4-inch pieces, two 3.5 by 4-inch pieces, and one 3.5 by 11-inch piece. Next, assemble a rectangle with the pieces so the two longer pieces make up the sides and the two shorter pieces make up the ends. Once you've assembled the rectangle, use wood glue and clamps to attach the pieces to each other. Finally, glue the 3.5 by 11-inch piece to the bottom of the rectangle and let it dry before filling the mold with soap. To learn how to make a cylinder soap mold, scroll down!