This article was co-authored by Rob Litman. Rob Litman is a Landscaper, General Contractor, and the CEO of Vitoli Inc., a landscaping, hardscaping, ecoscaping, and swimming pool design company in Los Angeles, California. With over 20 years of experience in construction, Rob specializes in energy-efficient and drought-tolerant landscaping. He holds General Building Contractor (Class B) and Registered Pool/Spa Contractor Licenses. In 2007, Rob won House of the Year in Gardena, California.
There are 10 references cited in this article, which can be found at the bottom of the page.
This article has been viewed 48,719 times.
If you prefer a traditional pool, a chlorine pool may be right for you. Unlike salt water, chlorinated water requires weekly testing. However, you can easily adjust the water with chemicals and no longer have to replace the expensive salt cell every few years. The conversion also requires a little plumbing work. With a few pool supplies, you can then maintain a great chlorine pool.
Steps
Replacing the Salt Cell
-
1Wear gloves and goggles for safety. Wear a pair of latex or nitrile gloves to keep your hands clean while handling the salt cell and PVC pipes. Also put on protective eye goggles to shield your eyes when cutting PVC pipe.
-
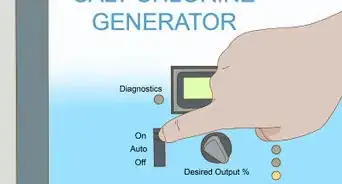
2Turn off the pool pump. Use the electronic controls attached to the pool’s plumbing system. Press the “off” button to stop the pump.Advertisement
-
3Unscrew the salt cell to remove it. The salt cell is a cylinder, usually colored white, on a pipe near the control panel. It attaches to the pipe through a pair of plastic PVC rings called unions. Turn the unions counterclockwise by hand until you can pull them off the salt cell. Then, lift the cell off of the pipes.
-
4Use a tape measure to determine what size PVC pipe you need. You will need to replace the salt cell with new pipe before you can activate the pump again. Measure the space between existing pipes where the salt cell used to be. Also note the diameter of the existing pipes by measuring across their openings.[1]
- Get a new pipe that is the same diameter as the existing pipes. It will fit into any fittings already attached to the old pipes.
- You will also need 2 straight fittings to connect the new PVC pipe to the old ones.
-
5
-
6Brush primer onto the new and existing pipes. Wipe down the pipe ends with a clean cloth. Use the brush included with the purple primer to paint about 3 in (7.6 cm) along the ends of each fitting. Coat the inner end of each fitting as well as the outer portions both the new and existing pipes.[3]
- Then, wait about 10 seconds for the primer to dry.
-
7Spread PVC cement over the primed areas on the pipes. Take the cap off the PVC cement bottle to uncover the brush. Spread a thin, even layer of cement over the outer ends of the fittings. Also coat the inside portion of the pipes. Spread the cement about 3 in (7.6 cm) as well, covering all of the primer.[4]
-
8Place the fittings on the existing pipes. Set a fitting in each existing pipe. Push the fittings as far as you can to ensure they glue in place. Situate them so the other opening points outwards towards the opposite pipe.
-
9Set the new pipe in place. Move the pipe to the open space in the plumbing system. Slide the new pipe into the fitting of the lower pipe. Give the pipe a quarter twist to the right to lock it in place. Then, pull the uppermost pipe back and slide the new pipe into its fitting.[5]
-
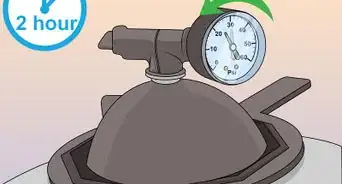
10Wait 2 hours for the glue to dry. Avoid activating the pump again until the glue has settled. After about 2 hours, you can drain the pool and add chemicals to convert it to chlorine.


Converting the Water
-
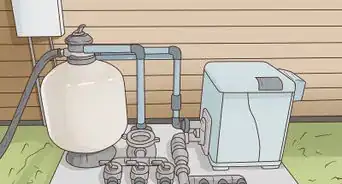
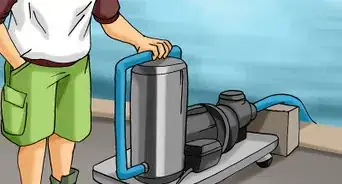
1Drain half of the water from the pool. Change the pump’s settings to reverse so the water pumps out. If you don’t have a pre-installed pump, rent or purchase a vacuum pump from a pool supply store. Put the inlet hose in the water, then put the outlet hose near a container or drain. This takes out a lot of salt and makes the chemical levels a little easier to balance later.[6]
- You can also try opening the pool’s drain if it has one or taking apart the pool until you can turn over the liner.
-
2Shut off the pump and refill the pool with fresh water. Hook up a garden hose to a nearby water spout and use it to replace the water. Continue filling the pool until the water level is about ⅓ of the way up the skimmer, which is the rectangular opening near the pipes.[7]
- Depending on the size of your pool, this can take a few hours.
-
3Use a kit to test the water’s chemical levels. Testing strips are the most common option sold by pool supply stores. Scoop some water out of the pool with a cup, then hold the strip in the sample for about 15 seconds. The strip will change colors to indicate the levels of several chemicals within the water.[8]
- Compare the strip’s colors to the chart included with the test kit.
- Liquid test kits are also available. You squeeze a droplet of dye into the sample, which changes color depending on the chemical it detects.
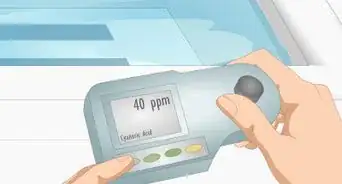
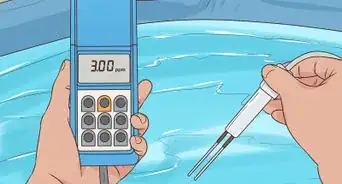
- Digital water testers are also available. For these, you dip the end of the device into the sample. Activate the device to get the test results.
-
4Avoid adding chlorine if the cyanuric acid level is above 70 ppm. A normal cyanuric acid reading is between 20 and 30 ppm. If yours is around 70 ppm or higher, wait 2 or 3 days before testing the pool again.[9]
- Most chlorine tablets include cyanuric acid, so adding them now could end up damaging the pool by making the water too acidic. Acid eats away at the pipes and pool liner.
- The pH and other chemicals should still be at safe levels. If you are concerned about them, keep everyone out of the pool until you finish converting it.
-
5Fill a floating container with chlorine tablets and place it in the water. Purchase chlorine tablets from a pool supply store along with a plastic floating container. Once the pool’s acid level is around 30 ppm or lower, add the tablets to the container according to the manufacturer’s instructions. Push the container below the water’s surface, then let it float so the tablets dissolve.[10]
- The number of chlorine tablets you need depends on the size of your pool. Add 1 tablet for every 5,000 US gal (19,000 L) of water your pool holds.
- You may also purchase a chlorinator. It attaches to the pool’s pipes and automatically disperses any chlorine you place inside it.
- Avoid adding the tablets directly to the pool. They can damage the pool’s pipes and liner.


Maintaining the Pool
-
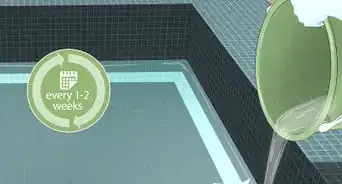
1Test the pool water at least once a week. Continue using your pool testing kit. Collect a new sample to perform a fresh test every time. With chlorine pools, you have to test the water every week in order to monitor and adjust the chemical levels.[11]
- When converting your pool, it can be helpful to test the water every couple of days until the chemical levels stabilize.
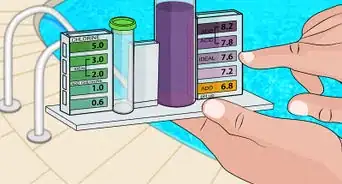
- The ideal pool pH level is between 7.2 and 7.8.
- Keep the chlorine level between 1 and 3 ppm.
- Make sure the cyanuric acid level is between 20 and 30 ppm.
-
2Refill the floating container after the chlorine tablets dissolve. You will usually need to add a couple of tablets every week. Check the container daily to see how many tablets are left. Add more as needed to keep your water sterilized. The chlorine level should stay between 1 and 3 ppm.[12]
- Follow the manufacturer’s instructions. Avoid using more than the recommended number of tablets.
-
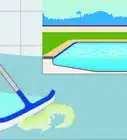
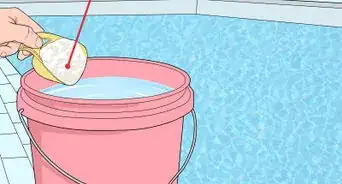
3Add shock to the pool once a week to sterilize the water. Purchase a bag of non-chlorinated shock from a pool supply store. In a well-ventilated area, mix the shock into a bucket of pool water. Add about 1 lb (0.45 kg) of shock for every 10,000 US gal (38,000 L) your pool holds.[13]
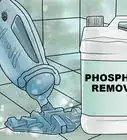
- Non-chlorinated shock is the best choice since it won’t raise your pool’s cyanuric acid level, which may be high after switching from salt water.
-
4Adjust the pH level with muriatic acid. Salt water pools tend to have a high pH level. To bring your pool’s pH down after converting it to chlorine, get muriatic acid from a pool supply store. You will need to add 1⁄4 US gal (0.95 L), possibly more for pools that hold more than 10,000 US gal (38,000 L) of water. Pour it into the water according to the instructions on the label.[14]
- The pH level should read between 7.2 and 7.8 on your testing kit.
- Avoid using soda ash or baking soda. These products raise the pH. They are only useful later on if you lower the pH too much.
-
5Mix and add the chemicals to the water separately. Mix the chemicals 1 at a time, all in separate buckets. Read the manufacturer’s instructions to figure out what ratio of chemical product and pool water to mix. Then, dump the chemical directly into the pool to disperse. Wash out the buckets after using them.
- Use an online tool such as http://www.poolcalculator.com to figure the amount of chemicals to add.
-
6Run the pool’s pump for at least 30 minutes after adding chemicals. The pump keeps the water moving in your pool, which helps disperse the chemicals. After you are done adding your chemicals and tablets, turn the pump on. Let it run for at least half an hour before getting into the water.[15]


Warnings
- Mixing chemicals together is dangerous. Dump them into the pool to dilute them. Don’t mix them together directly.⧼thumbs_response⧽
Things You’ll Need
- PVC pipe
- Straight PVC pipe fittings
- Hacksaw
- Vise
- PVC primer
- PVC cement
- Chlorine tablets
- Floating chlorine container
- Non-chlorinated shock
- Water testing kit
- Muriatic acid


References
- ↑ https://www.youtube.com/watch?v=CnXy3gZSm_c&feature=youtu.be&t=664
- ↑ https://www.familyhandyman.com/plumbing/how-to-glue-and-join-pvc-plastic-pipe/view-all/
- ↑ https://www.youtube.com/watch?v=CnXy3gZSm_c&feature=youtu.be&t=529
- ↑ https://www.familyhandyman.com/plumbing/how-to-glue-and-join-pvc-plastic-pipe/view-all/
- ↑ https://www.familyhandyman.com/plumbing/how-to-glue-and-join-pvc-plastic-pipe/view-all/
- ↑ https://apsp.org/Portals/0/PDFs/Advantis%20Pool%20Chemistry%20Book%20-%20ENGLISH.pdf
- ↑ https://apsp.org/Portals/0/PDFs/Advantis%20Pool%20Chemistry%20Book%20-%20ENGLISH.pdf
- ↑ https://www.cdc.gov/healthywater/swimming/swimmers/pool-spa-test-strips.html
- ↑ https://dphhs.mt.gov/Portals/85/publichealth/documents/FCS/CyanuricAcidforwebsite.pdf
- ↑ https://www.thisoldhouse.com/how-to/how-to-maintain-pool
- ↑ https://www.cdc.gov/healthywater/swimming/residential/disinfection-testing.html
- ↑ https://www.thisoldhouse.com/how-to/how-to-maintain-pool
- ↑ https://chlorine.americanchemistry.com/Chlorine/Pool-Treatment-101/
- ↑ https://apsp.org/Portals/0/PDFs/Advantis%20Pool%20Chemistry%20Book%20-%20ENGLISH.pdf
- ↑ http://www.thepoolprofessor.com/hints.pdf
About This Article

To convert a salt water pool to chlorine, start by turning off the pool pump and unscrewing the salt cell to remove it from the pipe near the control panel. Once the salt cell is taken off, get a new PVC pipe that is the same diameter as the existing pipes and use a hacksaw to fit it in the space where the salt cell was placed. Then, brush primer and PVC cement on the new and existing pipes, as well as 2 straight fittings that will connect the pipes. After setting all the pieces in place, wait 2 hours for the glue to dry. Next, drain half of the water from the pool and replace it with fresh water from a garden hose. Finish by filling a floating plastic chlorine container with the necessary amount of chlorine tablet for your pool size. For more tips, like how to balance your pool’s pH level, read on!