This article was co-authored by wikiHow Staff. Our trained team of editors and researchers validate articles for accuracy and comprehensiveness. wikiHow's Content Management Team carefully monitors the work from our editorial staff to ensure that each article is backed by trusted research and meets our high quality standards.
There are 13 references cited in this article, which can be found at the bottom of the page.
This article has been viewed 32,946 times.
Learn more...
Testing pool water at least once a week keeps your pool clean and safe. To test the water, all you need is one of several different varieties of testing kits. By monitoring the colors on the testing kit, you can adjust the water with chemicals to both protect your pool and anyone swimming in it.
Steps
Collecting the Sample
-
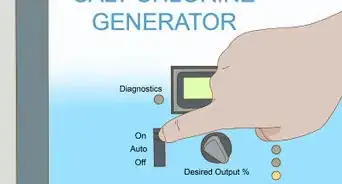
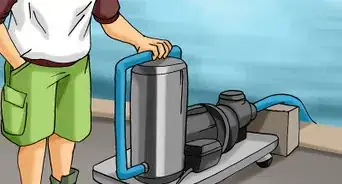
1Run the pump in the morning for 15 minutes. Aim on getting there before noon, since the day’s heat and sunlight affect the chemicals in the water. If the pool’s systems were turned off, turn them on and wait at least 15 minutes for the chemicals to disperse.[1]
- As long as the systems were kept on for at least 15 minutes, you can collect the sample immediately.
-
2Take the sample in the middle of the pool. Stand outside the pool, near the side, and reach down towards the water. You’ll want to get far away from any jets or skimmers, since these are where chemicals tend to accumulate. The middle of the pool is where you’ll get the most accurate results.Advertisement
-
3Collect a sample in a cup or a bottle. You don’t need a lot of water, only enough to cover the testing strip or mix with the liquids in the testing kit. A clean cup or mug from your kitchen will do. If you have a plastic bottle, that’ll also work and is easy to cap in case you want to bring the sample to a professional.
- Make sure you wash out the cup or bottle with soap so the sample is as accurate as possible.
-
4Dip the collecting cup elbow-deep into the water. The easy way to collect the sample is to hold the cup upside down at first. Lower your arm until the water is up to your elbow, about 12 to 18 in (30 to 46 cm) deep. Flip over the cup to collect the water.[2]
-
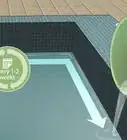
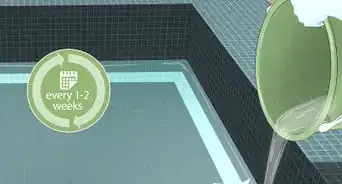
5Test at least once a week. Pick a day of the week and test the water on that day every week. Most home pools can be safely maintained this way. If your pool is undrained during the winter, you will still need to perform the test once a week.[3]
- Ideally, you should test the pool 2 to 3 times a week.
- Pool water shouldn’t be allowed to freeze in winter. Lower the water level until it's below the skimmer and run the pumps normally. Stop ice from forming to protect your pool and collect samples easily!
-
6Take the pool sample to an expert when you’re unsure. Most pool stores accept and analyze samples for no cost. They can give you a more accurate reading as well as make recommendations on what to do next. This is most helpful when you’re unsure of a problem or how to improve it.[4]
- For example, your pH level might be too high, but when you add chemicals to lower it, the alkalinity drops too low.
- Another example is when your water is green, but treating it for algae didn’t work and you need to know if metals are causing it.


Using the Testing Kit
-
1Purchase a water testing kit. Pool testing kits come in several different varieties. Test strips are the cheapest and easiest to use. Make sure the strips come with a color chart printed on a card or the back of the bottle so you can interpret the results. Once you own the chart, you can purchase additional bottles of strips rather than whole kits.[5]
- Another test variety are liquid test kits. You add the included chemicals to the water, then look for color changes. It can be difficult to mix the dye in the proper proportion and spot slight color changes.
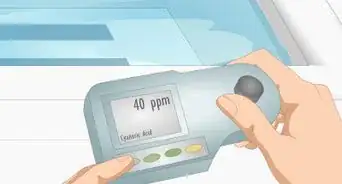
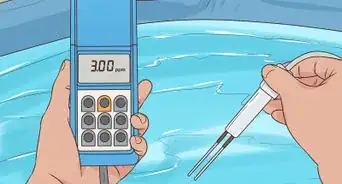
- The last option is a digital water tester. Dip the end in the sample to get results. These are accurate but expensive and can malfunction.
-
2Submerge the test strips for 15 seconds. After this time, the strip will change colors. Remove the strip immediately, but don’t shake off the water. For testing strips, you’ll only need a single water sample.[6]
- When doing a liquid test, pour a few drops of the dye into the water sample. You will need to collect a new sample of pool water for each dye.
- For digital testers, stick the sensor in the sample.
-
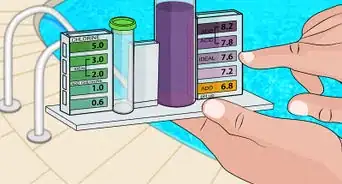
3Compare the results to the color chart. The color chart will be somewhere in your kit or on the back of the bottle of testing strips. If you bought 4 in 1, 5 in 1, or 6 in 1 strips, several colored patches on the strips may change. Each one corresponds to a separate chemical measurement on your color chart.
- Strips that aren’t all in 1 only test a single element. You’ll need to go to the store and get separate strips for chlorine, pH, and alkalinity. Strips for cyanuric acid and water hardness are also recommended.
-
4Look for a pH level between 7.2 and 7.8. Water testing below 7.2 is more acidic, so if you notice colored stains from metal or corroded pipes, low pH could be the culprit. Water above 7.8 is more basic, causing chemical deposits on pool gear and preventing chlorine from killing bacteria and algae. Both high and low pH water irritate eyes and skin.[7]
- The pH level can be raised by adding soda ash, which is available at any pool store. Follow the directions on the label to figure out the proper amount to add.
- Lower the pH level by mixing in muriatic acid.
-
5Test for a chlorine level between 1 and 3 ppm. Again, the corresponding patch on the testing strip will change colors, so read the chart to determine the chlorine level. Chlorine prevents bacteria and algae, so low chlorine can be the cause of green water or illness. Chlorine is a skin irritant at high levels.[8]
- If your pool uses bromine instead of chlorine, the color on the strip should correspond to a level between 2.0 and 4.0 ppm.
- Chlorine tablets are normal ways to raise this measurement. Get them at the store and put one in the chlorinator or skimmer basket every week.
- Chlorine burns off naturally in the day. You can lower it further by applying a neutralizing chemical like sodium thiosulfate or sodium sulfite.
-
6Aim for an alkalinity result between 120 and 150 ppm. The alkalinity changes a lot due to the pH level, or it can cause the pH level to change. High alkalinity causes scaling and cloudy water, while low alkalinity corrodes and stains pools.
- Baking soda (sodium bicarbonate) is the main product used for raising the alkalinity level.[9]
- Muriatic acid or dry acid (sodium bisulfate) are effective for lowering the alkalinity.
-
7Check that the cyanuric acid levels are between 20 and 30 ppm. Cyanuric acid is typically included in chlorine tablets, keeping the chlorine in the water longer. It’s an acid, so it can be the reason for lower pH and alkalinity. It’s also important for keeping the chlorine level consistent, so a low chlorine level could be caused by a lack of cyanuric acid.
- Cyanuric acid is added through regular usage of chlorine tablets. Adding a product called stabilizer, found at pool stores, also helps.
- To lower the cyanuric acid level, stop using chlorine tablets for a while and switch to chlorine shock. For immediate effect, drain some of the water and replace it with untreated water.
-
8Choose a calcium hardness level based on your pool type. For vinyl pools, the level needs to be between 175 and 225 ppm. In concrete pools, it’s best between 200 and 250 ppm. Water low in calcium abrades pool walls and liners. High calcium levels cause cloudy, scaly water.[10]
- Chlorine shock is responsible for increasing calcium levels.
- To lower the calcium level, try adding a flocculant from the pool supply store. Another option is to drain some of the water and replace it.


Treating Pool Water
-
1Calculate the amount of chemicals you need to add. Any product you need can be purchased online or at a pool store. Read the product information to find out how much product you need and how frequently to add it.
- A tool like poolcalculator.com also helps when figuring this out.
-
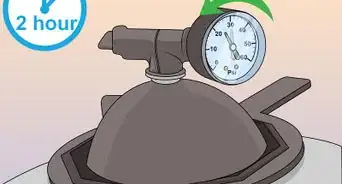
2Add the chemicals at night when everyone’s out. Give the chemicals time to circulate before anyone swims in the water. Immediately turn on the pumps for at least half an hour to distribute the chemicals.[11]
- To keep your pool healthy, run the pumps from 6 to 8 hours every day. You can turn on the pumps overnight to do this, spread chemicals, and ready the water for testing.
-
3Pour the chemicals into the pool one at a time. Start with 1 chemical and finish adding it to the pool before moving on to the next one. Let the first chemical circulate for a few minutes while while you prepare the second one. Mixing the chemicals together directly can be dangerous.
- This also means you should avoid using the same measuring cup for two chemicals, unless you rinse the cup out first.
-
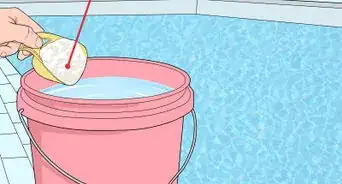
4Gradually add chemicals to the pool according to the instructions. Read the packaging for directions first. Chemicals are meant to be poured into the pool slowly, usually after diluting them in a cup with water. In addition, the manufacturer will specify how much and how often you should add a chemical.
- It is a good idea to test the water 24 hours after adding chemicals. This allows you to monitor changes when making major adjustments to the chemical levels.
-
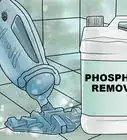
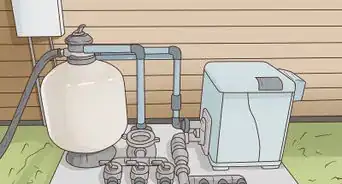
5Remove metal stains with a home filter and a scale remover. Metal in pool water won’t harm swimmers but discolors water and pool liners. Empty out the water and treat the stains with a pool stain remover product. Install a pre-fill filter on your hose or connect the hose to a water line serviced by a home water filter.[12]
- Metals turn everything different shades of color. For instance, copper leaves green stains and turns unwashed blonde hair green. Iron leaves brown-red stains.
- There are testing strips that monitor metal levels, but they’re pricey.
-
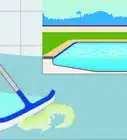
6Clear out green water with chlorine. Green water is caused by algae, which is prevented with chlorine shock and tablets. Dilute these gradually in the water every week according to the instructions on the packaging. Monitor the pool’s chlorine levels afterwards and watch for the water to clear as the level rises.[13]
- Green water can also mean dirty filters, especially after adding shock. Remove the filters and rinse them off with a hose. Add some baking soda to the water to clear it within a few days.
-
7Drain the pool when all else fails. Sometimes the easiest way to fix bad pool water is to replace it. Drain the water and repair any problems with the pipes, filters, or other devices affecting the water. Then, fill the pool with clean water and begin treating it with chlorine tablets to get a fresh start. It beats sinking lots of money into chemicals that won’t have enough of an effect.


Warnings
- Work with pool chemicals outdoors or a well-ventilated area.⧼thumbs_response⧽
- Store chemicals in a cool, dry place away from children and pets.⧼thumbs_response⧽
- Never mix chemicals together. Add them into the pool one at a time.⧼thumbs_response⧽


References
- ↑ https://youtu.be/vy4dET3vSv8?t=85
- ↑ http://ww2.health.wa.gov.au/~/media/Files/Corporate/general%20documents/water/PDF/Water_Sampling_Technique.ashx
- ↑ https://www.cnbc.com/id/48372146
- ↑ http://www.poolsolutions.com/gd/pool-water-testing-by-swimming-pool-dealers.html
- ↑ https://www.youtube.com/watch?v=eu8GiRBDXQM&feature=youtu.be&t=35
- ↑ https://www.cdc.gov/healthywater/swimming/swimmers/pool-spa-test-strips.html
- ↑ https://www.cdc.gov/healthywater/swimming/residential/disinfection-testing.html
- ↑ http://www.popularmechanics.com/home/lawn-garden/how-to/a7671/how-to-get-your-swimming-pool-ready-for-summer-8692427/
- ↑ http://www.poolspanews.com/how-to/maintenance/soda-ash-vs-baking-soda_o
About This Article

If you want to test the water in your pool, take a sample from the center of the pool in a cup. The best way to get the sample is to put your arm into the water until it's up to your elbow, then flip the cup over to fill it up. Next, put the strips from your test kit into the water for 15 seconds. Find the color chart in your kit and compare the results. Look for a pH result of between 7.2 and 7.8. If you need to increase the pH level, buy soda ash from a pool store. To reduce it, add muriatic acid to your pool. Also be sure to check your chlorine, alkalinity, and cyanuric acid levels. If you want to know what levels are best for your pool, keep reading the article!