This article was co-authored by Lauren Kurtz. Lauren Kurtz is a Naturalist and Horticultural Specialist. Lauren has worked for Aurora, Colorado managing the Water-Wise Garden at Aurora Municipal Center for the Water Conservation Department. She earned a BA in Environmental and Sustainability Studies from Western Michigan University in 2014.
There are 8 references cited in this article, which can be found at the bottom of the page.
This article has been viewed 150,581 times.
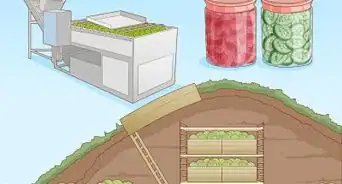
Gardening is fun and rewarding, but the digging process can be tiresome. That’s why a no-dig garden is a great alternative solution to the typical garden. Making a no-dig garden is similar to composting, meaning ingredients are layered to decompose the soil. Vegetables such as kale, chicory, corn, and tomatoes can be grown in your garden. This type of garden can be set up in 1 day. Preparing the no-dig garden can be quite a workout, but the veggies you will grow within 2 to 4 months of planting will save you several trips to the grocery store!
Steps
Setting up the Location
-
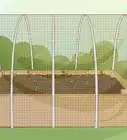
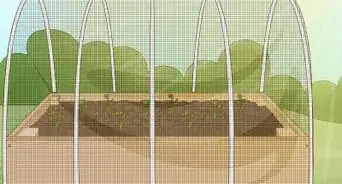
1Choose a level site for your no-dig garden. A good amount of space is 4 by 5 feet (1.2 by 1.5 m), though you can make it smaller or larger. An ideal area should get 4 to 5 hours of sunlight a day.[1]
- If the area is not very level, even it out with garden tools. Then, then fill in the gaps with things like twigs, leaves, and bark.
-
2Contain the garden by building a wall around it. This is optional, but it can be helpful when it comes to containing your garden in one space. You can use wooden planks, or you can use materials such as branches, bricks, or rocks.[2]
- The material you choose for your garden wall largely depends on cost and the look you’re going for. For example, wooden planks are commonly used and look nice, but they are more expensive than branches.
Advertisement -
3Mow or cut the area in preparation, but leave the clippings. Once you've cut the grass and weeds, do not remove these cuttings from the area. If you leave them there, they can help fertilize your no dig garden![3]


Adding Layers to the Garden
-
1Cover the area with 3 inches (7.6 cm) of mulch. You can also use old hay or collect leaves in autumn to use as mulch. The hay or leaves will gradually break down and nourish the soil underneath, and while they do, they will keep moisture in and weeds in check.[4]
- You can also purchase mulch from your local nursery.
- Another option for the bottom layer is plain, brown cardboard.
-
2Use newspapers as a barrier between the ground and your garden. Avoid glossy or colored print or advertising brochures, and opt for basic newsprint instead.[5]
- You will need quite a bit of newspaper, so it is helpful to save newspapers for a few weeks.
-
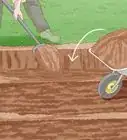
3Fill a large container with water and insert the newspaper. The newspapers need to be wet when they are laid out on the mowed or cut ground. Leave the newspaper until it is completely wet and then remove.[6]
- A wheelbarrow is ideal to use because it can be easily transported, but any large container will work.
-
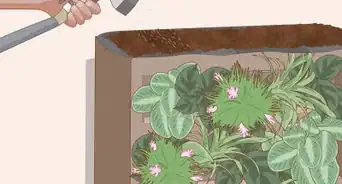
4Layer 3-4 sheets of newspaper on top of the mulch, making sure to overlap. Your newspapers should have between 1 and 2 inches (2.5 and 5.1 cm) of overlap. Make sure you cover the entire space in your garden.[7]
- Spread thickly enough, the paper and other matter will block light to whatever weeds or sod you cover with it.
- Certain weeds, such as Bermuda grass, don't respond especially well to smothering and seem to come up through just about anything. If you try newspaper for such weeds, use extra newspaper (around 10-20 sheets) and make sure that the offending weeds remain buried on all sides for at least 2 years.
- Use more paper if the ground is uneven.
-
5Add a layer of hay, straw, or grass clippings until you can't see the newspaper. Lucerne hay is ideal to use for this layer. It can be purchased from horse stables or your local gardening store. If you can’t find Lucerne hay, you can also use straw mixed with grass clippings.[8]
-
6Water in between each layer in your no-dig garden. After the Lucerne hay, water the area until it is wet but not soaking. Continue to water after each layer you put down.[9]
-
7Spread a 1 inch (2.5 cm) layer of fertilizer over the hay. Try natural commercial fertilizer. You can also use well-rotted horse, chicken, or cow manure as fertilizer.[10]
- You can purchase fertilizer at your local gardening store. If you are using commercial fertilizer, use less than 1 in (2.5 cm).
-
8Put down a 1 inch (2.5 cm) layer of straw. This is just your basic straw that is very easy to find. Make sure to cover the entire garden area.[11]
-
9Finish with a 1 inch (2.5 cm) layer of mulch. You can use the same mulch that you used underneath the newspaper. You only need 1 inch (2.5 cm), though you can use more if you'd like.[12]
-
10Water the established area thoroughly. Once your no-dig garden is established, it will retain water. However, while it's being established, water runoff and dry soil are a concern. Check the soil daily, and make sure to water to keep the soil damp, if necessary.[13]
- You can also let the next rainstorm do the job. If you do let a rainstorm water your garden, it won’t be necessary to water it yourself until the soil begins to dry out.


Planting in Your Garden
-
1Grow plants like broccoli during cool weather. Consider your climate and the time of year you’re creating your garden when choosing what vegetables to plant. If you live in a cooler climate or if it will be fairly cool during the growing season, like 50 to 70 °F (10 to 21 °C), then considering plants such as broccoli. Along with broccoli, Brussels sprouts, cauliflower, turnips, onions, and peas are ideal for cooler temperatures because they can withstand a light frost.[14]
-
2Choose vegetables like carrots during cool to warmer weather. Vegetables such as carrots, cabbage, radish, and lettuce grow well in intermediate temperatures between 60 to 80 °F (16 to 27 °C). If you try to grow these vegetables in colder or much warmer temperatures, there’s a good chance they will not grow well or at all.[15]
- Parsnip, leek, and celery also grow well in intermediate temperatures.
-
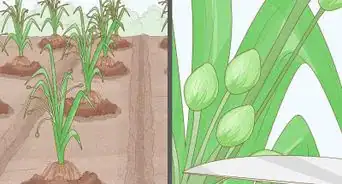
3Pick vegetables like corn in warm to hot weather. Along with corn, potatoes, tomatoes, eggplants, and beans grow well in temperatures between 60 to 80 °F (16 to 27 °C). These plants should not be exposed to frost. So make sure the majority of growing time is during warm weather for any of these vegetables.[16]
- Capsicum and all vine crops also grow well in warm weather.
-
4Create small, 1 inch (2.5 cm) deep holes. You can dig the holes with your hands or another instrument. Each hole should be at least 3 inches (7.6 cm) apart.[17]
-
5Fill the holes with compost. The holes should be almost or completely filled with the compost.[18]
-
6Create a 1⁄2 inch (1.3 cm) hole in the compost and plant seeds. You can plant 2 to 3 seedlings per hole.[19]
-
7Keep the soil in your garden damp at all times. How often you water your garden largely depends on what you plant. Check your garden daily to see how wet or dry the soil is. Water whenever the soil feels dry.[20]
-
8Harvest vegetables throughout the year. Certain vegetables will grow and be ready to harvest at different times during the year. For example, your broccoli will grow and be ready during a cooler time of year—like autumn. But your tomatoes will grow and be ready for your salad during warm weather. Watch for your vegetables to reach full size and whichever color represents ripeness for each type of vegetable before picking.[21]
-
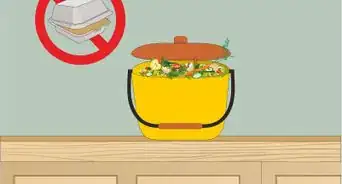
9Add compost once or twice a year to keep your garden healthy. You can make compost out of things like yard clippings, table scraps, eggshells, and leaves. Compost at the beginning of spring and at the beginning of autumn if you plan to do it twice a year.[22]


Community Q&A
-
QuestionThe drawing of the garden at the top details a size of garden of four inches by five inches. What can be grown here?
 Community AnswerMost smaller and above-ground vegetables, and just about all herbs. You can also make notes of what's at your local nursery in small pots for flowers.
 -
QuestionHow do I remove tomato plants from a raised bed? My problem is I have too many plants in the raised bed, so I want to move some to pots. Any suggestions?
 DonaganTop AnswererDig up the plant without touching the roots if possible. Tomato roots can be fairly large, depending on your watering pattern. Let the soil ball be almost as big as the pot you'll put it in. Keep it well watered afterward.
Warnings
- Make sure that you have permission to use the space before beginning your no-dig garden.⧼thumbs_response⧽
Things You’ll Need
- Wooden planks (or bricks or rocks)
- Newspaper
- Watering can
- Mulch
- Compost
- Lucerne hay
- Straw
- Fertilizer
- Seedlings


References
- ↑ http://www.no-dig-vegetablegarden.com/build-a-garden.html
- ↑ http://www.no-dig-vegetablegarden.com/build-a-garden.html
- ↑ http://www.no-dig-vegetablegarden.com/build-a-garden.html
- ↑ https://www.veryediblegardens.com.au/iveg/no-dig-gardening/
- ↑ http://soiltosupper.com/how-to-build-a-no-dig-garden/
- ↑ http://soiltosupper.com/how-to-build-a-no-dig-garden/
- ↑ http://www.no-dig-vegetablegarden.com/build-a-garden.html
- ↑ http://www.no-dig-vegetablegarden.com/build-a-garden.html
- ↑ http://www.no-dig-vegetablegarden.com/build-a-garden.html
- ↑ http://www.no-dig-vegetablegarden.com/build-a-garden.html
- ↑ https://deepgreenpermaculture.com/diy-instructions/no-dig-gardening/
- ↑ https://deepgreenpermaculture.com/diy-instructions/no-dig-gardening/
- ↑ https://www.veryediblegardens.com.au/iveg/no-dig-gardening/
- ↑ http://www.no-dig-vegetablegarden.com/plan-a-vegetable-garden.html
- ↑ http://www.no-dig-vegetablegarden.com/plan-a-vegetable-garden.html
- ↑ http://www.no-dig-vegetablegarden.com/plan-a-vegetable-garden.html
- ↑ http://www.no-dig-vegetablegarden.com/build-a-garden.html
- ↑ http://www.no-dig-vegetablegarden.com/build-a-garden.html
- ↑ http://www.no-dig-vegetablegarden.com/build-a-garden.html
- ↑ http://www.no-dig-vegetablegarden.com/build-a-garden.html
- ↑ http://www.no-dig-vegetablegarden.com/build-a-garden.html
- ↑ https://www.veryediblegardens.com.au/iveg/no-dig-gardening/
About This Article