X
wikiHow is a “wiki,” similar to Wikipedia, which means that many of our articles are co-written by multiple authors. To create this article, 13 people, some anonymous, worked to edit and improve it over time.
This article has been viewed 40,529 times.
Learn more...
Love roses, but don't have a green thumb? Don't fear! It's easy to make crocheted roses for embellishing purses, headbands, or scarves. Consider your project, pick your yarn, and let your skills blossom.
Steps
Part 1
Part 1 of 2:
Preparing to Crochet
-
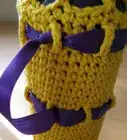
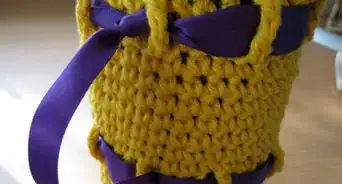
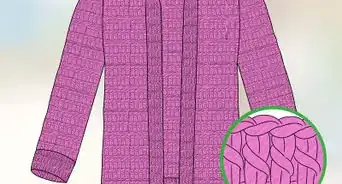
1Consider your project. Are you just making roses for practice or would you like to affix them to another item? For example, think about if you'd like to attach roses to a scarf, jacket, blanket, or hat. You'll need to decide how large you'd like your roses and how many you intend to make.
-
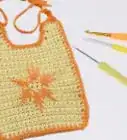
2Select your yarn. A worsted weight yarn is ideal for starting, since you'll be able to see the stitches. Consider how you'll be using the roses. If they're embellishing a scarf or purse, you may want a specialty yarn. Make sure the texture of the yarn matches the texture of the item you'll be attaching it to.Advertisement
-
3Pick your crochet hook. This is basically determined by the type of yarn you've chosen. The yarn package should give a suggested hook size for use with that specific yarn.
- Many worsted weight yarns will work with a number 5 hook or size I. The hook size suggestion doesn't have to be followed, but your crocheting might turn out knotty or too loose.


Advertisement
Part 2
Part 2 of 2:
Crocheting Your Roses
-
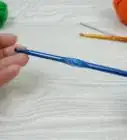
1Create a slipknot. Make a loop about 6 inches (15.2 cm) from the free end of the yarn. The free end should hang behind your loop. Insert your crochet hook through the loop and hook the free end before pulling it back through the loop and onto the hook.[1]
-
2Chain 60 stitches. Remember not to count your first stitch towards the 60 chains.
- To make one chain stitch, you'll want to hold the hook in you right hand and loop the working yarn over your left index finger. Hold the end of the slipknot between the thumb and middle finger of your left hand. Then, bring the yarn from back to front around the shaft of the hook, drawing it through the loop on the hook. Repeat this to make the first row, or foundation chain.
-
3Chain 3 more stitches. Add 3 chains onto the 60 that you already have. This will maintain the height when you start crocheting the following rows.
-
4Double chain into the fourth chain from your hook. This will effectively count as turning your work, so just continue crocheting the row.
- To double chain, insert your hook into the fourth chain. Yarn over and pull the yarn through the chain. At this point, you should have three loops on your hook. Yarn over again and pull through two loops on your hook. You should now have one loop on your hook.
-
5Double crochet all across your foundation chain. Make sure to insert your hook into the chain and not the gap closer to your hook.
- To double crochet into your chain, insert your hook and yarn over. Pull up a loop, yarn over, pull through two, yarn over and pull through two. Continue doing this across the length of the chain.[2]
-
6Count your stitches. Check to make sure you have 60 stitches once you complete the row.
-
7Turn your work. Turning your work simply means rotating it so that the last stitch you worked becomes the beginning of the next row.
-
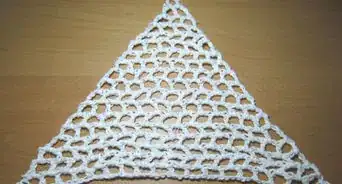
8Create a scallop: skip one stitch and double crochet 6 times into the next stitch. Repeat this all the way across.
- To double crochet, yarn over insert your hook under both of your loops, yarn over, and pull up. You should now have three loops on your hook. Yarn over, pull through two, yarn over and pull through two.
-
9Secure the scallop: skip one stitch and single crochet into the next stitch. Repeat this all the way across.
- To single crochet, insert your hook from front to back in the center of the second chain from the hook. At this point, you should have 2 loops on your hook. Yarn over, or twist the yarn from front to back around the hook, and pull the yarn through the chain. Again, you should have 2 loops on your hook. Yarn over again and draw through the 2 loops. You'll now have single crochet stitches.
-
10Continue making and securing scallops all the way across your row.
-
11Bind off. Cut the working yarn, then wrap the tail around your hook and pull it completely through your loop.
-
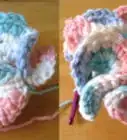
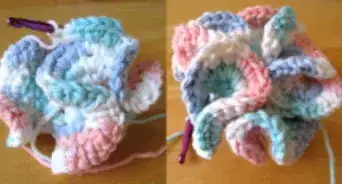
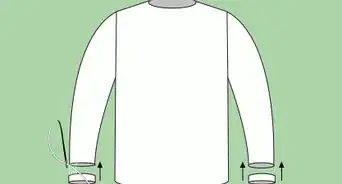
12Shape your rose. Wrap and roll your scalloped piece so the scalloped edges face out like petals. Make sure to keep the straight edges lined up as you roll since you'll need to secure them later.
- Wrapping the scalloped piece tightly will create a smaller ruffled rose, as compared to one that's looser and larger. Play with wrapping until you create a shape you like.
-
13Secure the base of your rose. Thread a darning or embroidery needle using the tail from your scalloped piece. Insert your needle into the next row over. Pull through to tighten the end of your scalloped piece.
-
14Work your thread through the base. Using your threaded needle, continue working back and forth through the bottom or base of the row. Make sure to pass through all of the rose's layers.
- Keep working the thread back and forth until the rose feels secure.
-
15Tightly tie off the loose ends. Trim the remaining thread and use your rose.


Advertisement
Community Q&A
-
QuestionHow do I make these into granny squares? The roses come out beautiful. I made a quilt and 1 dozen long stem roses.
 MicheleTop AnswererIt's really very easy and less complicated than even this simple crochet rose. See crochet a granny square for full instructions with pictures on how to do this.
Advertisement
Things You'll Need
- Worsted weight yarn
- 5 mm crochet hook (size I)
- Darning needle
References
About This Article
Advertisement