This article was co-authored by Madeleine Johnson. Madeleine Johnson is a Hair Stylist and Hair Extensions Specialist based in Beverly Hills, California. She is affiliated with Hair by Violet Salon in Beverly Hills. Madeleine has over six years of hairstyling experience as a licensed cosmetologist. She specializes in microbead extensions and tape-in extensions. She trained under celebrity extension artist Violet Teriti (Chaviv Hair) and earned her cosmetology license from Santa Monica College.
This article has been viewed 15,995 times.
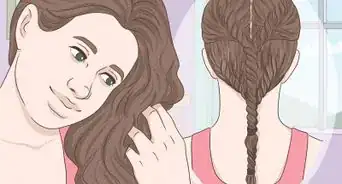
Curling your short hair is a great way to change-up your look! The curling process is really easy and only takes about 20 minutes. Start by sectioning off half your hair, then clamp 1 inch (2.5 cm) sections of hair around the iron for 10 seconds. Release the clamp to reveal your beautiful curls. Repeat the curling process on the rest of your hair to transform your look.
Steps
Prepping Your Hair
-
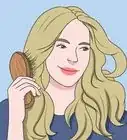
1Leave your natural oils to build up for at least 1 day. Wash your hair 1-3 days before you want to curl it. This allows the natural oils to build up, which makes your hair look shiny and helps it to hold the curls better. However, don't apply any additional oils to your hair, as this can make it look greasy and will weigh it down.
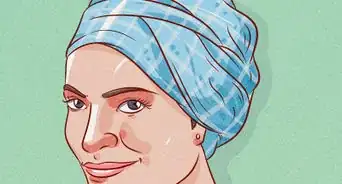
- If you do wash your hair right before you curl it, make sure that it is completely dry before you start curling it. You can either air dry your hair or use a hair dryer to speed up the process.
-
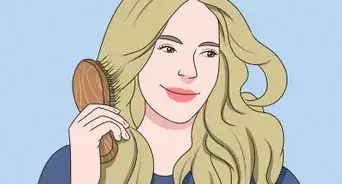
2Spray your hair with a heat protectant spray before you curl it. Coat the lengths of your hair with a heat protectant spray to help prevent heat damage.[1] Pay particular attention to the ends of your hair, as these are most easily damaged by the heat.
- Purchase a heat protectant spray from a pharmacy or from the hair care aisle at the grocery store.
Advertisement -
3Apply a texturizer to your roots to add volume. If your hair has a tendency to look thin or limp, use a texturizer to make it look thicker. Sprinkle a thin coating over your roots and massage it in with your fingers until you can no longer see it.
- If you have very dark hair, use a texturizer that is designed for dark hair, as this won't make your hair look chalky.
-
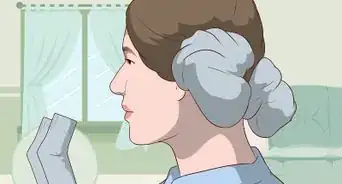
4Tie up the upper half of your hair with a hair tie. Use a comb to gather the upper half of your hair and secure it in a bun. Divide your hair from ear-to-ear and scoop it together with a comb. This makes your hair easy to section off and clamp in the curling iron.
- If your hair is too short to tie up, use an alligator clip to secure the top layer of your hair instead.
- For best results, use a hair tie rather than a scrunchie, as this is less likely to get in the way of the curling iron.
- Don't worry about parting your hair. If you want a specific parting, create this once you have curled your hair.
-
5Plug your curling iron in to heat up. Plug your curling iron in close to a mirror and leave it to heat up for 2-3 minutes. Adjust the curling iron to the low setting if you have very thin hair or coloured hair. If your hair is thick and healthy, opt for the medium or high setting. The higher temperatures tend to set the curls better, but they can damage your hair over time.[2]
- It's best to curl your hair in a bathroom in front of a well-lit mirror.
- Experiment with different settings to find the lowest setting that effectively curls your hair.
-
6Use a thicker barrel iron for loose waves or a thinner one for tighter waves. The diameter of the barrel determines how tight your curls will be. Use a 1 inch (2.5 cm) barrel curling iron for loose, wavy curls or a 0.5 in (1.3 cm) barrel curling iron for tight, ringlet-style curls.[3]
- Avoid using a barrel that is wider than 1 inch (2.5 cm), as this doesn't work on short hair.


Curling and Setting Your Hair
-
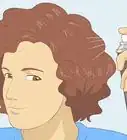
1Clamp 1 in (2.5 cm) sections of hair and wrap them away from your face. Squeeze the handle of the curling iron to open it. Then, take a 1 in (2.5 cm) section of hair from the front of your head and clamp the iron over the ends of the hair. Hold the iron in a vertical position and wrap the hair evenly around the barrel.[4]
- Don't allow the curling iron to touch your scalp, as this can cause burns.
-
2Keep the hair on the iron for 10 seconds and then release it. Avoid holding your hair in the curling iron for longer than 10 seconds, as this can cause heat damage. Squeeze the handle of the curling iron to release the curl from the clamp.
-
3Support the curl in your hand for a few seconds. When the curl is first released from the clamp, it will sit quite close to your head. Place your hand under the curl for a few moments to allow it to set. This creates tighter and longer lasting curlings.
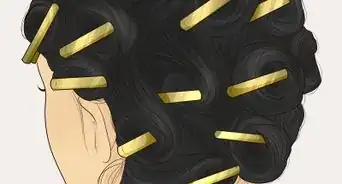
- As another option, secure each curl to your head with an alligator hair clip. Let them continue to set while you finish getting dress. This can create tight curls, such as pin curls.
- If you want very loose curls, skip this step and allow the curl to drop to its natural position.
-
4Curl all the hair that isn't tied up, starting at the front of your head. Repeat the curling process with the rest of your untied hair. Start at the front of your head and work your way to the back of your head. Then, curl the hair on the other side of your head and once again work your way to the back of your head.
- Use a mirror to check that you have curled all the hair at the back of your head. To do this, stand in front of a large mirror, then use a handheld mirror to look behind you.
-
5Release the rest of your hair and curl it. Untie your bun to release the upper half of your hair. It will be easy to distinguish from the rest of your hair, as the bottom layer will be much curlier. Use the same curling method to curl the rest of your hair.
- Start at the front of 1 side of your head and work your way to the back of your head. Then, start at the front on the other side of your head and work your way to the back of your scalp.
-
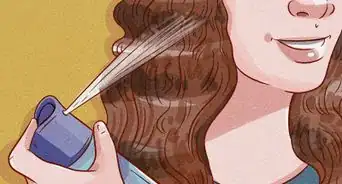
6Spray your hair with hairspray to set it in place. This is a great way to make your curls last all day and also helps to tame frizzy hair. Lightly spray your hair with the hairspray and add extra coats throughout the day, if needed.
- Look for a hairspray that doesn't contain alcohol, as alcohol can dry out your hair.


Expert Q&A
Did you know you can get expert answers for this article?
Unlock expert answers by supporting wikiHow
-
QuestionDoes it matter if I pull my hair up or to the side while I'm curling?
 Yan KandkhorovYan Kandkhorov is a Hair Stylist and Owner of K&S Salon, a hair salon based in New York City's Meatpacking District. Yan has over 20 years of experience in the hair industry, is best known for paving the way for iconic hair trends in the industry, and has operated his salon since 2017. His hair salon has been voted one of the Best Hair Salons in New York City in 2019 by Expertise. Yan and K&S Salon has collaborated with leading fashion magazines and celebrities such as Marie Clair USA, Lucy Magazine, and Resident Magazine.
Hair StylistYes, the direction that you're curling your hair matters. Your curls will flow in the direction that you curl them, so you have to pay attention to this.
Support wikiHow by unlocking this expert answer.
-
QuestionWhy do my curls always end up inconsistent?Yan KandkhorovYan Kandkhorov is a Hair Stylist and Owner of K&S Salon, a hair salon based in New York City's Meatpacking District. Yan has over 20 years of experience in the hair industry, is best known for paving the way for iconic hair trends in the industry, and has operated his salon since 2017. His hair salon has been voted one of the Best Hair Salons in New York City in 2019 by Expertise. Yan and K&S Salon has collaborated with leading fashion magazines and celebrities such as Marie Clair USA, Lucy Magazine, and Resident Magazine.
Hair StylistA lot of people end up with creases in their curls because they don't roll the iron consistently as they're putting the curls in. If you pause every couple of inches or you hold the curling iron in place for too long. You've got to use a smooth, consistent motion when you're curling.Support wikiHow by unlocking this expert answer.
-
QuestionWhere do I start curling my hair?Yan KandkhorovYan Kandkhorov is a Hair Stylist and Owner of K&S Salon, a hair salon based in New York City's Meatpacking District. Yan has over 20 years of experience in the hair industry, is best known for paving the way for iconic hair trends in the industry, and has operated his salon since 2017. His hair salon has been voted one of the Best Hair Salons in New York City in 2019 by Expertise. Yan and K&S Salon has collaborated with leading fashion magazines and celebrities such as Marie Clair USA, Lucy Magazine, and Resident Magazine.
Hair StylistIt totally depends on the style of curl you're going for. If you want kind of wavier, looser curls, then you should start in the middle of your hair. If you want stronger curls that will hold their shape for longer, start at the bottom and work your way up.Support wikiHow by unlocking this expert answer.
Things You'll Need
- Heat protectant spray
- Curling iron
- Comb
- Hair tie
- Mirror
- Alligator clips (optional)
-Step-12-Version-4.webp)

References
- ↑ Madeleine Johnson. Hair Stylist & Hair Extensions Specialist. Expert Interview. 18 December 2019.
- ↑ https://www.glamour.com/story/biggest-curling-iron-mistakes-youre-making
- ↑ https://www.glamour.com/story/biggest-curling-iron-mistakes-youre-making
- ↑ Yan Kandkhorov. Professional Hair Stylist. Expert Interview. 28 January 2020.
About This Article


-Step-12-Version-4.webp)