This article was co-authored by wikiHow staff writer, Hunter Rising. Hunter Rising is a wikiHow Staff Writer based in Los Angeles. He has more than three years of experience writing for and working with wikiHow. Hunter holds a BFA in Entertainment Design from the University of Wisconsin - Stout and a Minor in English Writing.
There are 10 references cited in this article, which can be found at the bottom of the page.
This article has been viewed 15,236 times.
Learn more...
Penstemons are popular flowering plants that bloom through the summer and come in a variety of colors that work in any garden. As penstemons age, their stems get woodier and won’t produce as many flowers during the next growing season. Luckily, you can prune the old growths off of your penstemons to make room for the new shoots in spring. New penstemons can also bloom from cuttings you take during the summer if you want exact copies of the blooms you’re currently growing!
Steps
Pruning during the Growing Season
-
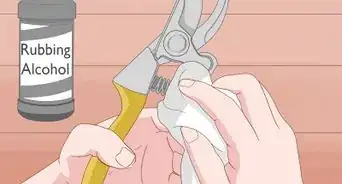
1Cut stems back if your penstemon plant starts looking rough around the edges. While you can just let penstemon grow naturally, the stems may grow uneven and may not look as cosmetically pleasing. Use a pair of gardening sheers and place them up to one-third down from the tip of the stem. Squeeze the handles together to cut the stem at a 45-degree angle so water doesn’t pool on top. Continue trimming any other stems that are longer than the others.[1]
- Never trim off more than one-third of the growths during the growing season, or else your penstemons may not bloom.
-
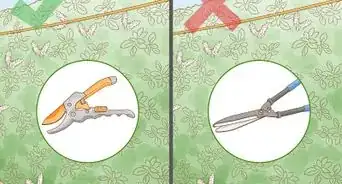
2Deadhead the flowers to promote a second round of blooms. Wait until after your penstemon blooms and the flowers begin to wither. Place a pair of pruning shears or a gardening knife just below the set of healthy leaves closest to the bloom. Make your cut at a 45-degree angle to prevent the stems from rotting.[2]
- Flowers usually appear sporadically after deadheading, so you may not get a full second bloom.
Advertisement -
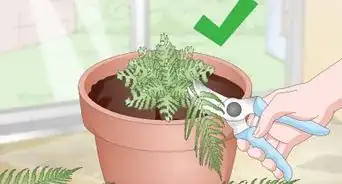
3Prune one-third off of each stem's height in the fall to winterize the plant. As soon as the flowers start withering and turning brown, you can prune your penstemons. Hold a pair of pruning shears a third of the way down the stem from the tip. Keep the shears at a 45-degree angle to the stem and make your cut. Work your way around the plant, cutting back all of your stems so they’re only two-thirds their original height.[3]
- Leave the remaining growth from the summer when you’re pruning, or else you may risk your penstemons dying during the winter.


Trimming Old Growths in Spring
-
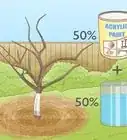
1Start trimming your penstemon after the last frost in spring. Leave the remaining growth on your penstemons over winter to protect them from any harsh weather and help them survive. Check online for the last estimated frost date in your area or climate so you know when to start cutting. When the weather starts warming up and there’s no risk for frost, it’s safe to cut the stems.[4]
- You can find the last expected frost date for your area here: https://www.almanac.com/gardening/frostdates.
- If you cut back your penstemons any earlier, they may not grow during the next season.
-
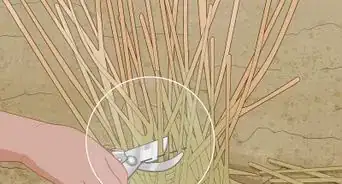
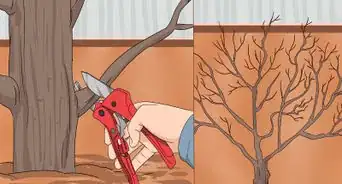
2Trim growths that are dead or don’t have new shoots down to the base. Examine your penstemon’s stems to see if they have any fresh green shoots growing from them. If you notice a stem that doesn’t have any shoots, place your prunings shears just above the soil and make your cut. Then check for any stems that are cracked, withered, or damaged and remove them since they won’t produce any healthy shoots.[5]
- Be sure to check the stems in the middle of the plant as well to help thin it out.
-
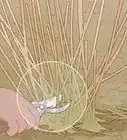
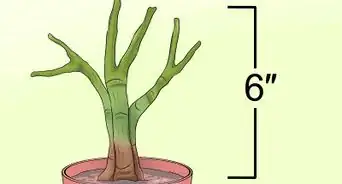
3Cut every stem just above the lowest shoots with your pruning shears. Look near the bottom 6 inches (15 cm) of the stems and look for fresh green shoots starting to grow from them. Place your pruning shears at a 45-degree angle just above the node for the lowest shoot on the stem. Snip through the stem to cut it off of the plant. Check the remaining stems on your penstemon and cut them back the same way.[6]
- You use the stems you cut off as compost to help add more nutrients to your soil.
-
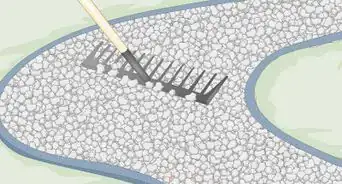
4Remove any weeds growing around your penstemon. Check the soil surrounding your penstemons and make sure there aren’t any other plants within 18 inches (46 cm) of your stems. If there are, pull them by the roots out of the ground so they don’t steal any nutrients from your plant.[7]
- Mulching or laying a weed barrier around your penstemons can help prevent weeds from sprouting.


Taking Cuttings for Propagation
-
1Cut 4–5 in (10–13 cm) non-flowering tips in the summer. You can take your cuttings at any point during the summer while they’re growing. Look at the ends of the stems and find a few that don’t have any flowers growing from them. Put your pruning shears 4–5 inches (10–13 cm) from the tip of the stem just below one of the nodes with leaves growing from it. Make a 45-degree angle cut to take your cutting.[8]
- Avoid cutting stems that have flowers since they won’t grow as well.
-
2Pull the bottom leaves off your cuttings. Locate the 2–3 leaves that are closest to the cut end of your cutting. Pinch the base of the leaf and gently pull it from the stem. That way, you expose more of the stem to help promote healthy root growth.[9]
- You may also trim a third off of the leaves that are higher on your cutting to help reduce moisture loss when you replant them.
-
3Dip the cut ends into a rooting hormone. Rooting hormone helps stimulate the plant’s growth and helps protect the roots from fungus. Pour some rooting hormone into a dish and place the cut ends of the plant in the powder. Coat the exposed node where you removed the leaves as well so they will sprout new roots. Apply the hormone to all of the cuttings you took so they’re more likely to survive.[10]
- You can buy rooting hormone online or from your local gardening supply store.
- Throw away any rooting hormone that’s left in the dish rather than putting it back in the container. Otherwise, you could contaminate it and potentially spread diseases harmful to your plants.
-
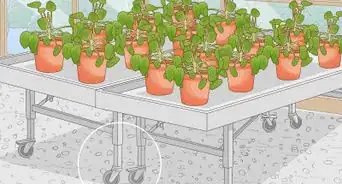
4Stick the cuttings into a pot with a mix of compost and perlite. Fill a 3 1⁄2 in (8.9 cm) pot with a mix that’s equal parts compost and perlite. Take your cuttings and place the stems into the soil around the edges of the pot. Push the stems down so the lowest leaves are just above the soil’s surface so they’re more likely to grow roots.[11]
- You can grow up to 5 penstemon cuttings in a single 3 1⁄2 in (8.9 cm) pot.
- You may also use a modular planting tray if you want to root more cuttings.
-
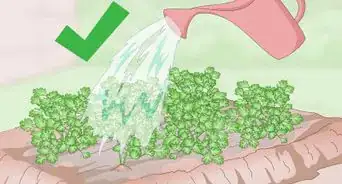
5Water your cuttings until the potting mix feels damp. Fill a watering can with fresh, clean water and slowly pour it onto the potting mix. Let the water absorb and sink into the pot before adding more. Once you see water running out of the drainage holes at the bottom, stop watering your penstemons.[12]
- Avoid overwatering your penstemon cuttings since they could develop root rot and will not survive.
-
6Cover the pot with a plastic bag or put it in a propagator. Place 4 bamboo poles that are taller than your cuttings into the potting mix so they form a square. Set a large plastic bag over the bamboo poles to help trap the moisture so they’re more likely to grow. Alternatively, you can keep the pot inside an unheated propagator to maintain the humidity.[13]
- Keeping the soil humid helps keep the soil warm and prevents water from evaporating so the roots are more likely to grow.
-
7Keep the pot in an area without the risk of frost. If you live in an area with freezing winters, bring your penstemon cuttings inside and let them grow over winter. Make sure they’re near a south-facing window so they get the most sun throughout the day. Otherwise, you can also keep them in a heated greenhouse so they don’t freeze.[14]
-
8Trim any flowers that form on your cuttings to promote better growth. Check your cuttings every few days to see if they’re developing flowers. If they are, pinch the flowers off at the base and discard them. If you can’t easily pinch them off, use your pruning shears or a gardening knife to remove them.[15]
- Flowers use up nutrients that your penstemons can use to grow stronger roots or taller stems.


Warnings
- Avoid cutting more than a third of your penstemon’s growth at the end of the growing season, or else they may not survive through the winter.[17]⧼thumbs_response⧽
Things You’ll Need
Pruning during the Growing Season
- Pruning shears
- Gardening gloves
Pruning to Promote Healthy Growth
- Pruning shears
- Gardening gloves
Taking Cuttings for Propagation
- Pruning shears
- Gardening gloves
- Rooting hormone
- 3 1⁄2 in (8.9 cm) pot
- Compost
- Perlite
- Watering can
- Plastic


References
- ↑ https://www.fs.fed.us/rm/pubs_other/rmrs_2013_kratsch_h001.pdf
- ↑ https://extension.colostate.edu/topic-areas/yard-garden/penstemon-a-colorful-choice-for-water-wise-gardening/
- ↑ https://www.gardenersworld.com/how-to/grow-plants/how-to-grow-penstemons/
- ↑ https://www.gardenersworld.com/how-to/grow-plants/how-to-grow-penstemons/
- ↑ https://youtu.be/n2j1IEunDm8?t=194
- ↑ https://www.rhs.org.uk/advice/profile?pid=406
- ↑ https://www.rhs.org.uk/advice/profile?pid=406
- ↑ https://www.rhs.org.uk/advice/profile?pid=406
- ↑ https://youtu.be/GtG8VKd0UNM?t=169
- ↑ https://www.rhs.org.uk/advice/profile?pid=406
- ↑ https://www.rhs.org.uk/advice/profile?pid=406
- ↑ https://www.gardenersworld.com/how-to/grow-plants/how-to-take-softwood-penstemon-cuttings/
- ↑ https://www.gardenersworld.com/how-to/grow-plants/how-to-take-softwood-penstemon-cuttings/
- ↑ https://www.rhs.org.uk/advice/profile?pid=406
- ↑ https://youtu.be/A7ohwdumY9A?t=482
- ↑ https://gardenknow.com/should-you-wear-gardening-gloves/
- ↑ https://www.gardenersworld.com/how-to/grow-plants/how-to-grow-penstemons/
About This Article