This article was co-authored by wikiHow Staff. Our trained team of editors and researchers validate articles for accuracy and comprehensiveness. wikiHow's Content Management Team carefully monitors the work from our editorial staff to ensure that each article is backed by trusted research and meets our high quality standards.
This article has been viewed 30,443 times.
Learn more...
Whether you’re putting down a layer of protective flooring for a workshop, home gym, or animal stall, trimming rubber mats to the right size is probably easier than you think. It doesn’t require any power tools or sophisticated cutting implements—in fact, all you need is a simple utility knife. After measuring for your space, lay a straight edge along the section you want to cut to set your dimensions. Then, use the razor-sharp blade to score the thick material, using the straight edge as a guide. Continue cutting along the same line until you make it all the way through the mat.
Steps
Preparing Your Materials
-
1Equip yourself with the proper safety gear. Since you’ll be working with a razor-sharp utility knife, a pair of protective work gloves is a must. Consider strapping on some cushioned knee pads to spare your joints unnecessary discomfort while kneeling for long stretches.[1]
- To prevent possible injury, avoid handling the utility knife while you’re not wearing gloves.
-
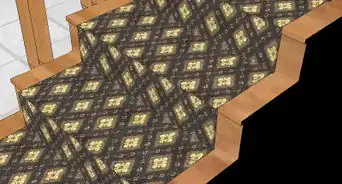
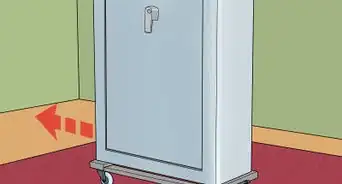
2Select an appropriate surface to do your cutting. There’s a chance that the utility knife could scar the flooring beneath the mats once it clears the thick rubber. For this reason, it’s a good idea to set up your materials in an area where minor damage won’t be noticeable, like a basement or garage floor.
- If you don’t have a surface that’s ideal for cutting, you can also protect your subfloor with a layer of cardboard or plywood.[2]
Advertisement -
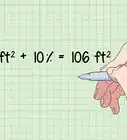
3Measure the area where you’ll be installing the mat. Extend a tape measure across the floorspace lengthwise, then widthwise. Multiply the two numbers together to find the square footage of the area. You can reference this number against the dimensions of the rubber flooring to determine how much material you’ll need to remove.
- Be sure to write down the necessary measurements so you don’t forget them.
- The size of each individual mat should be clearly indicated on the packaging.
-
4Mark the specified dimensions on the mat. Drag a graphite pencil or piece of chalk lightly over the surface of the mat. This will make it easier to see where you’ll be cutting. A visual guide will also allow you to get on your mark again quickly should you happen to lose your progress.[3]
- Using a straight edge when tracing out your measurements will result in straighter, more precise lines.
- The chalk or pencil markings should wash away without difficulty once your project is complete.


Making Clean, Efficient Cuts
-
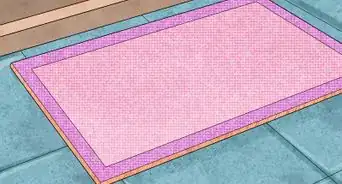
1Lay the mat out flat. Unfold or unroll the mat and stretch it out over the floor of your work area. Thinner mats may bunch up in spots and create wrinkles or bumps. Be sure to smooth these out before you proceed.[4]
- If you’re attempting to cut interlocking sectional mats, put them together first to help them stay put.
- Consider using a few heavy objects to weight down the edges of the mat while you work.
-
2Position your straight edge alongside the measuring line. Line up the tool so that the markings you made earlier are just visible. The straight edge will help guide the blade of the utility knife and keep you on track.[5]
- Be careful not to accidentally cover up the line, or the mat may end up being slightly too big or too small for your floorspace.
- If you don’t have a straight edge handy, you could also try using a 2x4. The heavy board will provide the added benefit of holding the mat in place.[6]
-
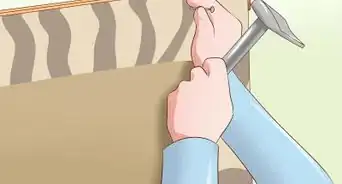
3Score the mat along the measurement line. Run the tip of the utility knife along the surface of the mat. Work your way down the length a few feet at a time. On your first pass, you're just concentrating on getting a shallow groove started. You’ll go back and deepen the cut on subsequent passes.
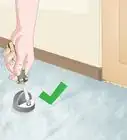
- Dipping the blade of the utility knife in soapy water will enable it to glide effortlessly through the rubber.[7]
-
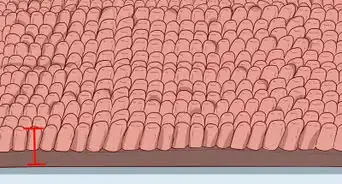
4Continue slicing until the blade clears the mat. Press down on the mat with one hand and carefully go back over the slit you just made with the other. Apply firm downward pressure and use long, linear strokes to achieve cleaner edges. It may take you 3-5 individual passes to get all the way through, depending on the thickness of the rubber.[8]
- For most efficient results, keep moving from one end of the mat to the other, rather than separating a single section at a time. That way, the whole strip will come away in one piece.[9]
- Be sure to keep the hand you’re using to steady the mat clear of your knife at all times.
-
5Fine-tune your cuts for a custom fit. Unlike other types of flooring that comes in rigid, angular sections, rubber is soft enough to shape any way you need. This means you’ll be able to make modifications to the material in areas that would otherwise present a problem. [10]
- When properly trimmed, rubber mats will lay perfectly around corners, columns, alcoves, and other tricky spots.
- Take your time maneuvering the utility knife around curves and contours to avoid making mistakes.
-
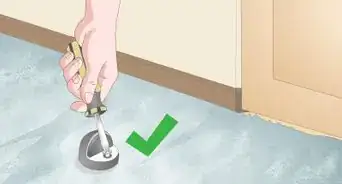
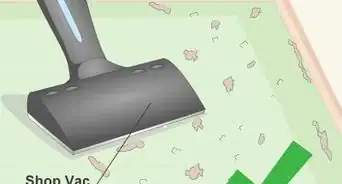
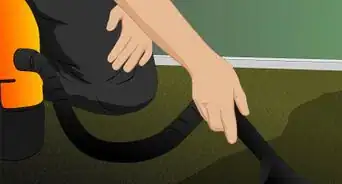
6Clean up your work area. Use a broom and dustpan to collect any small rubber shavings littering the floor. If you had a lot of mats to cut, you might be able to save some time by suctioning up the leftover debris with a portable shop vacuum. Inspect your work area closely when you’re finished.[11]
- Scrap rubber may not be safe to leave lying around if you have pets or small children.


Warnings
- Be extremely cautious when working with utility knives. The smallest slip has the potential to result in serious injury.⧼thumbs_response⧽
Things You'll Need
- Rubber flooring mats
- Utility knife
- Tape measure
- Straight edge
- Pencil or chalk
- Work gloves
- Knee pads
- Soapy water (optional)

-Step-19.webp)


References
- ↑ https://www.youtube.com/watch?v=-fXFMcbtjRo&feature=youtu.be&t=15
- ↑ https://www.homeflooringpros.com/blog-guides/best-way-to-cut-rubber-flooring/
- ↑ http://www.rubbercal.com/sheet-rubber/how-to-cut-rubber/
- ↑ http://www.rubbercal.com/sheet-rubber/how-to-cut-rubber/
- ↑ http://www.floormatcompany.com/press-media/floor-mat-videos/how-to-cut-rubber-mats-easy-diy.html
- ↑ https://www.youtube.com/watch?v=cQZjxwU4WZY&feature=youtu.be&t=110
- ↑ http://www.floormatcompany.com/press-media/floor-mat-videos/how-to-cut-rubber-mats-easy-diy.html
- ↑ https://www.youtube.com/watch?v=-fXFMcbtjRo&feature=youtu.be&t=40
- ↑ https://www.homeflooringpros.com/blog-guides/best-way-to-cut-rubber-flooring/
About This Article


-Step-19.webp)


