This article was co-authored by wikiHow staff writer, Janice Tieperman. Janice is a professional and creative writer who has worked at wikiHow since 2019. With both a B.A. and M.A. in English from East Stroudsburg University, she has a passion for writing a wide variety of content for anyone and everyone. In her free time, you can find her working on a new crochet pattern, listening to true crime podcasts, or tackling a new creative writing project.
There are 13 references cited in this article, which can be found at the bottom of the page.
This article has been viewed 33,516 times.
Learn more...
The life cycle of a plastic bottle doesn't have to end once you've finished drinking from it! Whether you're an experienced crafter or just a hobbyist, there are endless possibilities on how you can repurpose your bottle by cutting it into new shapes. Once you've cleaned and your plastic bottle and labeled the parts that you want to cut out, you can use an X-Acto knife or bandsaw to transform your bottle into something new!
Steps
Cleaning and Marking the Bottle
-
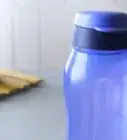
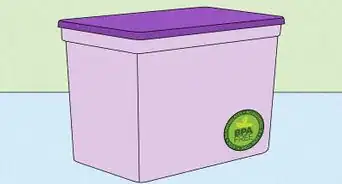
1Wash the bottle and let it dry. Rinse the bottle with dish soap and warm water to clear out any excess liquids. Clean it thoroughly with a sponge or dish rag. Once you've rinsed out all of the suds, pat the outside of the bottle to remove any extra water. Don't put the cap back on—instead, allow the plastic to air-dry completely.[1]
- Don't worry if there's glue residue from any labels lingering on the plastic.
-
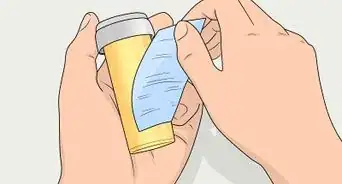
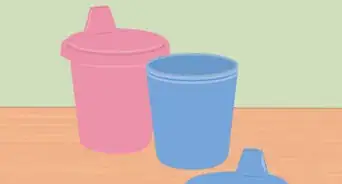
2Wipe off any stickiness or labels with an adhesive cleaning agent. Apply a grape-sized amount of adhesive cleaner like Goo Gone to a paper towel. Scrub the outside of the bottle vigorously until you've wiped off all of the label remnants and sticky residue. You can purchase this type of cleaner at any store that sells cleaning products.[2]
- If you don't want to use a paper towel, an old rag can also work.
Advertisement -
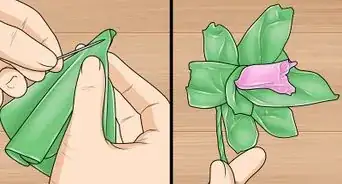
3Use permanent marker to mark the areas that need to be cut. Draw a line (or lines) with marker to signify the exact areas that need to be cut from the bottle. Even if you're familiar with the project, guides are always useful throughout the cutting process. Wrap a non-mechanical measuring tape around the bottle if you need to cut it in half.[3]
- Some projects might require more marking than others. For instance, a bird feeder might require one long cut around the center of the bottle, while a cell phone holder might require a more specific, rounded cut.[4]


Using an X-Acto Knife to Cut the Bottle
-
1Set a piece of thick wood down as a cutting board. Take a piece of wood that's at least 1 inch (2.5 cm) thick and place it on the surface of your workspace. The wood block only has to be about 4 inches (10 cm) going across, but it can be wider if you're using a larger plastic bottle.[5]
- If you don't have any wood on hand, pick some up from a hardware shop, lumber supplier, or home improvement store.
-
2Use one hand to hold the plastic in place as you cut. Take your non-cutting hand and cup it around the base of the plastic bottle. Apply enough force so the bottle rests securely on the block of wood. Make sure that this hand stays at least 2 inches (5.1 cm) away from the X-Acto knife at all times.[6]
-
3Stick an X-Acto knife into the bottle to cut through the plastic. Force the blade into the marked area, and make sure that the edge of the knife has sliced through the plastic entirely. Drag the knife forward by pulling on its handle. Your cutting will feel more like carving as you make your way around the bottle.[7]
- You can use scissors to cut off the neck of a smaller, thinner plastic bottle. Only do this if you're positive that the plastic is thin enough for you to cut comfortably.[8]
-
4Trim the bottle's edges with a pair of scissors. Take some scissors and trim 1 millimetre (0.039 in) to 2 millimetres (0.079 in) away from the freshly cut edge of the plastic bottle. Since this edge is still uneven from the jagged motions of the X-Acto knife, use the scissors to remove any splinters or sharp spots along the bottle.[9]
- Turn the bottle as you cut to make ensure that you've removed all of the splinters.


Slicing the Bottle with a Bandsaw
-
1Assemble your safety equipment before starting. Make sure that your eyes are protected before you start using the bandsaw. Most hardware and home improvement stores sell safety glasses that you can wear as you work. Depending on the size of your machine, you might want to consider more advanced equipment, like a transparent guard plate that separates the blade area from your fingers.[10]
- Make sure that your workspace is well-lit before continuing.
-
2Insert blades that are designed for plastic. Bandsaws have a variety of purposes, and can cut many materials ranging from metal to wood. If you use the wrong type of blade, the intense friction could potentially melt the plastic and ruin your project. Double check your equipment to make sure that it's safe to use on plastic, or purchase the proper blades from a hardware or home improvement store.[11]
- Experiment with your bandsaw if you need to. Take a piece of plastic that you don't mind ruining and test out different saw blades and machine speeds. Keep trying out new settings until you find one that works best for your project.
- Check the manufacturer's guide for your bandsaw if you still aren't sure which blade speed to use.
-
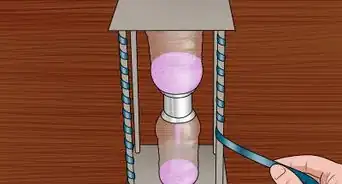
3Guide the bottle slowly along the bandsaw. Place the marked plastic bottle on the flat work surface beneath the bandsaw before turning on the machine. Slowly push the bottle forward, allowing the bandsaw to move in a straight, exact line around your marked pattern. Always keep your fingers towards the end of the bottle, and at least 3 inches (7.6 cm) away from the moving bandsaw blade.[12]
- Don't be discouraged if the line isn't straight—you can always trim it later.
- Turn off the bandsaw and realign the bottle if you're cutting corners. Depending on how complex your project is, you might have a lot of rectangular corners to remove from the bottle. Instead of turning the bottle while the bandsaw is still cutting, turn off the machine and readjust your bottle. Above all, do your best to always operate the bandsaw using straight lines.[13]
-
4Trim off any splintering edges using scissors. Turn off the bandsaw and examine your freshly cut bottle for any sharp or uneven edges. If you find any splinters or grooves in the plastic, cut 1 millimetre (0.039 in) to 2 millimetres (0.079 in) away to create a smoother edge. Make sure that the edges are as smooth as possible before you continue with your project.[14]


Things You'll Need
Cleaning and Marking the Bottle
- Dish soap
- Warm water
- Adhesive Cleaning Agent
- Permanent marker
- Thick block of wood
Using a Knife and Scissors to Cut the Bottle
- X-Acto knife
- Scissors
Slicing the Bottle with a Bandsaw
- Bandsaw
- Plastic sawing blades
- Safety glasses
- Scissors


References
- ↑ https://m.youtube.com/watch?v=MWE5Rjht178&t=0m59s
- ↑ https://m.youtube.com/watch?v=MWE5Rjht178&t=1m3s
- ↑ https://m.youtube.com/watch?v=MWE5Rjht178&t=1m45s
- ↑ http://www.architectureartdesigns.com/16-unbelievably-simple-diy-plastic-bottle-projects-youll-do-right-away/
- ↑ https://m.youtube.com/watch?v=B-CIpY_qbfw&t=0m13s
- ↑ https://m.youtube.com/watch?v=B-CIpY_qbfw&t=0m13s
- ↑ https://m.youtube.com/watch?v=MWE5Rjht178&t=2m20s
- ↑ https://m.youtube.com/watch?v=S7XseeCOPEs&t=4m20s
- ↑ https://youtu.be/MWE5Rjht178 7t=2m43s