This article was co-authored by Laura Martin. Laura Martin is a Licensed Cosmetologist in Georgia. She has been a hair stylist since 2007 and a cosmetology teacher since 2013.
wikiHow marks an article as reader-approved once it receives enough positive feedback. In this case, 90% of readers who voted found the article helpful, earning it our reader-approved status.
This article has been viewed 762,167 times.
After you prep and section your hair for a bob haircut, it's time to cut. But before you take up your shears, make sure to research the exact type of bob cut you want, whether it's a classic bob, a graduated or angled bob, or a layered bob. These common cuts are likely culprits.
Steps
Classic Bob
-
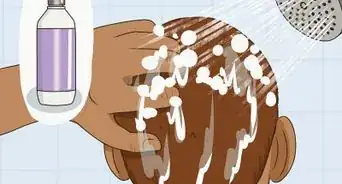
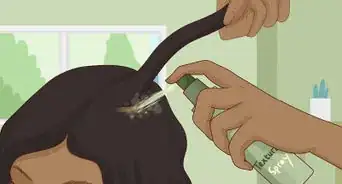
1Wash and part the hair. Divide the hair into four sections. For the back sections, part the hair along the back of the head by following the hair's natural part from the crowd down. Comb out the hair to either side.
-
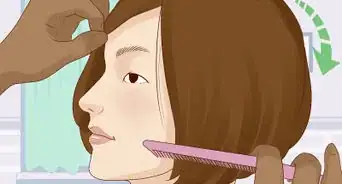
2Take a small section of hair from the back of the head. With your comb, separate a small diagonal section of hair from the bottom of the back section. Comb it flat against the client's neck, letting it come to a natural fall.[1]Advertisement
-
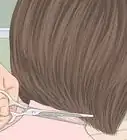
3Cut a straight line from the middle. Using your comb, cut the hair square starting from the middle and moving to the outside edge. At the end, check to make sure that the line is straight and even.
-
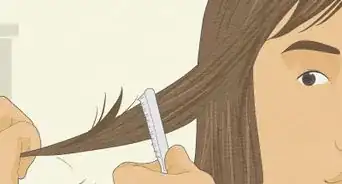
4Repeat with the rest of the hair. Take another small diagonal section, and comb it down over the first cut. Cut along the same straight line as the first cut. Continue doing this throughout the bob for a straight, classic cut.


Graduated Bob
-
1Divide the hair in four sections that are parted neat and straight. Your vertical part should be straight down the middle of your client's head, and your horizontal part should be about one inch above the hairline.
- Each side of the bottom horizontal portion should be divided equally down the center and tucked off to each side.
-
2Comb the hair flat against the neck. The hair should be cut in natural fall. This means that you should comb the hair flat against the neck, holding it with light tension. This will help create more blended graduations.
-
3Begin cutting. Take a diagonal subsection of hair from the back, and hold your hand close to the base of the scalp at a 45-degree angle. Cut the hair along the 45-degree line created by your fingers.
- Cut the hair above the parietal ridge (where the skull begins to curve upwards to the top of the head) at a lower elevation.
- If you are right-handed, comb the left section aside, beginning with the right half of your first section.
- Left handed individuals should follow these directions in reverse, starting first with the left section and then working from the outside in.
-
4Follow the guideline of your hand closely. You will want to cut a straight line from the outside inward. Use the straight edge of your hand to maintain your cutting angle. Cross check by pulling a small piece of hair from the same spot on either side and visually checking the length.
-
5Cut the left side of the first section. Do this in the same fashion described for cutting the right side. Be sure you maintain the same angle of cut on each side.
-
6Take a new section of hair at the same angle. Your next section of hair is going to be anywhere from a half to a full inch above the first section line. Make sure you are cutting methodically. Consistency is key to making your cut uniform.
-
7Repeat until you reach the meeting point of the crown and the back of the head. This line can be identified by connecting an imaginary line from ear-to-ear across the top of the middle of the head. Separate the back portion by directing it behind the ear. This will connect the back and side sections properly.


Layered Bob
-
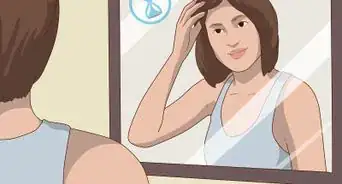
1Wash the hair and section it into standard four-quadrant sections. If you're feeling unsure about prep for this hairstyle, review our article about how to Prep and Section for a Bob Haircut.
-
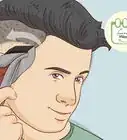
2Cut an angled bob to the occipital bone. You can locate the occipital bone by observing the bump on the back of the head and imagining an even line extending from that to the ears.
-
3Take the hair in even subsections from the occipital bone up. Adding layers will add volume to your cut. Bear in mind that your horizontal sections should be in increments between one-half inch and one whole inch.
-
4Lift each section of hair to form a 90-degree angle with the head. Doing this should leave you holding the hair straight above your client's head. From this position, you can determine the length at which you will make your cut.
-
5Cut the desired length of hair evenly at your perpendicular angle. This will give your bob lift.[2] A layered cut will make the hair naturally stack on itself, giving your stacked bob more body as a result.
- It is imperative that you take care and precisely cut the same angle and length on both sides.
-
6Continue cutting subsections at a 90-degree angle until the back of the head is complete. You should cut until you reach a line across the middle of the head, connecting one ear to the other. When you have exhausted your back subsections, you're ready to move on to the subsections in the front.
-
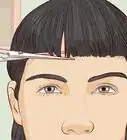
7Cut the front of the bob. To work through the front section, take horizontal sections and continue the bob outline up to the occipital bone. Then, take the hair from the top front of the head and pull it back to the length at the crown and trim away any overhang to blend the layers.


Expert Q&A
Did you know you can get expert answers for this article?
Unlock expert answers by supporting wikiHow
-
QuestionHow do I cut layers into a bob?
 Laura MartinLaura Martin is a Licensed Cosmetologist in Georgia. She has been a hair stylist since 2007 and a cosmetology teacher since 2013.
Professional Hair StylistAfter you've cut all hair into a bob shape, you can create layers by taking vertical sections, elevating the hair above the occipital bone 90-degrees, and removing the corner. This will give the hair soft surface layers without disrupting the outline of the bob.
Support wikiHow by unlocking this expert answer.
-
QuestionDo I cut the inside shorter than the outer layer?
 Community AnswerNo, you need to cut the outside shorter or else you won't be able to see the layers (this is if you have shoulder length or longer hair). If you cut it shorter inside and you have longer than above shoulder length hair, it will be hidden. If you have above shoulder length hair, it might work. If you were planning to do this to yourself, I strongly urge you to go to a professional instead.
Things You'll Need
- Haircutting scissors
- A sectioning comb
- A haircut cape
- A client

References
About This Article

To cut the back of a classic bob haircut, start by washing the person’s hair to make it easier to work with. After you’ve cleaned their hair, comb it along their central part and divide the hair into 4 equal sections using hair ties. Once you’ve divided the person’s hair, comb out a diagonal section of their hair from the bottom so that it lies flat against their neck. Use your comb and scissors to cut a straight line across the middle. When the first section is straight, comb down another section over the first cut. Then, cut along the same straight line as before so all of the person’s sections are the same length. For more tips from our Hair and Beauty co-author, including how to cut a graduated or layered bob, read on!