X
wikiHow is a “wiki,” similar to Wikipedia, which means that many of our articles are co-written by multiple authors. To create this article, volunteer authors worked to edit and improve it over time.
This article has been viewed 45,469 times.
Learn more...
This instruction aims to help the newbie programmers to get start debugging with Eclipse quickly. It uses a simple program to demonstrate how to debug in Eclipse. It covers basic debugging knowledge and skills, so it will be easy to be understood and easy to follow. We'll see how the program executes step-by-step in debug mode.
Steps
-
1Set Breakpoints: To set a breakpoint, select one line of code first, then move mouse to the left most area of that line(as shown in below picture), either double click or right click then select “Toggle Breakpoint” in the popup list, a small blue ball will appear, that means a breakpoint has been set successfully.
-
2Start the program in debug mode: We have three ways to do so: 1> Press F11; 2> Click item “Run” in main menu then select “Debug” in the drop list; 3> Click the bug icon on the tools panel(as below picture shows) then select “Debug As Java Application”.Advertisement
-
3Add variables to watch box for examination: We can see the program now is stopping at the line on which we've set a breakpoint. Now we'll add the variables into watch box to see if the program will run as we expected. To add a variable into watch box, put the cursor on it, right click, then in the popup list select “Watch”.
-
4Check the variable values in the watch box: Now we can see the value of num1 and num2 are as expected, but sum is still 0.0, because the program hasn't run the code that will update sum’s value.
-
5Step Into: Run into the function: Now we'll use function add() to calculate the sum. To see if the function add() will work as we expected, we'll step into it. To do so, just Press F5, or on tools panel, press the "Step Into" icon in the tools panel, or in main menu, select “Step Into” in the drop-down list of the item “Run”. The program will run into function add() and stop on the first executable code.
-
6Return from the function: Run the code by pressing F6, or pressing the "Step Over" icon in the tools panel, or in main menu, select “Step Over” in the drop-down list of the item “Run”. The program will return from function add() to main() and stop on the same line when it left previously.
-
7Check the return value from function: Run the program with Step Over, the value of sum will be changed to 9.0.
-
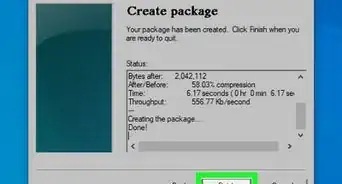
8Print the result: Run the program with Step Over. We must use Step Over instead of Step Into because we don't have the source code of the function println().
-
9Set debug filter: To avoid stepping Into the functions without source code, we'll have to modify some configurations to tell debugger not to step into those functions even step into command is used. From main menu “Windows”, select “Preference”, then follow the numbers sequentially in below picture:
-
10Stop in main: There is another way to stop the execution of a program for debug purpose--Stop in main. That means if it is enabled, every time when a program starts to run, it will stop on the first executable code in main() so that the code can be run manually. To enable “Stop in main”, right click on the project name in project explorer window, select “property” to bring out the “properties for xxx”(xxx is the project name) dialog box, then follow the steps labelled numbers sequentially.


Advertisement
Warnings
- Eclipse debugger will issue an error message "source not found" if the debugger steps into a function without source code, so please try not to step into any code that are not available.⧼thumbs_response⧽
Advertisement


About This Article
Advertisement