This article was co-authored by Maria Short. Maria Short is a Baker and the Owner of Short N Sweet Bakery & Cafe in Hilo, Hawaii. With over 24 years of experience, she specializes in specialty desserts and wedding cakes. She graduated from L’Academie de Cuisine’s Pastry Arts Program with honors and studied at Baltimore International Culinary College. In 2019, Maria competed in the 6th season of the Food Network’s Holiday Baking Championship. In 2010, she had a cake named one of “America’s Most Beautiful Cakes” by Brides magazine.
There are 13 references cited in this article, which can be found at the bottom of the page.
This article has been viewed 30,080 times.
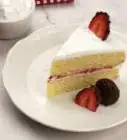
Filled with carrots, cinnamon, nutmeg, and walnuts, carrot cake is a delicious dessert for any occasion. Half the fun of making your own cake is decorating it. Frost your carrot cake with fluffy cream cheese icing, then add elegant garnishes like candied carrot curls for the final touch.
Ingredients
- 1⁄2 cup (120 ml) of butter, softened
- 3 ounces (85 g) of cream cheese, softened
- 1 teaspoon (4.9 ml) of vanilla extract
- 3 and 3⁄4 cup (710 and 180 ml) of confectioners’ sugar
- 2 to 3 tablespoons (30 to 44 ml) of 2% milk
- 1 to 2 large peeled carrots
- 1 cup (240 ml) of water
- 1 cup (240 ml) of sugar
- Cooking spray
Garnish Options
- Crushed walnuts
- Candied carrots
- Nutmeg
- Grated coconut
Steps
Making Cream Cheese Icing
-
1Cream butter and cream cheese with an electric mixer for 30 seconds. Use a low speed to whip the butter and cream cheese together in a large bowl until they are light and fluffy. Blend them thoroughly.[1]
- Both the butter and cream cheese should be softened, meaning they’re room temperature. Take them out of the refrigerator 1 hour before using to let them soften.
- If you don’t have a mixer, use a wooden spoon to vigorously stir the butter and cream cheese together, recreating the effect of the mixer.
-
2Sift 3 and 3⁄4 cup (710 and 180 ml) of confectioners’ sugar using a sifter. This will remove any chunks and make your frosting much smoother. Hold the sifter over a bowl and pour the confectioners' sugar into the sifter. Turn the hand crank on the side in a circular motion to sift the sugar and break up clumps. The sugar in the bowl is what you'll use for your icing.[2]
- To sift confectioners' sugar without an actual sifter, whisk the sugar in a small bowl before measuring it out.
Advertisement -
3Beat in the vanilla extract and confectioners’ sugar until they're blended. Add the 2 ingredients to the butter and cream cheese mixture and use your electric mixer to combine them. Make sure there are no clumps or streaks of confectioners’ sugar when you’re finished.[3]
- Avoid a mess by adding the confectioners’ sugar into the bowl 1⁄4 cup (59 ml) at a time. If you pour it all in at one once, the mixer may kick the powder up into the air.
-
4Add the milk gradually until the icing reaches a spreadable consistency. Start with 1 tablespoon (15 ml) of milk and blend it into the mixture with your mixer. If the frosting is too thick, add another 1 tablespoon (15 ml). Repeat until you’re satisfied with the texture.[4]
- The icing should be thick enough that it doesn’t run but not so thick that you can’t spread it easily.
-
5Store the icing in the refrigerator for up to 2 weeks. If you aren’t using the icing right away, keep it in the fridge in a sealed container or bag until you’re ready to use it.[5] Throw away the icing if you notice mold spots or if the icing is hard and stale.
- Icing can also be frozen for several months if kept in a tightly sealed container.


Creating Candied Carrots
-
1Preheat the oven to 225 °F (107 °C). Turn your oven on before you begin preparing your ingredients so it has time to warm up. It typically takes about 15 minutes for an oven to preheat.[6]
- Older or less efficient ovens may take longer to heat up.
- Don’t use a higher temperature in hopes of cooking your carrots faster. Adjusting oven temperatures is risky and can dry out or burn your carrots.
-
2Lay parchment paper on a baking sheet and coat it with cooking spray. Tear off enough parchment paper to completely cover the baking sheet. Spritz a thin layer of cooking spray on the parchment paper to prevent the carrots from sticking.[7]
- Use any size baking sheet you’d like. The most common size is 13 by 18 inches (33 by 46 cm).
- Parchment paper creates a very thin layer of air between the baking sheet and the paper which allows food to cook more evenly.[8]
- If you don’t have parchment paper, use aluminum foil. But be aware that food baked on foil often cooks faster so cut down on the cooking time as needed.[9]
-
3Peel 15 to 20 strips from the carrots with a vegetable peeler. Set the carrot on a cutting board and firmly pull the peeler along the entire length of the carrot, creating a ribbon-like piece of carrot. Each carrot should produce about 8 to 10 of these “ribbons.”[10]
- Carrots that are bigger than 1 inch (2.5 cm) in circumference work best for making strips that aren’t too thin.
- Your carrots should already be peeled. The strips you’re removing now are actual pieces of carrot, not the outer rind.
- Keep the strips as uniform in length and width as possible. This will ensure they all cook evenly.
-
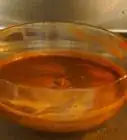
4Bring 1 cup (240 ml) of water and 1 cup (240 ml) of sugar to a boil. Pour the mixture into a saucepan and set it the stove burner to medium-high heat. Wait until you see large bubbles rising up from the bottom of the pan. You’ll also notice steam coming off the liquid when it’s boiling as the water is evaporating.[11]
- Stir frequently so the sugar doesn’t clump at the bottom of the pan.
- Sugar raises the boiling point of water so expect for it to take longer for the mixture to boil than a pot of just water.
-
5Add the carrots to the saucepan and cook for 15 minutes at a simmer. Gently place the carrots in the sugar and water mixture, being careful not to let the hot liquid splash onto your skin. Leave the pan uncovered and reduce the heat to medium-low so the liquid is at a simmer.[12]
- A simmer is when there are constant small bubbles in the liquid.[13]
-
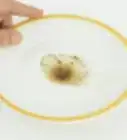
6Drain the carrots in a strainer and let them cool for 5 minutes. Set a strainer in your sink and carefully pour the contents of the saucepan into the strainer. This will leave just the carrot strips. Lightly toss them in the strainer to remove any excess water.[14]
- Any type of strainer will work, from plastic to wire mesh. Just make sure that the slots in the strainer aren’t big enough for the carrot strips to slip through.
-
7
-
8Bake the carrots for 30 minutes in the oven. Place the baking sheet with the carrots on the middle rack of the oven, where the hot air circulates the best and will cook the carrots evenly. Check the carrots frequently to make sure they aren’t burning.[17]
- The carrots will become almost translucent as they cook.
-
9Remove the carrots from the oven. After the 30 minutes are up, use an oven mitt to carefully pull the baking sheet out of the oven. The carrots themselves should be warm, but not too hot that they burn you.[18]
- Feel one of the strips. If the carrot still feels almost raw, put the carrots back into the oven. They need to be limp to create the curls.
-
10Wrap the carrots around the handle of a spoon to create curls. Gently wind 1 carrot strip at a time loosely around the handle into a spiral shape. Then slide it off the handle and set aside while you repeat for each strip.[19]
- A smaller spoon will create tighter curls whereas a larger, thicker spoon will create looser spirals.
- Do this immediately after removing the carrots from the oven. The key is to form the curls before the carrots are cool and unworkable.
- Sprinkle some sugar on the carrot curls for a sweeter bite.
-
11Let the carrot curls cool completely for 30 minutes. Sit the curls in a room temperature area until they are dry and cool. Moving them before they’re cool will ruin their spiral shape. If you're in a time crunch, speed up the cooling by sitting them in the refrigerator.[20]
- If you aren’t using the curls immediately after they cool, store them in an airtight container in the refrigerator for up to 5 days.


Icing and Garnishing the Cake
-
1Set the cake on a turntable so you can rotate it as you frost. Place the turntable itself on a level, flat surface. A sheet of wax paper underneath the turntable can help catch any excess crumbs or bits of icing as you work.[21]
- Buy a turntable from a kitchen store, craft store or online retailer.
- If you don’t have a turntable, a lazy Susan will work. Or place the cake on a large plate and turn it by hand.
-
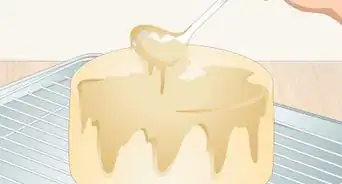
2Spread 1/3 of the icing over the top and sides with an offset spatula. This is known as a crumb coat, as it’s the first layer and seals in any stray crumbs. Smooth the frosting over the cake in a thin layer using the spatula.[22] Make sure you cover every inch of the cake so your next layer doesn’t draw in crumbs.
- Use the front of the spatula for scooping the icing out of the bowl and the back, flat side for spreading it.
- Place your crumb coat icing in a smaller bowl before you begin to avoid getting crumbs in the rest of the icing.[23]
- You don’t need to do a crumb coat if you plan to press walnuts into the sides of the cake as no one will see the icing anyways.
-
3Chill the cake for 30 to 45 minutes to let the first layer harden. Cover the cake in a cake dome or airtight container and place it in the refrigerator until the crumb coat hardens slightly. If you try to ice the next layer without letting the first one set, you’ll end up just smearing the crumbs into the second layer.[24]
- The cake must be covered completely. Otherwise, the inside of the cake will dry out from the cool air of the refrigerator.
-
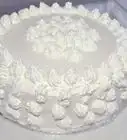
4Spread another 2 layers of icing on the cake with your spatula. Once the crumb coat has hardened, use your offset spatula to frost a second and third layer all over the top and sides of the cake. These layers should be smoother and thicker than the crumb coat as they will be visible. If you have a turntable, rotate it while you spread the icing.[25]
- Chilling the cake in between these 2 layers like you did after the crumb coat helps you get the smoothest frosting without smearing.
- Wipe the spatula clean after each pass on the cake.
- If you’re going to pipe a border around the cake, set aside some of the icing now in a separate bowl.
-
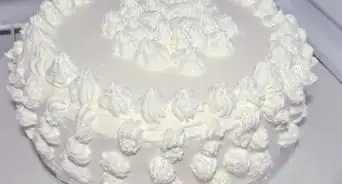
5Pipe a border of icing around the perimeter of the top using a piping tip. Use a spoon to fill a piping bag with icing. Hold the piping bag at a 45 degree angle as you squeeze gently. Rotate the turntable with one hand as you pipe with the other to create a border.[26]
- Squeeze a little frosting out on a paper towel first to get rid of any air bubbles.[27]
- There are all different sized piping tips available at craft stores and kitchen stores. Smaller tips will create a thinner border whereas larger tips will create a thicker one.
-
6Press chopped walnuts into the icing on the sides of the cake. Using your fingers, take a handful of finely chopped walnuts and push them onto the side, creating a thick, even layer over the icing. You don’t want any of the icing showing through.[28]
- If you don’t like walnuts, substitute pecans instead.
- Toasting the walnuts beforehand will enhance their flavor. To toast walnuts, spread them out on a foil-lined baking sheet and place them in the oven at 350 °F (177 °C) for 7 to 10 minutes. Stir frequently so they don’t burn.[29]
-
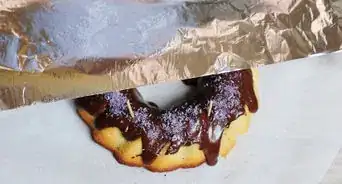
7Sprinkle nutmeg, candied carrots, and coconut over the top of the cake. Arrange them however you’d like, either around the border of the cake, piled in the center, or completely covering the top.[30]
- Do this just before serving the cake. If you put the toppings on the cake too far ahead of time, they could dry out.

Things You’ll Need
Cream Cheese Icing
- Mixing bowl
- Electric mixer
- Measuring cups and spoons
- Spoon (optional)
Candied Carrots
- Parchment paper
- Baking sheet
- Vegetable peeler
- Cutting board
- Measuring cups
- Stove
- Saucepan
- Strainer
- Wooden spoon
- Oven
Icing and Garnishing the Cake
- Turntable
- Wax paper
- Offset spatula
- Cake dome or airtight container
- Piping bag
- Piping tip
- Spoon
Expert Interview
Thanks for reading our article! If you'd like to learn more about decorating a carrot cake, check out our in-depth interview with Maria Short.
References
- ↑ https://www.tasteofhome.com/recipes/old-fashioned-carrot-cake-with-cream-cheese-frosting/
- ↑ https://www.tasteofhome.com/recipes/old-fashioned-carrot-cake-with-cream-cheese-frosting/
- ↑ https://www.tasteofhome.com/recipes/old-fashioned-carrot-cake-with-cream-cheese-frosting/
- ↑ https://www.tasteofhome.com/recipes/old-fashioned-carrot-cake-with-cream-cheese-frosting/
- ↑ http://www.eatbydate.com/other/baking/how-long-does-frosting-last/
- ↑ https://www.myrecipes.com/recipe/candied-carrot-curls
- ↑ https://www.myrecipes.com/recipe/candied-carrot-curls
- ↑ https://thepioneerwoman.com/food-and-friends/7-reasons-to-use-parchment-paper/
- ↑ https://www.thebalanceeveryday.com/what-to-use-if-you-dont-have-parchment-paper-1388013
- ↑ https://www.theyummylife.com/Carrot_Curls
- ↑ https://www.myrecipes.com/recipe/candied-carrot-curls
- ↑ https://www.myrecipes.com/recipe/candied-carrot-curls
- ↑ https://www.finecooking.com/article/whats-the-difference-between-a-simmer-and-a-boil
- ↑ https://www.myrecipes.com/recipe/candied-carrot-curls
- ↑ https://www.myrecipes.com/recipe/candied-carrot-curls
- ↑ https://www.thekitchn.com/5-mistakes-to-avoid-when-roasting-vegetables-236648
- ↑ https://www.myrecipes.com/recipe/candied-carrot-curls
- ↑ https://www.myrecipes.com/recipe/candied-carrot-curls
- ↑ https://www.myrecipes.com/recipe/candied-carrot-curls
- ↑ https://www.myrecipes.com/recipe/candied-carrot-curls
- ↑ http://wickedgoodkitchen.com/carrot-cake-best-ever-bakery-style/
- ↑ http://www.callmecupcake.se/how-to
- ↑ https://www.craftsy.com/cake-decorating/article/how-to-frost-a-cake/
- ↑ http://wickedgoodkitchen.com/carrot-cake-best-ever-bakery-style/
- ↑ http://www.callmecupcake.se/how-to
- ↑ https://www.queensleeappetit.com/how-to-pipe-cake-borders-how-to-prepare-a-piping-bag/
- ↑ https://www.queensleeappetit.com/how-to-pipe-cake-borders-how-to-prepare-a-piping-bag/
- ↑ http://wickedgoodkitchen.com/carrot-cake-best-ever-bakery-style/
- ↑ https://www.culinaryhill.com/how-to-toast-walnuts/
- ↑ http://wickedgoodkitchen.com/carrot-cake-best-ever-bakery-style/
About This Article