This article was co-authored by Mathew Rice. Mathew Rice has worked in restaurant pastry kitchens across the country since the late 1990's, and currently owns Pink Door Cookies in Nashville. His creations have been featured in Food & Wine, Bon Appetit, and Martha Stewart Weddings. In 2016, Eater named Mathew one of the top 18 chefs to follow on Instagram. In 2018, he appeared in season 18 of the Food Network's Beat Bobby Flay and won his episode.
There are 9 references cited in this article, which can be found at the bottom of the page.
wikiHow marks an article as reader-approved once it receives enough positive feedback. In this case, 89% of readers who voted found the article helpful, earning it our reader-approved status.
This article has been viewed 135,459 times.
A cake is oftentimes the center of most traditional birthday parties. Everyone gathers around the cake, its candles are lit, the birthday song is sung, and the lucky birthday boy or girl blows out the candles to make a wish. It's a magical moment that can be made even more magical by a homemade cake from you! With a few techniques and tricks, making a jaw-dropping cake can be fairly easy. All you need are the right supplies, some patience, and a little creativity and you'll soon have made a cake no one will forget.
Steps
Planning Your Cake Decorating
-
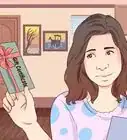
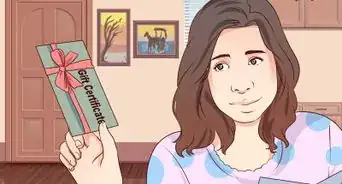
1Brainstorm your cake theme. Your decisions here will likely depend on the person the cake is intended for. You might use that person's favorite color as the color scheme of your cake, but you should also think about favorite activities, like sports, or characters, like those from favorite books and TV shows.
- When basing your cake around a favorite book, TV show, or character, try to pick out iconic features that will be easy to recreate on your cake. For example, if making a Harry Potter themed cake, you might use Lego Harry Potter figurines to decorate. If making a Minnie Mouse shaped cake, use pink frosting to create a bow.
-
2Plan out any messages on your cake. Writing with icing can be difficult. Letters that are too small will turn out squashed and can be easily missed. On the other hand, writing that is too big can leave your message incomplete, or throw off the balance of your cake. Use a pencil and a piece of scrap paper to get a feel for the spacing and size of the letters in your message before you attempt icing.
- You might want to practice your writing by using your pencil copy as a stencil. Mix up some extra frosting, and use a piping bag to follow the letters of your message accustom yourself to cake writing.
- You might also want to check out how to write with frosting.
Advertisement -
3Make stencils if a newcomer to cake writing. Write out your message in the fashion you desire and then cut out a stencil of your message with scissors. Once you have cut the shape of the letters of your message into your paper, you can set your stencil off to the side to use later.
- When you're ready to write your message, you should place your stencil close to the surface of the icing where you will be writing, and dust it with powdered sugar. This way you have a powdered sugar guide for your cake writing.
-
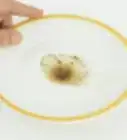
4Check the levelness of your cake. A flat top will be best for your decorating endeavors, as you won't have to worry about decorations sliding down a sloped or domed portion of your cake. If your cake has a slight crown, you can correct this by putting a plate on top of your cake after you take it from the oven and press down gently.
- Check the levelness of your cake by lying a piece of clean cardboard atop it. If the cardboard lies flat, your cake is level. Using a small carpenter's level will ensure the flattest possible cake.
- Your oven temperature might be the cause of your uneven cake. Temperatures that are too high can cause this to occur; avoid this by double-checking your oven temperature with an oven thermometer.[1]
-
5Allow your cake to cool completely. Applying frosting while your cake is still warm can result in a melty mess. Beyond that, while your cake is still cooling it will be less structurally sound. Cool your cake by:
- Removing your cake from the oven and placing it on a cooling rack or your counter for about 5 - 10 minutes.
- Moving your cake to the refrigerator to aid cooling while locking in moisture.
- Sealing your cake inside its mold with two layers of plastic wrap will prevent it from drying out.
- Returning your cake to the refrigerator for another one to two hours.[2] [3]
-
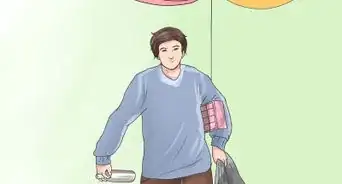
6Gather your cake decorating supplies. There are many different kinds of decorations you might use for the birthday cake you are making. Some of these may be edible, like fondant decorations and candy accents, while others may be inedible, like figurines and models. Some supplies you'll likely want to have on hand include:
- Chocolate chips (optional)
- Edible glitter (optional)
- Fondant (optional)
- Food coloring (optional)
- Frosting
- Fruit (optional)
- Mixing bowls (for frosting)
- Nuts (optional)
- Piping bag (or plastic baggie)
- Scissors (for homemade piping bag)
- Sprinkles (optional)
- Stencils (optional)
- Toothpicks (optional)


Frosting Your Cake
-
1Prevent frosting splatter and runs with wax or parchment paper. Even expert cake decorators sometimes have dribbles of icing puddle or pool around the base of the cake. To create a clean edge between your cake and the surface it rests on, place the corners of four pieces of wax or parchment paper under your cake so the paper skirts the bottom edges of the cake.
- You should be able to easily remove any drips or messy frosting around the cake's base by pulling free the paper from underneath it.
-
2Protect your frosting from crumbs with a crumb coat. A crumb coat is a thin layer of frosting that you put on your cake before the main layer of frosting. When frosting your cake, crumbs can get stuck in your frosting, making it look less than great. Your crumb coat will trap these crumbs and keep your main layer of frosting looking clean and professional.[4] Use a knife or offset spatula to apply your frosting, spreading it until you can see the cake underneath.
- Give your crumb coat a few minutes to set before you move on to your main layer of frosting.[5]
-
3Buy some icing, or make your own. Vanilla buttercream frosting, as delicious as it may be, is fairly simple to make. For more complicated versions of icing or frosting, you may want to check out how to make icing or frosting. The following recipe only needs to be beaten together to a regular consistency in a mixing bowl:
Softened butter (½ cup)
Confectioners' sugar (4½ cups)
Vanilla extract (1½ teaspoons)
2% milk (5 to 6 tablespoons)[6]- A few drops of food coloring in your icing can change plain white buttercream into whatever color best suits your cake design!
-
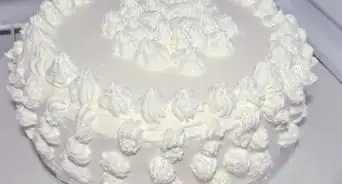
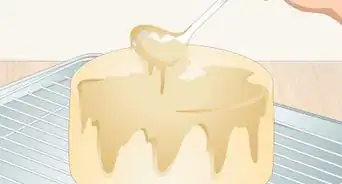
4Frost your cake evenly. To keep your frosting equally distributed, you should start from the top and spread small amounts frosting across your cake with your knife or offset spatula. As the frosting thins, you should scoop more of it from its container or mixing bowl with your knife or spatula, and continue to spread the frosting on your cake little by little until it is completely frosted.
-
5Make or buy a piping bag. A piping bag is a flexible plastic container that you can fill with frosting. After loading the bag with frosting, you should cut the end of the bag that comes to a point to create a nozzle. Then all you need to do is squeeze the bag to force your icing out in a controlled stream.[9]
- If you have trouble finding a suitable piping bag at your local grocery, you can make a homemade piping bag with a zippered plastic bag. Put icing in your baggie and seal the top firmly. Cut off the tip of one corner of the baggie and voila! Your homemade piping bag is finished.[10]
EXPERT TIPMathew Rice has worked in restaurant pastry kitchens across the country since the late 1990's, and currently owns Pink Door Cookies in Nashville. His creations have been featured in Food & Wine, Bon Appetit, and Martha Stewart Weddings. In 2016, Eater named Mathew one of the top 18 chefs to follow on Instagram. In 2018, he appeared in season 18 of the Food Network's Beat Bobby Flay and won his episode.Professional Baker & Dessert Influencer Mathew Rice
Professional Baker & Dessert InfluencerMathew Rice, pastry chef, adds, "There are special writing tips for piping bags. You definitely want to use one of these — it will make it a lot easier to write your message."
-
6Model your messages before writing with frosting. Beginning pipers might not yet feel confident piping a message freehand onto a cake. If you're one such person, you may want to sketch out the message in your frosting with a toothpick. This way you can follow your sketch with your piping bag and limit mistakes.[11]
-
7Add details and a message with your piping bag. You can use the end of your piping bag to direct your stream of frosting, or you can buy special tips to create special effects with your frosting. Some special effect tips you can use with your piping bag include:
- Round tips, which are suited for lines, dots, and writing messages.
- Star tips, which are mostly used to create stars shapes, decorative shells, flowers, borders, and rosettes.
- Basket-weave tips, which are fitting for making lattices and lines that mimic ribbons, and other borders.[12]
EXPERT TIPMathew Rice has worked in restaurant pastry kitchens across the country since the late 1990's, and currently owns Pink Door Cookies in Nashville. His creations have been featured in Food & Wine, Bon Appetit, and Martha Stewart Weddings. In 2016, Eater named Mathew one of the top 18 chefs to follow on Instagram. In 2018, he appeared in season 18 of the Food Network's Beat Bobby Flay and won his episode.Professional Baker & Dessert InfluencerMathew Rice
Professional Baker & Dessert InfluencerMathew Rice, pastry chef, adds: "You want your frosting here to be a little bit thinner than the frosting you used to frost the cake. So, just take a little bit of frosting and dilute it with a splash of milk. When it's just a little bit thinner, it's a lot easier to write with."
-
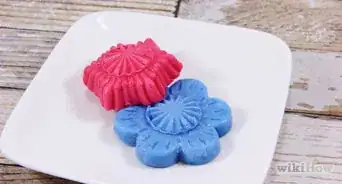
8Border your cake, and add other edible designs. You may need to wait until you graduate from beginner before you tackle any designs that are too complex, but with your piping bag, you can create all sorts of shapes and designs. You can also make clever designs from a special, hardened sugar substance called fondant. You might even try:
- Icing flowers
- Icing roses


Adding Special Touches
-
1Use edible decorations to give your cake extra appeal. In the baking section of most grocers, there will be decorative candies that you can use to dress up your cake. Candy beads, sprinkles, and other special edible confectioner ornaments can change your cake from simply delicious to dazzling.
-
2Hide blemishes and errors with a thin layer of glitter. Edible glitter is a great way of giving your cake a magical touch, and can also be used to hide small inconsistencies in your frosting. Simply dust the surface of your cake in a thin layer of glitter for an effect that will impress all who see.
- You can also drizzle your glitter through stencils to create special shapes and patterns on the surface of your cake.[13]
-
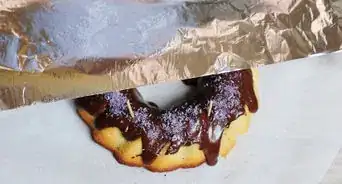
3Add candy to your design for candy lovers. Pieces of Kit-Kat can be used to create a border around your cake. Stick the wafers of the candy one or two at a time to the frosting on the side of your cake until it is completely bordered. M&Ms are another popular addition to birthday cakes. You might even use these to spell out a message or create a special design.[14]
-
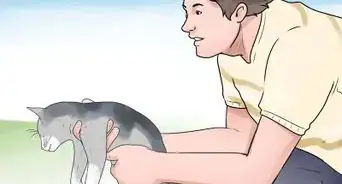
4Top your cake with toys or figurines. Especially for themed cakes, this is an easier way to indicate a favorite character or series than drawing an elaborate picture freehand. Consider using Lego models. These are small enough that they can easily be nested in the icing of your cake.
-
5Enjoy the look on the birthday boy or girl's face. There's nothing better than the look of pure gratitude you'll get when the recipient sees the beautiful cake you've crafted. Place candles in the cake, sing happy birthday, and share your handiwork with all your guests!


Community Q&A
-
QuestionMy buttercream is melting and not staying on the cake. What do I do?
 Community AnswerFirst of all, make sure the cake has cooled completely before adding any frosting. If it's not completely cooled, the warmth of the cake will melt the frosting. You may have also added too much milk to the buttercream, causing it to take on a runny texture. Try re-making the frosting, paying careful attention to the amount of liquid you add.
 -
QuestionI want to draw the person on the cake. How can I do it?
 Community AnswerDo so carefully by piping icing and using decorations for the details, like the eyes.
 -
QuestionWhat cake would be easy to make for a 13 year old girl?
 Community AnswerA box cake made in a sheet pan is a simple process.
Warnings
- Piping can get messy. Wear clothes you don't mind getting frosting on while piping your cake.⧼thumbs_response⧽
Things You'll Need
- Chocolate chips (optional)
- Edible glitter (optional)
- Fondant (optional)
- Food coloring (optional)
- Frosting
- Fruit (optional)
- Mixing bowls (for frosting)
- Nuts (optional)
- Piping bag (or plastic baggie)
- Scissors (for homemade piping bag)
- Sprinkles (optional)
- Stencils (optional)
- Toothpicks (optional)
References
- ↑ https://www.tasteofhome.com/article/how-to-decorate-a-cake/
- ↑ http://www.craftsy.com/article/how-to-cool-a-cake-quickly
- ↑ http://www.cookinglight.com/cooking-101/techniques/cake-baking/cooking-cakes
- ↑ http://www.cookinglight.com/cooking-101/techniques/cake-baking/how-to-frost-cakes
- ↑ http://bakingbites.com/2009/08/what-is-a-crumb-coat/
- ↑ http://www.tasteofhome.com/recipes/easy-vanilla-buttercream-frosting
- ↑ http://startcooking.com/chocolate-cake-for-beginners
- ↑ http://www.cookinglight.com/cooking-101/techniques/cake-baking/how-to-frost-cakes
- ↑ http://www.bhg.com/recipes/how-to/bake/how-to-decorate-a-cake/
- ↑ http://www.realsimple.com/home-organizing/home-organizing-new-uses-for-old-things/zippered-plastic-bag-as-frosting-dispenser
- ↑ https://www.tasteofhome.com/article/how-to-decorate-a-cake/
- ↑ http://www.bhg.com/recipes/how-to/bake/how-to-decorate-a-cake/
- ↑ http://www.bhg.com/recipes/how-to/bake/how-to-decorate-a-cake/
- ↑ http://www.bhg.com/recipes/how-to/bake/how-to-decorate-a-cake/
- ↑ http://www.bhg.com/recipes/how-to/bake/how-to-decorate-a-cake/
About This Article
If you want to write a message on a birthday cake, buy or make a piping bag by filling a zippered plastic bag with frosting, sealing it firmly, and cutting a tip off one corner. If you are nervous about writing directly on the cake, start by gently etching your message on the cake with a toothpick, which you can then write over with the frosting. If you prefer, you can make a stencil of your message, place your stencil close to the surface of the cake, and dust the stencil with powdered sugar to give you a guide to follow with your piping bag. To learn more from our Professional Baker co-author, like how to frost your cake evenly, keep reading the article!