This article was co-authored by Lauren Kurtz. Lauren Kurtz is a Naturalist and Horticultural Specialist. Lauren has worked for Aurora, Colorado managing the Water-Wise Garden at Aurora Municipal Center for the Water Conservation Department. She earned a BA in Environmental and Sustainability Studies from Western Michigan University in 2014.
There are 18 references cited in this article, which can be found at the bottom of the page.
This article has been viewed 40,736 times.
Coneflowers (also known as echinacea) are bright, colorful perennial plants of the daisy family that typically bloom during the midsummer thanks to their tolerance to drought and heat. [1] Similar in appearance to common daisies except for their grander blossoms, they make great gifts and garden additions. To keep them healthy and growing, they should be divided every 3 to 4 years.[2] The entire process is comprised of preparation, uprooting, division, and planting.
Steps
Preparing to Divide Coneflowers
-
1Divide your coneflowers in the spring or late fall. Planting in the early spring is ideal because the plants have yet to bloom, while fall also works because the blossoms die down. Conducting division during these months is the least invasive and will minimize damage done to the plant.[3]
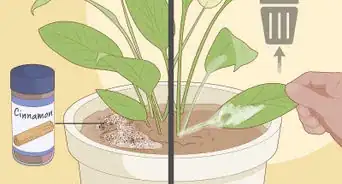
- Summer is not an ideal month for dividing coneflowers because they are in bloom. This means they are putting a lot of energy into flower production and less on roots, making them more vulnerable.
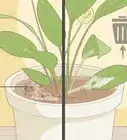
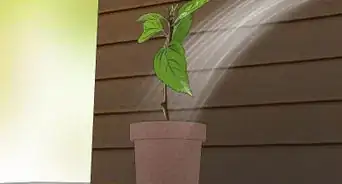
- If you absolutely have to divide in the summer, do it on a cloudy day and cut back flower heads to promote root development.[4] After division, keep your plants watered and screen them from the sun for 2 to 3 weeks using mesh netting or another kind of screen.
-
2Choose the planting location for your coneflower divisions. If you're planting the flowers in your garden, determine the general location for each before uprooting them. Coneflowers are adaptable to many soil types, but they grow best in soil with a pH between 6.0 to 7.0.[5]
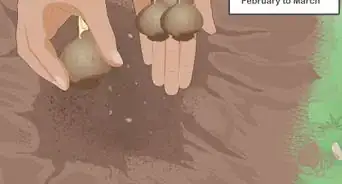
- If you're dividing your coneflowers from a pot into your garden, make sure the new holes are around twice the pot's diameter.[6]
Advertisement -
3
-
4Layer your soil with organic plant matter to prepare it for planting. Throw down a 2 to 4 inches (5.1 to 10.2 cm) layer of organic plant matter to ensure your plants get the proper nutrients.[9] The plant matter should comprise about 25 percent of the soil's volume.[10]
- Compress a handful of soil into a ball and gently poke it. If it doesn't fall apart, it's too wet.[11]
- Adding another 20 to 25 percent of moisture retaining material like perlite, vermiculite, or peat helps if your soil is dry.[12] If it's too wet, mix in 20 to 25 percent horticulture sand, which will improve drainage.
- Mix in some bone meal to encourage new root growth.


Uprooting the Coneflowers
-
1
-
2Use the tip of your shovel to loosen the coneflower's roots. Before uprooting, put the tip of your shovel into the trench and gently dislodge the flower's root system.[15] Continue doing this around the circumference of the coneflower to loosen the roots and isolate the clump.
- Water the soil 2 to 3 days before uprooting to make the process much easier.
-
3Force the coneflower clump from the ground using your shovel or garden fork. Take your shovel or garden fork and force it under the rootball. Lever the ball up and down to continue loosening it. Afterwards, lift the shovel or garden fork up and remove the clump.[16]
- Be sure to keep the root system as intact as you can.
-
4Remove the soil remaining on the coneflower's roots. Shake the coneflower clump off and use your hands or a garden hose to remove the soil that is caked onto the roots of the plant. Be gentle and try not to damage any of the roots.
- If you find any soggy, slimy, or discolored roots, remove them from the rootball with your garden pruners.


Separating Your Coneflowers
-
1Gently pull apart the roots of your coneflower into separate sections with your hands. Once the roots of the coneflower are exposed, look for the least dense spots. The coneflower has a spreading root system, which means pulling it apart with your hands is possible.[17]
- Take care not to disrupt the roots unnecessarily.
-
2Pry the roots apart using pitchforks for loose root systems that cannot be pulled apart by hand. Take 2 pitchforks and insert them back to back in the rootball. Slowly draw the handles away from each other until it divides. Repeat this technique until you have the amount of pieces you desire.[18]
-
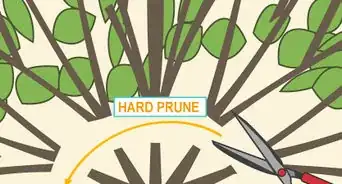
3Use a sharp spade to divide the coneflower if it has a dense root system that can't be pulled apart by your hands or pitchforks. Lay the rootball on its side and position the spade in the center of its crown (the combination of its aboveground parts like stems, leaves, and reproductive structures). Split the crown in half with a quick jab from the spade.[19] Continue splitting until you get the amount of pieces you need.
- Sharp spades are much more effective for cutting roots than flat spades.[20]
- Don't divide for the sake of dividing. Gaining 3 or 4 healthy plants is better than 5 or 6 dead ones. Optimal size is around a quarter the size of the original rootball, although you can make them smaller if you don't have enough space in your garden.[21]
-
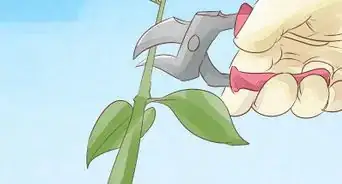
4Trim back the coneflower's root mass to give it room to grow. After division, trim back about one-third of each of the divided plants' root mass. This will give the plant room to send out new, fresh roots. They will be stronger, more efficient, and better organized in their new location than the ones they're succeeding.[22]
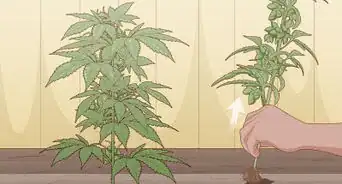
- If you like, you can trim the top of the flower off to promote root growth. In many cases, the top will end up dying following division.


Planting Your Coneflowers
-
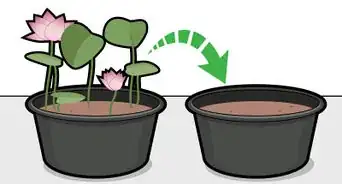
1Prepare a pot or container if you don't want to divide your coneflowers in your garden. If you don't have space in your garden and your coneflowers are small enough, you can divide them into containers or pots. Make sure they are big enough to accommodate their original depth. Fill the pot or container with firm soil around the roots to minimize air pockets[23] and water them well to prevent them from drying out.[24]
-
2Dig a new hole for your coneflower divisions if you're dividing them in your yard. Use your shovel to create a hole around twice the width of the rootball. In terms of depth, it should be equal to the original plant's root size from the base to the crown.[27]
-
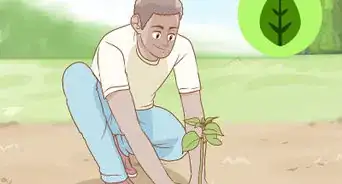
3Plant the separate coneflower pieces into the ground immediately after division. Place the coneflower into the hole and cover its root system with soil to conserve moisture.[30] Continue to water the newly planted coneflower to help it establish its roots. Keep the soil moist for the next 2 weeks.
-
4


Community Q&A
-
QuestionIs the petal position indicative of anything?
 Community AnswerNo, coneflowers have naturally droopy leaves, so this isn't indicative of anything in particular.
Things You'll Need
- 1 pointed shovel
- 1 sharp spade
- 2 pitchforks
- 1 pair of garden pruners
- 1 garden fork
- 1 tiller (hand or electric)
- 1 watering bucket
- 1 pack of plant netting
- 1 pair of gardening gloves
- 1 bag of organic plant matter
- 1 bag of horticultural sand
- 1 bag of mulch
- 1 bag crushed gravel
- Plant pots or containers
- Bone meal
- Moisture-retaining material (perlite, vermiculite, or peat)


References
- ↑ https://www.almanac.com/plant/coneflowers
- ↑ http://www.clemson.edu/extension/hgic/plants/landscape/flowers/hgic1182.html
- ↑ https://www.almanac.com/plant/coneflowers
- ↑ http://www.clemson.edu/extension/hgic/plants/landscape/flowers/hgic1150.html
- ↑ https://www.whiteflowerfarm.com/how-to-grow-echinacea-plants
- ↑ https://www.almanac.com/plant/coneflowers
- ↑ https://www.almanac.com/plant/coneflowers
- ↑ http://msue.anr.msu.edu/news/what_to_do_about_compacted_soil
- ↑ https://www.almanac.com/plant/coneflowers
- ↑ https://gardenerspath.com/how-to/propagation/divide-perennials/
- ↑ http://msue.anr.msu.edu/news/what_to_do_about_compacted_soil
- ↑ https://gardenerspath.com/how-to/propagation/divide-perennials/
- ↑ http://mysoulfulhome.com/dividing-plants-101/
- ↑ https://www.bhg.com/gardening/flowers/perennials/dividing-perennials/
- ↑ https://www.doityourself.com/stry/how-to-divide-a-coneflower
- ↑ https://www.bhg.com/gardening/flowers/perennials/dividing-perennials/
- ↑ http://www.clemson.edu/extension/hgic/plants/landscape/flowers/hgic1150.html
- ↑ http://www.finegardening.com/article/dividing-perennials-tools-techniques-and-timing
- ↑ http://www.finegardening.com/article/dividing-perennials-tools-techniques-and-timing
- ↑ http://www.chicagotribune.com/lifestyles/home/ct-garden-divide-perennials-home-qa-1001-20150928-story.html
- ↑ http://www.finegardening.com/article/dividing-perennials-tools-techniques-and-timing
- ↑ https://www.doityourself.com/stry/how-to-divide-a-coneflower
- ↑ http://www.clemson.edu/extension/hgic/plants/landscape/flowers/hgic1150.html
- ↑ https://www.rodalesorganiclife.com/garden/grow-echinacea
- ↑ https://plantcaretoday.com/coneflower-care-grow-echinacea-plant.html#growing-echinacea-in-pots
- ↑ https://plantcaretoday.com/coneflower-care-grow-echinacea-plant.html#growing-echinacea-in-pots
- ↑ https://gardenerspath.com/how-to/propagation/divide-perennials/
- ↑ https://gardenerspath.com/how-to/propagation/divide-perennials/
- ↑ https://www.almanac.com/plant/coneflowers
- ↑ https://www.bhg.com/gardening/flowers/perennials/dividing-perennials/
- ↑ http://www.chicagotribune.com/lifestyles/home/ct-garden-divide-perennials-home-qa-1001-20150928-story.html
- ↑ https://www.goodhousekeeping.com/home/gardening/a20706549/how-to-mulch-your-garden/
- ↑ https://www.almanac.com/plant/coneflowers
- ↑ https://www.almanac.com/plant/coneflowers
- ↑ https://www.almanac.com/plant/coneflowers
- ↑ https://www.almanac.com/plant/coneflowers
About This Article