This article was co-authored by Chris Willatt. Chris Willatt is the owner and founder of Alpine Maids, a cleaning agency in Denver, Colorado started in 2015. Alpine Maids has received Angie's List Super Service Award for three years in a row since 2016 and has been awarded Colorado's "Top Rated Local House Cleaning" Award in 2018.
This article has been viewed 106,195 times.
Epoxy coating is one of the toughest and most durable surfaces to have on your floor. Epoxy coating is most popular for garages, but it can be used on driveways as well. First, you will need to ensure that epoxy is a good fit for your floor. After this, you can clean and prime your floor, select and purchase the appropriate epoxy product, and mix and apply the epoxy. This is a moderately difficult project, but it can be accomplished if you are dedicated and mindful.
Steps
Making Sure Epoxy is Suitable for Your Floor
-
1Test your floor for moisture. Lay a plastic garbage bag down on your garage floor and secure it with duct tape on all 4 sides. Wait 24 hours. Gently lift up the corner of the bag to check for moisture accumulation. If it is dry underneath, you can proceed with your floor coating. If there is moisture, your floor is not suitable for epoxy and you should select a different floor coating.[1]
-
2Check for concrete sealer. Pour 1–2 cups (240–470 ml) of water onto the surface of your garage floor. If the water immediately beads up, this means that a concrete sealer has been used on this floor in the past. If this is the case, it is best to forego the epoxy project, since these products are incompatible.[2]Advertisement
-
3Wait at least 28 days before applying epoxy to a new slab. If you’re dealing with a newly installed slab, it is important to wait at least 28 days, but preferably 2 months, before applying epoxy. This gives the floor time to cure and dry thoroughly prior to coating.[3]
-
4Remove floor paint, if necessary. Epoxy coating will not work properly if it is applied over polyurethane or latex floor paints. If your floor is covered in one of these materials, you will need to strip your floor before you can begin the epoxy process.[4] For a large area, you might try soda blasting the paint.
- Rent a blasting unit (also called a pot blaster) for a local hardware store.
- Purchase special special sodium bicarbonate (make sure you get the right kind for your blaster).
- Following the manufacturer’s instructions, add the sodium bicarbonate to the blaster.
- Use the machine to “blast” the floor. It works very similar to a power washer.
- Rinse the floor thoroughly with clean water.
- After the floor dries, use an industrial vacuum to remove any remaining powder or debris.


Cleaning and Priming the Floor
-
1Use degreaser to remove oil and grease stains. Mop your entire floor using an industrial degreaser or solvent-based cleanser. After you allow the floor to dry, look for any remaining oil/grease stains. Spot clean these areas with a concrete degreaser and a stiff scrub brush. Then rinse the entire floor with clean water.[5]
-
2Sand off any rubber residue. While you were cleaning the floor, you may have noticed some areas where tire rubber was deposited on your floor. If any tire rubber remains after mopping and spot-cleaning, use sandpaper to remove it. Attach fine grit sandpaper to a pole sander, hand sander or floor sander. Rinse with clean water.[6]
- 180-grit sandpaper is a good choice.
-
3Vacuum up any remaining cleaning products or debris. Use an industrial strength vacuum to thoroughly suck up any dust, leftover cleaning powder, and other dirt. Leftover debris can cause bubbles and imperfections in your epoxy coating, so remove it all.[7]
-
4Use a pressure washer to deep clean the floor. Using an industrial power washer, spray down the garage floor so that any remaining impurities make their way out of the garage or toward a drain.
- You can rent a pressure washer from many home improvement stores or other rental outlets in your area.
-
5Etch the floor. Purchase muriatic acid (also called hydrochloric acid) from a home improvement store. You will need about 0.25 gallons (950 ml) of muriatic acid for every 50–70 square feet (4.6–6.5 m2) of floor.[8] Always follow the manufacturer’s instructions, but here are some guidelines:
- Hose down the floor.
- Mix 1 part muriatic acid with 3 parts water in a plastic bucket.
- Use a plastic watering can or pressure sprayer to coat the floor with diluted acid.
- Wait until the acid stops bubbling (about 2-15 minutes).
-
6Neutralize and remove the acid. Mix 8 fluid ounces (240 ml) of baking soda with 1 gallon (3,800 ml) of water. Apply this mixture over the floor to neutralize the acid.[9]
- Some muriatic acid products will not need to be neutralized. Follow the manufacturer’s instructions.
-
7Rinse the floor with clean water and leave it to dry overnight. Pour clean water onto the floor to rinse any remaining acid and neutralizer into the nearest drain. Let the floor dry overnight before doing any more work.[10]
-
8Patch any cracks with an epoxy crack filler. After the floor is completely dry, examine it for cracks. Any cracks that are 0.25 inches (0.64 cm) or larger, as well as any holes or spalled areas, will need to be filled in with epoxy crack filler. Place the product into the opening, then use a putty knife to scrape it down to surface level and smooth it out.[11]
- Let this dry for 4-6 hours.


Choosing and Mixing an Epoxy Product
-
1Choose between solvent-based and water-based epoxies. Solvent-based epoxies adhere well and are available in many colors. The drawback is that these products are extremely hazardous. Water-based products are clear in color, but these products do not give off hazardous fumes.[12]
- Both products typically contain from 40-60% solids (epoxy). The higher the percentage, the harder your floor will be, and the more expensive the product.
- You absolutely must use a ventilator to apply solvent-based epoxy products.
-
2Decide if you’ll use an epoxy primer. Epoxy primers can smooth out minor imperfections in the floor and give the epoxy a better base to bond to. It is important to use primer on floors that are very porous, flaky, chalky, or rough. Primers can also add strength and durability to any floor.[13]
- Always select a product that is compatible with the epoxy you plan to use.
-
3Purchase enough epoxy for 2 coats. For a 450 square feet (42 m2) garage (a typical 2-car garage), you will need 2–3 gallons (7.6–11 L) of epoxy per coat. This can vary based on the percent of solids in the epoxy you buy, so check the labels. Purchase enough epoxy to cover your floor in at least 2 coats.[14]
- Solvent-based epoxy products can be harder to find. Some paint specialty stores may carry them, but you may need to visit an industrial-supply store.
- Water-based epoxy products can be purchased at most home supply stores.
-
4Reduce hazards by wearing protective gear and turning off the power. Gloves, eye protection, lung protection, and good rubber boots can help keep you safe while applying epoxy. Turn off gas/power to any water heaters or other appliances in the garage. Take precautions to keep children and pets away from the area during application and drying. Always use a ventilator to apply solvent-based epoxy products.[15]


Applying the Epoxy
-
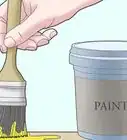
1Use a 3⁄4 inch (1.9 cm) nap roller to apply the epoxy primer. Begin in the back corner of the room, and work your way toward the exit. Dip your roller into the bucket, and spread a thin layer of epoxy primer onto your floor. Avoid letting the roller get too dry.[16]
- It can help to use an extension handle on your roller.
- Be careful not to paint yourself into a corner.
- Remember to wear a respirator and keep the garage door open.
-
2Let the primer coat dry for 12-24 hours. Maintain adequate ventilation and avoid going near the floor while the primer coat cures. For best results, wait a full day before resuming work on the floor.[17]
-
3Mix one batch of each epoxy product immediately prior to application. Both epoxy primer and standard epoxy will come in 2 parts. These needs to be mixed together, one batch at a time, right before they are applied. Mix the two epoxy components for 5 minutes using a drill and stirring bit. Pour the entire contents into a second bucket and mix again.[18]
- Epoxy kits are pre-measured. Mix all of part A together with all of part B to create the amount of epoxy listed.
- Most epoxy products (including most primers) have a “bucket life” of about 40 minutes. This means that the product must be applied within this time window before it hardens.
-
4Apply your first coat of epoxy. Once again use a 3⁄4 inch (1.9 cm) nap roller to apply your epoxy. Begin in the corner of the room, and make your way toward the exit. Try to keep the roller wet at all times, and try to keep your coat thin and even.[19]
- Remember to mix the epoxy immediately prior to application.
- Move as quickly as you can without being sloppy. Epoxy has a short working time.
-
5Wait 24 hours for your first coat to dry. Always make sure there is adequate ventilation during the drying process. Avoid going near the floor while the first coat cures. Plan to wait a day before applying a second coat.[20]
- Curing time will vary slightly across epoxy products. Read and follow the manufacturer's directions for the product you select.
-
6Check for problems before applying a second coat. Examine your floor for any problems that have appeared. This can include cracks, holes, or uneven surfaces that weren’t visible before. Seal any cracks with an epoxy crack filler and/or sand down areas that are uneven.[21]
- If you used sand paper, you may need to do another run with your vacuum to remove any debris.
-
7Wait 12-16 hours for the crack filler to dry, if you used it. If you had to patch any new cracks in your first coat of epoxy, wait at least half a day for the crack filler to dry before applying a second coat.[22]
-
8Apply a second coat with an added non-skid product. After mixing the epoxy for your second coat, consider adding a commercial non-skid product. Use a drill and stirring bit to blend well. Then apply your second coat. Begin in the corner and gradually move toward the exit.[23]
- Add 3–4 fluid ounces (89–118 ml) per every 1 gallon (3.8 l) of epoxy.
-
9Let the second coat dry for 24 hours. Avoid going near the floor while the second coat dries. Make sure there is adequate ventilation. Give the floor a day to cure before walking on it or using it.[24]


Community Q&A
-
QuestionHow long does it take to do epoxy flooring?
 Community AnswerEpoxy flooring typically takes about 4 days to become fully cured on the concrete surface.
 -
QuestionWhy is the epoxy they installed on my floors looking pitted?
 AllStar Concrete CoatingsCommunity AnswerThis could be for many different reasons. It could be pinholes from where the epoxy was absorbed into the porous substrate. Also, it could be from what's called fish eyes from surface tension being too tight. A good prep to open the surface and a primer coat usually address both of these issues.
Things You’ll Need
- Garbage bag
- Duct tape
- Industrial degreaser or solvent-based cleanser
- Scrub brush
- Sandpaper
- Baking soda
- Water
- Mop
- Power washer
- Muriatic acid
- Epoxy crack filler
- Rubber boots
- Gloves
- Eye protection
- Ventilator and/or face mask
- Drill and stirring bit or power mixer
- Epoxy kit
- Epoxy primer
- 3⁄4 inch (1.9 cm) nap roller and extension arm

-Step-19.webp)
References
- ↑ https://www.familyhandyman.com/garage/how-to-apply-epoxy-flooring-paint-to-your-garage/view-all/
- ↑ https://www.familyhandyman.com/garage/how-to-apply-epoxy-flooring-paint-to-your-garage/view-all/
- ↑ https://www.familyhandyman.com/garage/how-to-apply-epoxy-flooring-paint-to-your-garage/view-all/
- ↑ https://www.thisoldhouse.com/how-to/how-to-epoxy-coat-garage-floor
- ↑ https://www.thisoldhouse.com/how-to/how-to-epoxy-coat-garage-floor
- ↑ https://www.familyhandyman.com/garage/how-to-apply-epoxy-flooring-paint-to-your-garage/view-all/
- ↑ https://www.familyhandyman.com/garage/how-to-apply-epoxy-flooring-paint-to-your-garage/view-all/
- ↑ https://www.familyhandyman.com/garage/how-to-apply-epoxy-flooring-paint-to-your-garage/view-all/
- ↑ https://www.familyhandyman.com/garage/how-to-apply-epoxy-flooring-paint-to-your-garage/view-all/
- ↑ https://www.familyhandyman.com/garage/how-to-apply-epoxy-flooring-paint-to-your-garage/view-all/
- ↑ http://allgaragefloors.com/concrete-floor-repair/
- ↑ https://www.familyhandyman.com/garage/how-to-apply-epoxy-flooring-paint-to-your-garage/view-all/
- ↑ http://allgaragefloors.com/epoxy-primer-for-your-garage-floor/
- ↑ https://www.familyhandyman.com/garage/how-to-apply-epoxy-flooring-paint-to-your-garage/view-all/
- ↑ http://allgaragefloors.com/anti-slip-floor-coatings/
- ↑ https://www.thisoldhouse.com/how-to/how-to-epoxy-coat-garage-floor
- ↑ https://www.thisoldhouse.com/how-to/how-to-epoxy-coat-garage-floor
- ↑ https://www.familyhandyman.com/garage/how-to-apply-epoxy-flooring-paint-to-your-garage/view-all/
- ↑ https://www.thisoldhouse.com/how-to/how-to-epoxy-coat-garage-floor
- ↑ https://www.thisoldhouse.com/how-to/how-to-epoxy-coat-garage-floor
- ↑ http://allgaragefloors.com/anti-slip-floor-coatings/
- ↑ http://allgaragefloors.com/anti-slip-floor-coatings/
- ↑ http://allgaragefloors.com/anti-slip-floor-coatings/
- ↑ https://www.thisoldhouse.com/how-to/how-to-epoxy-coat-garage-floor
About This Article

To do epoxy flooring, you’ll need to clean the floor and apply the covering with a roller. First, scrub your floor to remove grease, sand any rough patches, and vacuum up debris. Then, clean the entire floor thoroughly with a pressure washer to remove any impurities. Once the floor is dry, start applying a coat of epoxy primer. Let the primer dry for 24 hours before adding your first coat of epoxy. After another 24 hours of drying time, inspect the floor for any cracks and add crack filler if you need to. If you used crack filler, wait 12 to 16 hours before adding your second and final coat of epoxy. For tips on how to decide between a solvent-based and water-based epoxy, keep reading!